


II.1 Observation and reflection based on what we perceive
It is advisable and very useful for the monitors and managers of the therapy centres, to do in their area some training, workshop or introductory course to Permaculture Design to serve as an important complement to this PERMIND Training Guide.
A basic principle in Permaculture is to observe first and reflect afterwards about what is perceived. It is essential to spend as long as possible observing natural patterns and collecting data of the environment in order to design the mental health therapy center where we are going to implement the principles of Permaculture.
From the very beginning, we will involve every person we work with in this task. A way to do so is to elaborate with them the design of the therapy center. With the help of the instructors, they can start drawing the elements of the project on the best location according to the collected information1.
Once finished, the drawings can be put in a visible location. This way the beneficiaries can see them and they act as a motivation during the real design of the project. (Figure II.1)

Figure II.1.- As an example: drawings of the Asociación para el Desarrollo de la Permacultura (Association for the Development of Permaculture) therapy center.
It is to be kept in mind that this project is alive, constantly exposed to the process of trial-and-error due to the observation and correlation of different elements of the design.
This trial-and-error methodology can be also applied as an effective therapy so users can make it part of their own daily learning.
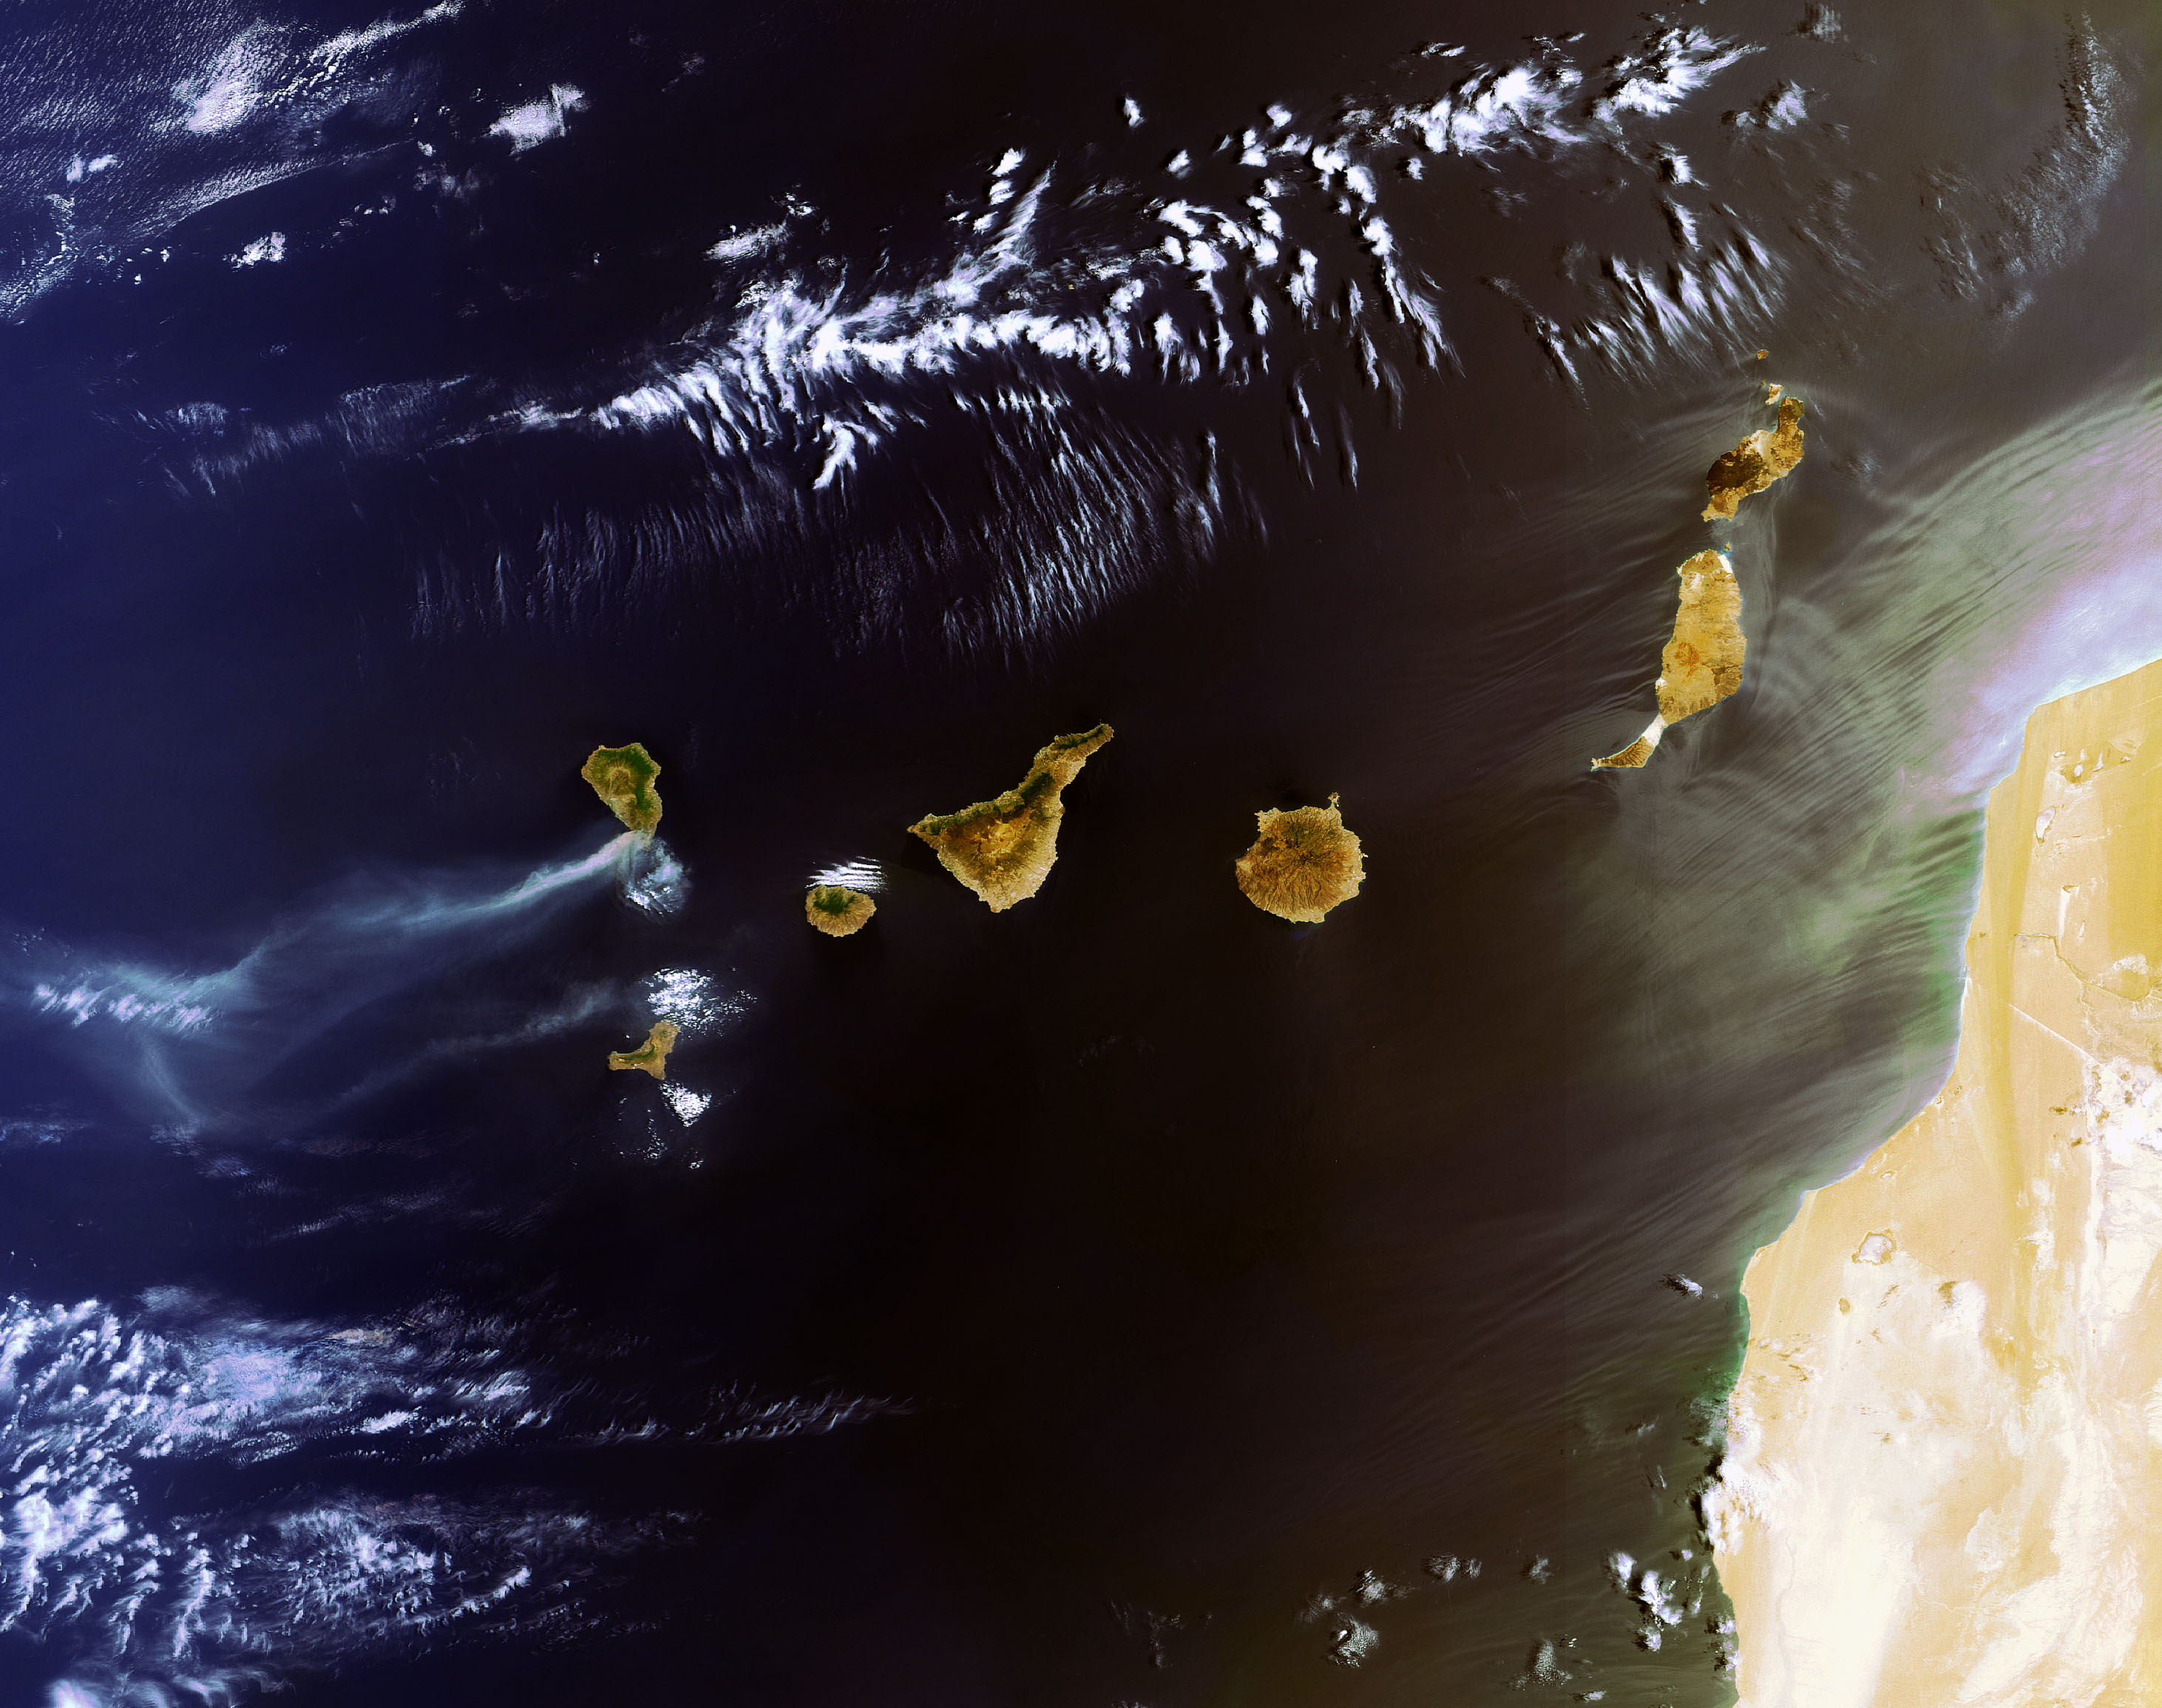
The design of a place depends on the area where it is located: the climate, region and altitude above the sea level. We have to take climatology, orientation, vegetation and culture into consideration so we can adapt us to the nature of the place.
Regarding culture, for instance, the contact with the traditional knowledge of the environment around our therapy center can provide relevant information for the project – such as information about the local traditional crops or the plant material suitable for the area, so the planning and continuity of the crops are ensured.
Collecting this information is also part of the training: with the help of the instructors, the pupils can visit the gardeners and farmers of the area, universities and agricultural research centers. That way, they can socialize and make known both permaculture and recovery of persons with mental illnesses.
This information will also allow us to identify the existing seed network and marketing channels we can link our future permacultural production with.
Table of Content
- 2.1 Observation and reflection based on what we perceive
- 2.2 Climatology and orientation of the place
- 2.3 Water harvesting
- 2.4 Hedges as borders for the ecosystems
- 2.5 Biotopes attracting animal life
- 2.6 “Pollinator volcano”
- 2.7 Wastes – resources network connected to the neighbourhood
- 2.8 In conclusion
II.2 Climatology and orientation of the place
Identifying the climatology and orientation (North, South, East and West) allows us to learn with the users in order to make use of all our senses whilst observing. Visiting some local meteorological center or practicing with the compass on the terrain, for instance, are ways to do so.
Thereby we will be able to know where the warmer and colder areas are, so we can locate the different elements related to the permacultural therapy center on the drawings.
We can then place the edible garden on the warmer area and as close as possible to the main infrastructure of the center, whether it is a house, a workshop, a classroom, a tool room, a greenhouse… The main infrastructure will be used as a reference and starting point in order to make the commercialization of the vegetables and crops as efficient as possible.
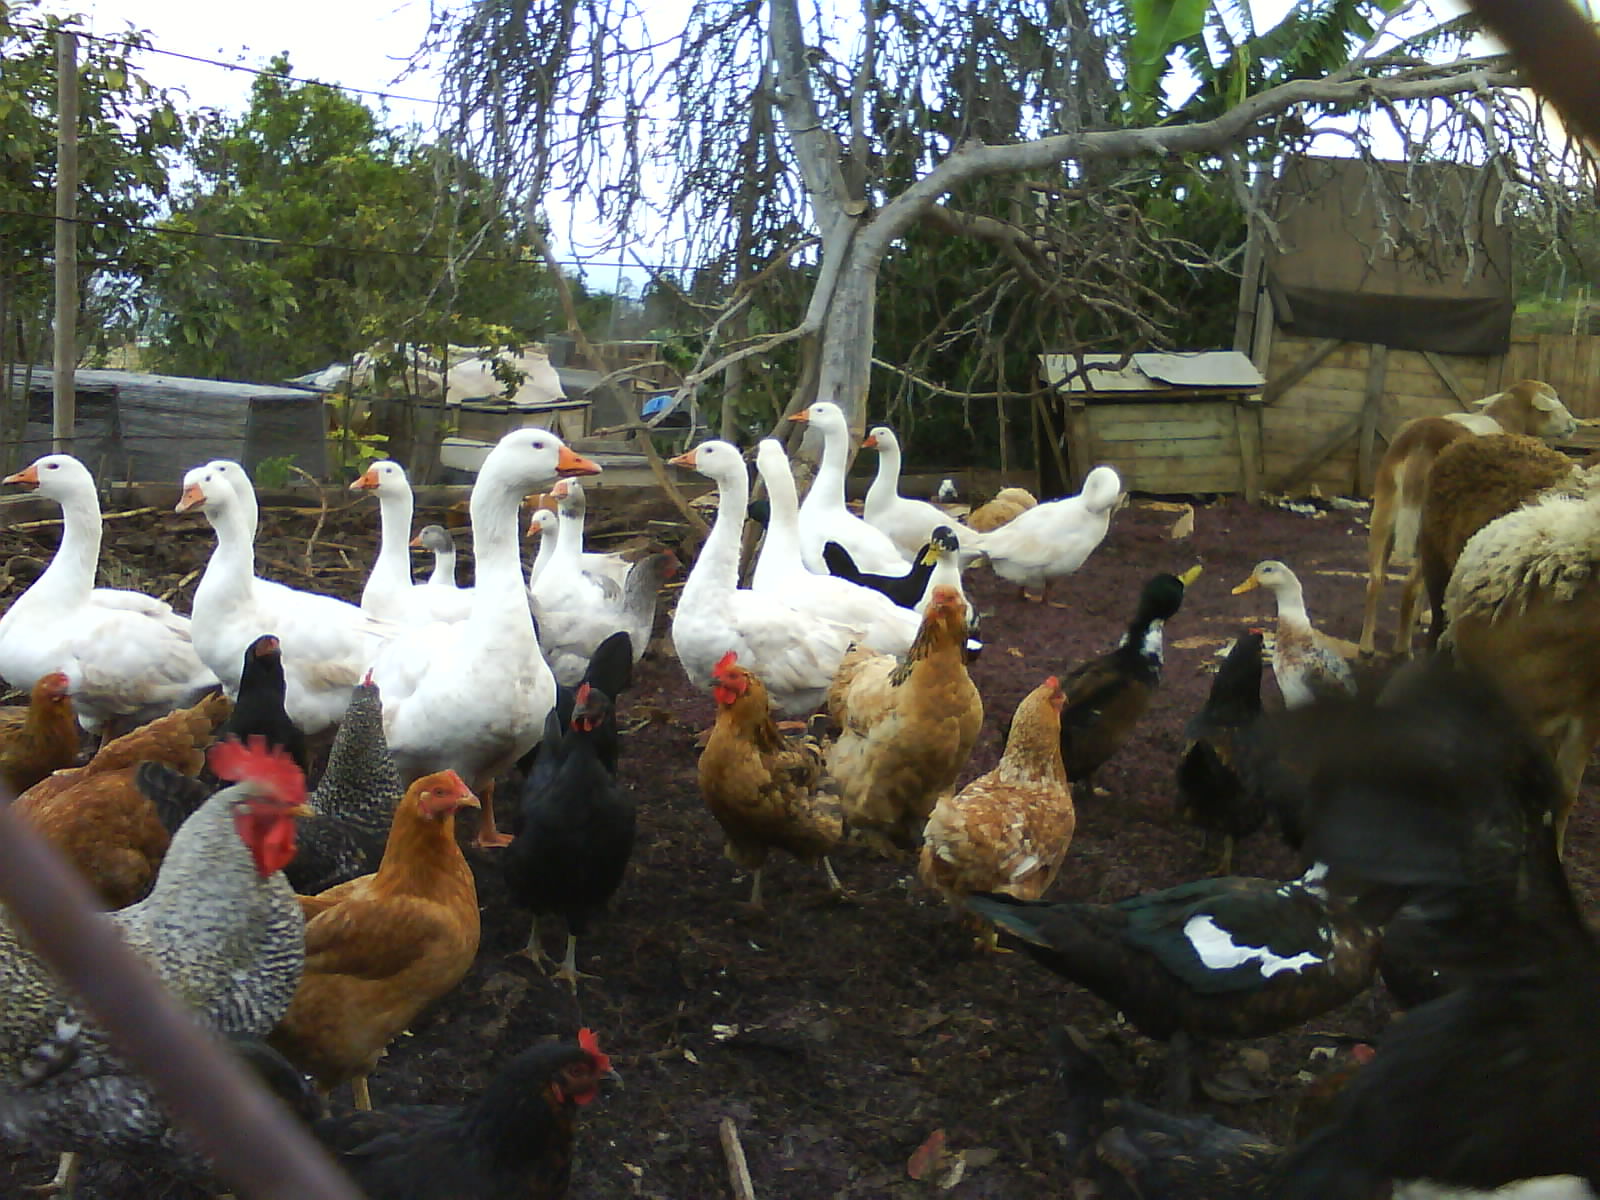
The animal housing can be placed in the following area. Animals have a high therapeutic value so their presence on the project mustn’t be underestimated: the fact that different species of animals share the same enclosure is a source of reflection and inspiration for the users (Figure II.2). Even if it isn’t possible to house different species together, it is still advisable to have a farm with just one species. This animal housing should be fenced so that the animals cannot reach the edible gardens.
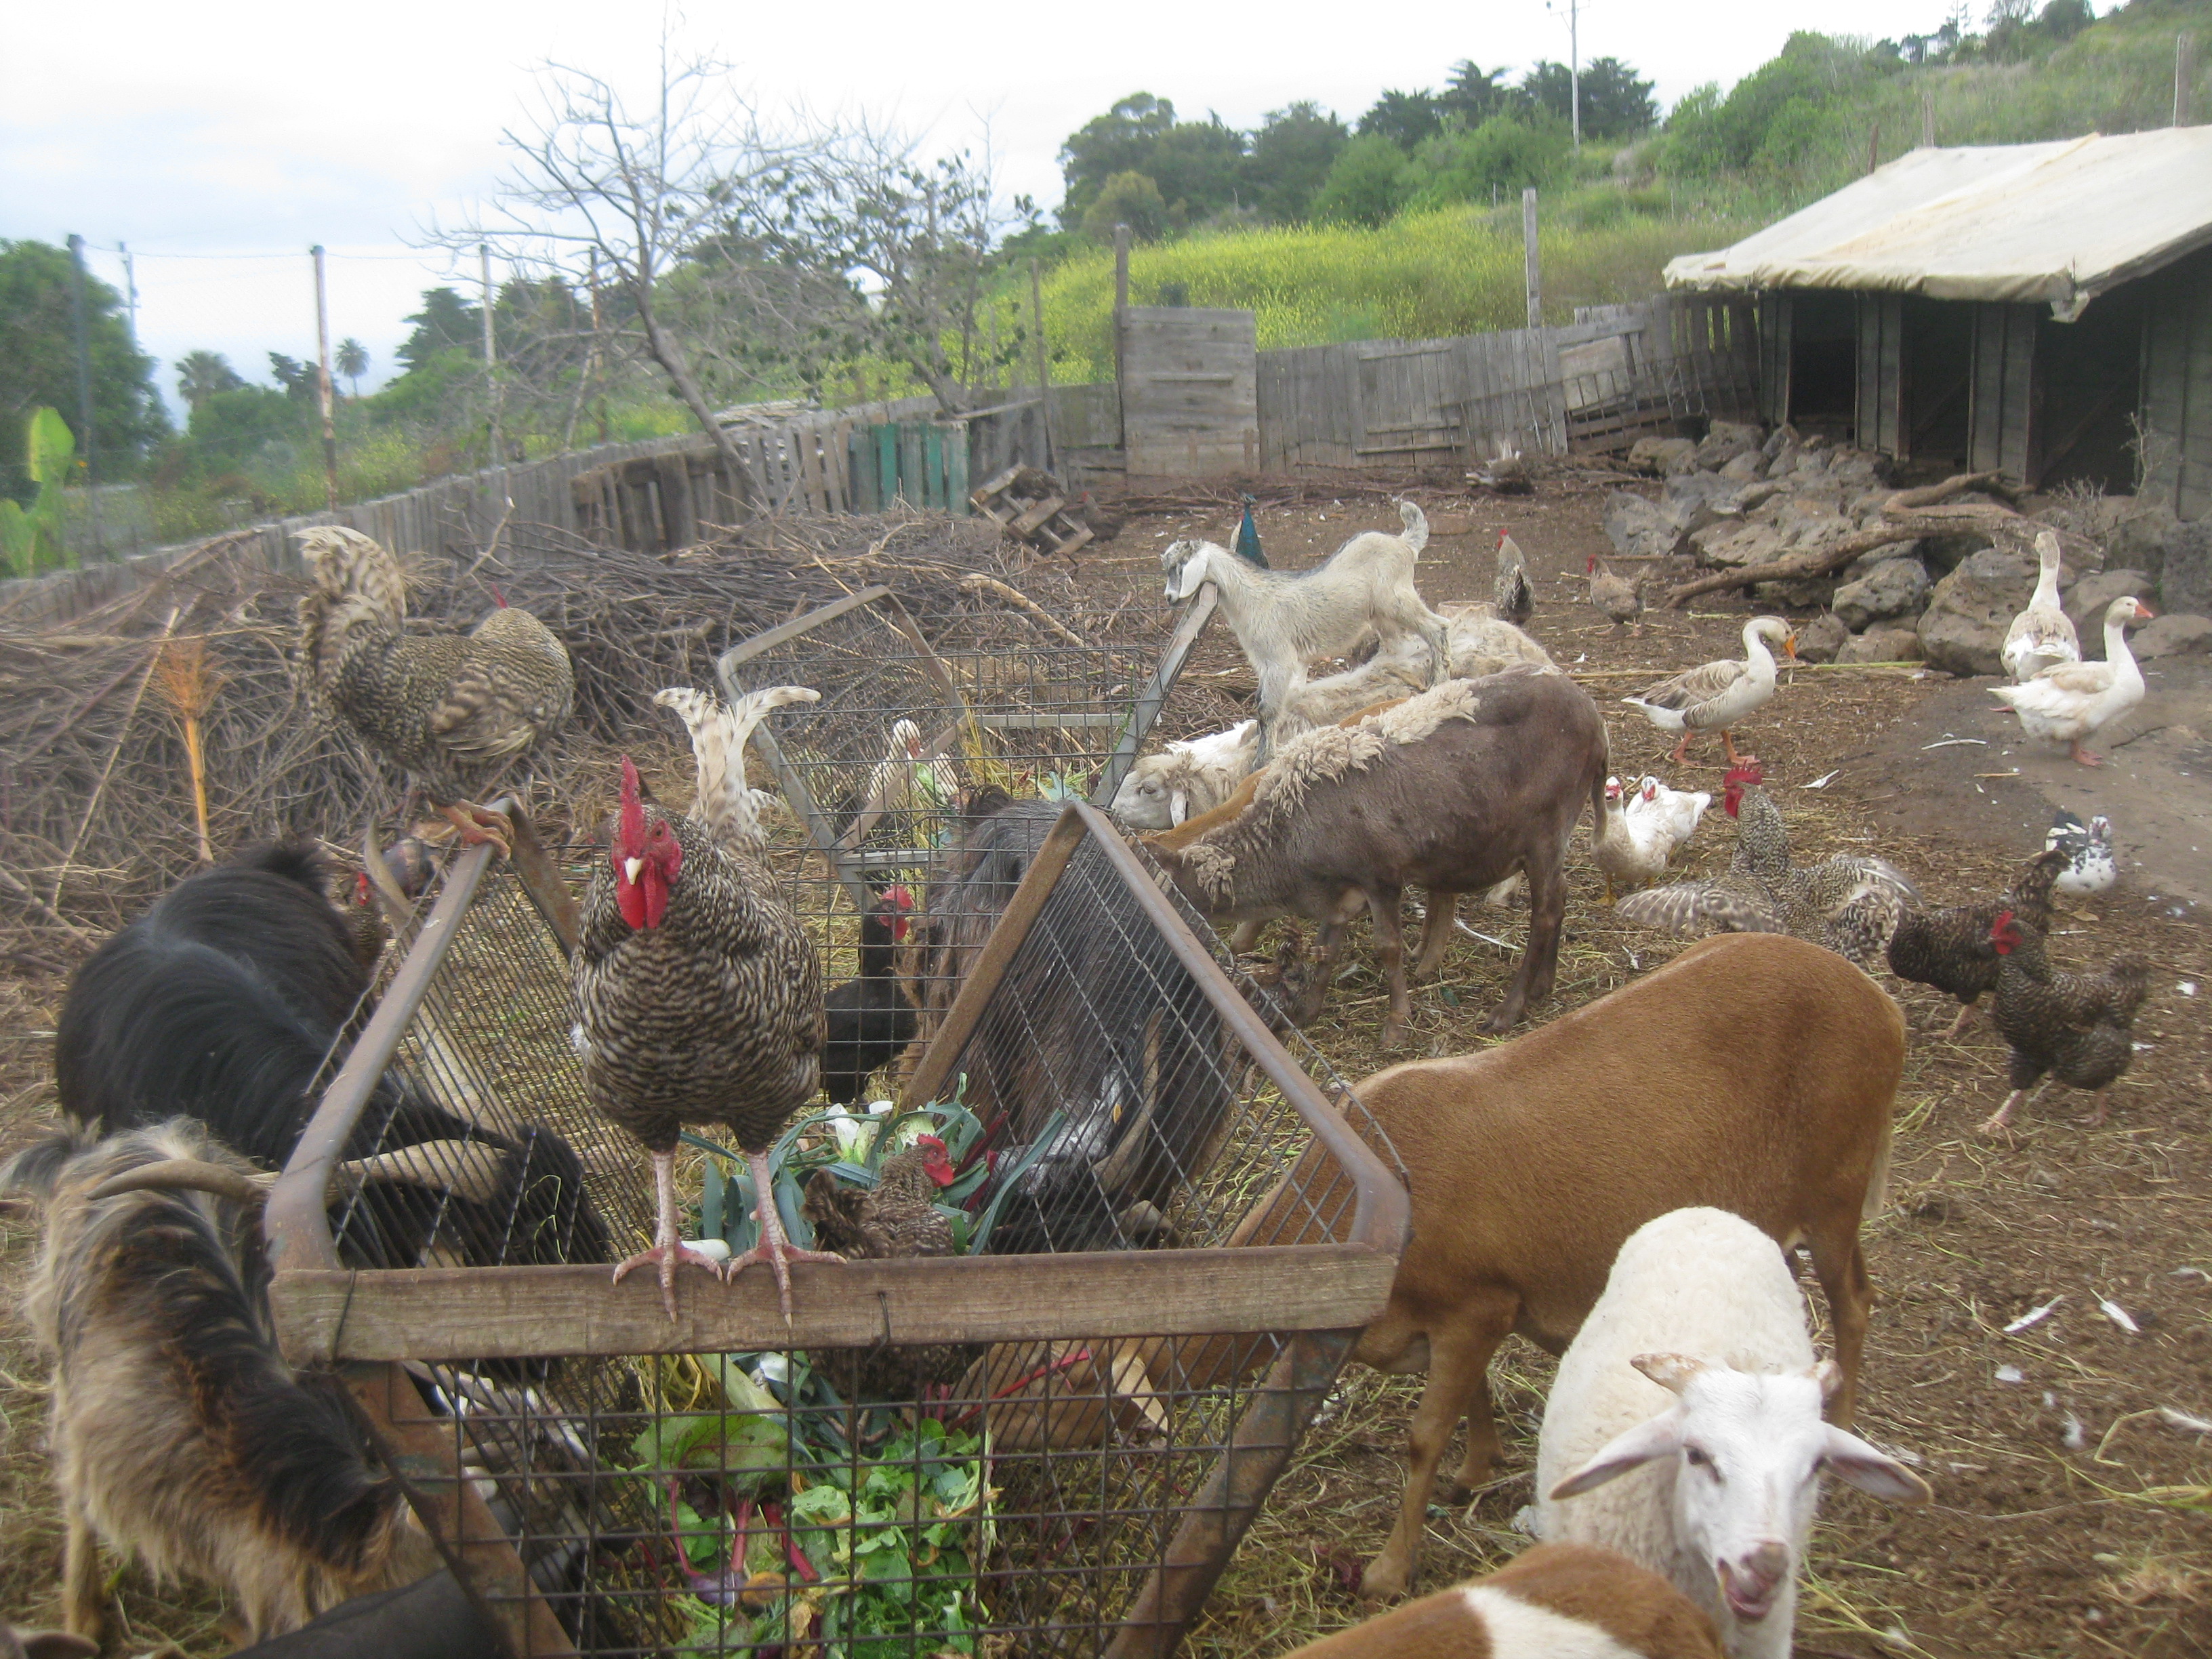
Figure II.2.- Animals in coexistence (animated Permaculture )
The parking and the access to the center can also be placed close to this area. By doing so, it acts as a barrier and eases the farm maintenance since it is next to the garden waste and the resources brought from outside –such as animal feed. The animal housing can also be used as a visiting area.
In the next area we will locate the grazing ground –preferably evergreen– that will act as biomass for mulching and/or for animal feed, if needed. The rest of the area will be covered by an edible garden forest, which will be described in Didactic Unit 4. The most suitable kind of pasture depends on the climatology of the region. The agricultural and/or livestock research centers of the area can provide this information.
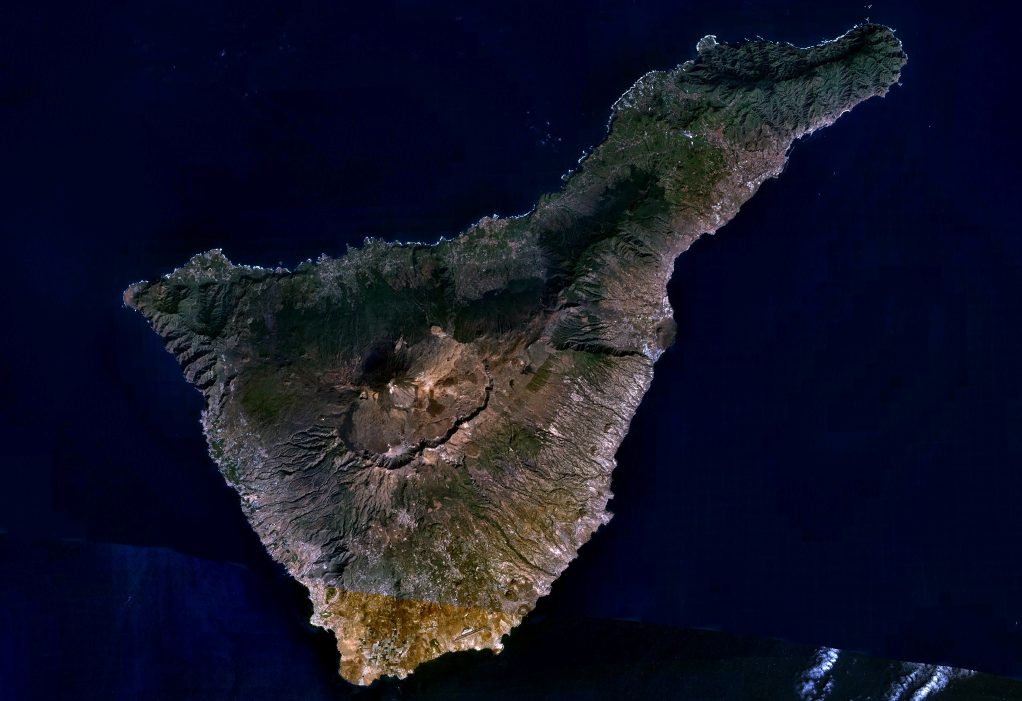
The setting will be made along or around the main infrastructure, depending on its location and conditions –dimensions, shape, access, water availability, present buildings and forests (Figure II.3).

Figure II.3.- Zoningin the therapy center of the Association for the Development of Permaculture in Finca El Mato Tinto, Tacoronte, Tenerife
If the infrastructures were to be built from scratch, the bioconstruction techniques could be used, which we will talk about in the Didactic Unit VII, techniques with a high therapeutic value.
It is advisable to build the infrastructures as close as possible to the main entrance so the access is quick and therefore requires little maintenance.
When drawing the plan of the center, it is very important to link different zones of the project. This way, we can ensure as much closed cycles as possible. For instance: the water to irrigate the edible garden will be collected from the roofs; the cleaning residues of vegetables of the edible garden will provide animal feed or mulch for the edible garden itself; pastures will provide feed for the animals and mulch as well; animals will ease the therapy for our pupils as well as produce nutrients to be used in the greenhouse or the edible garden; the edible garden forest will provide fruit, mulch, firewood for the kitchen; and so on (Figure II.4).
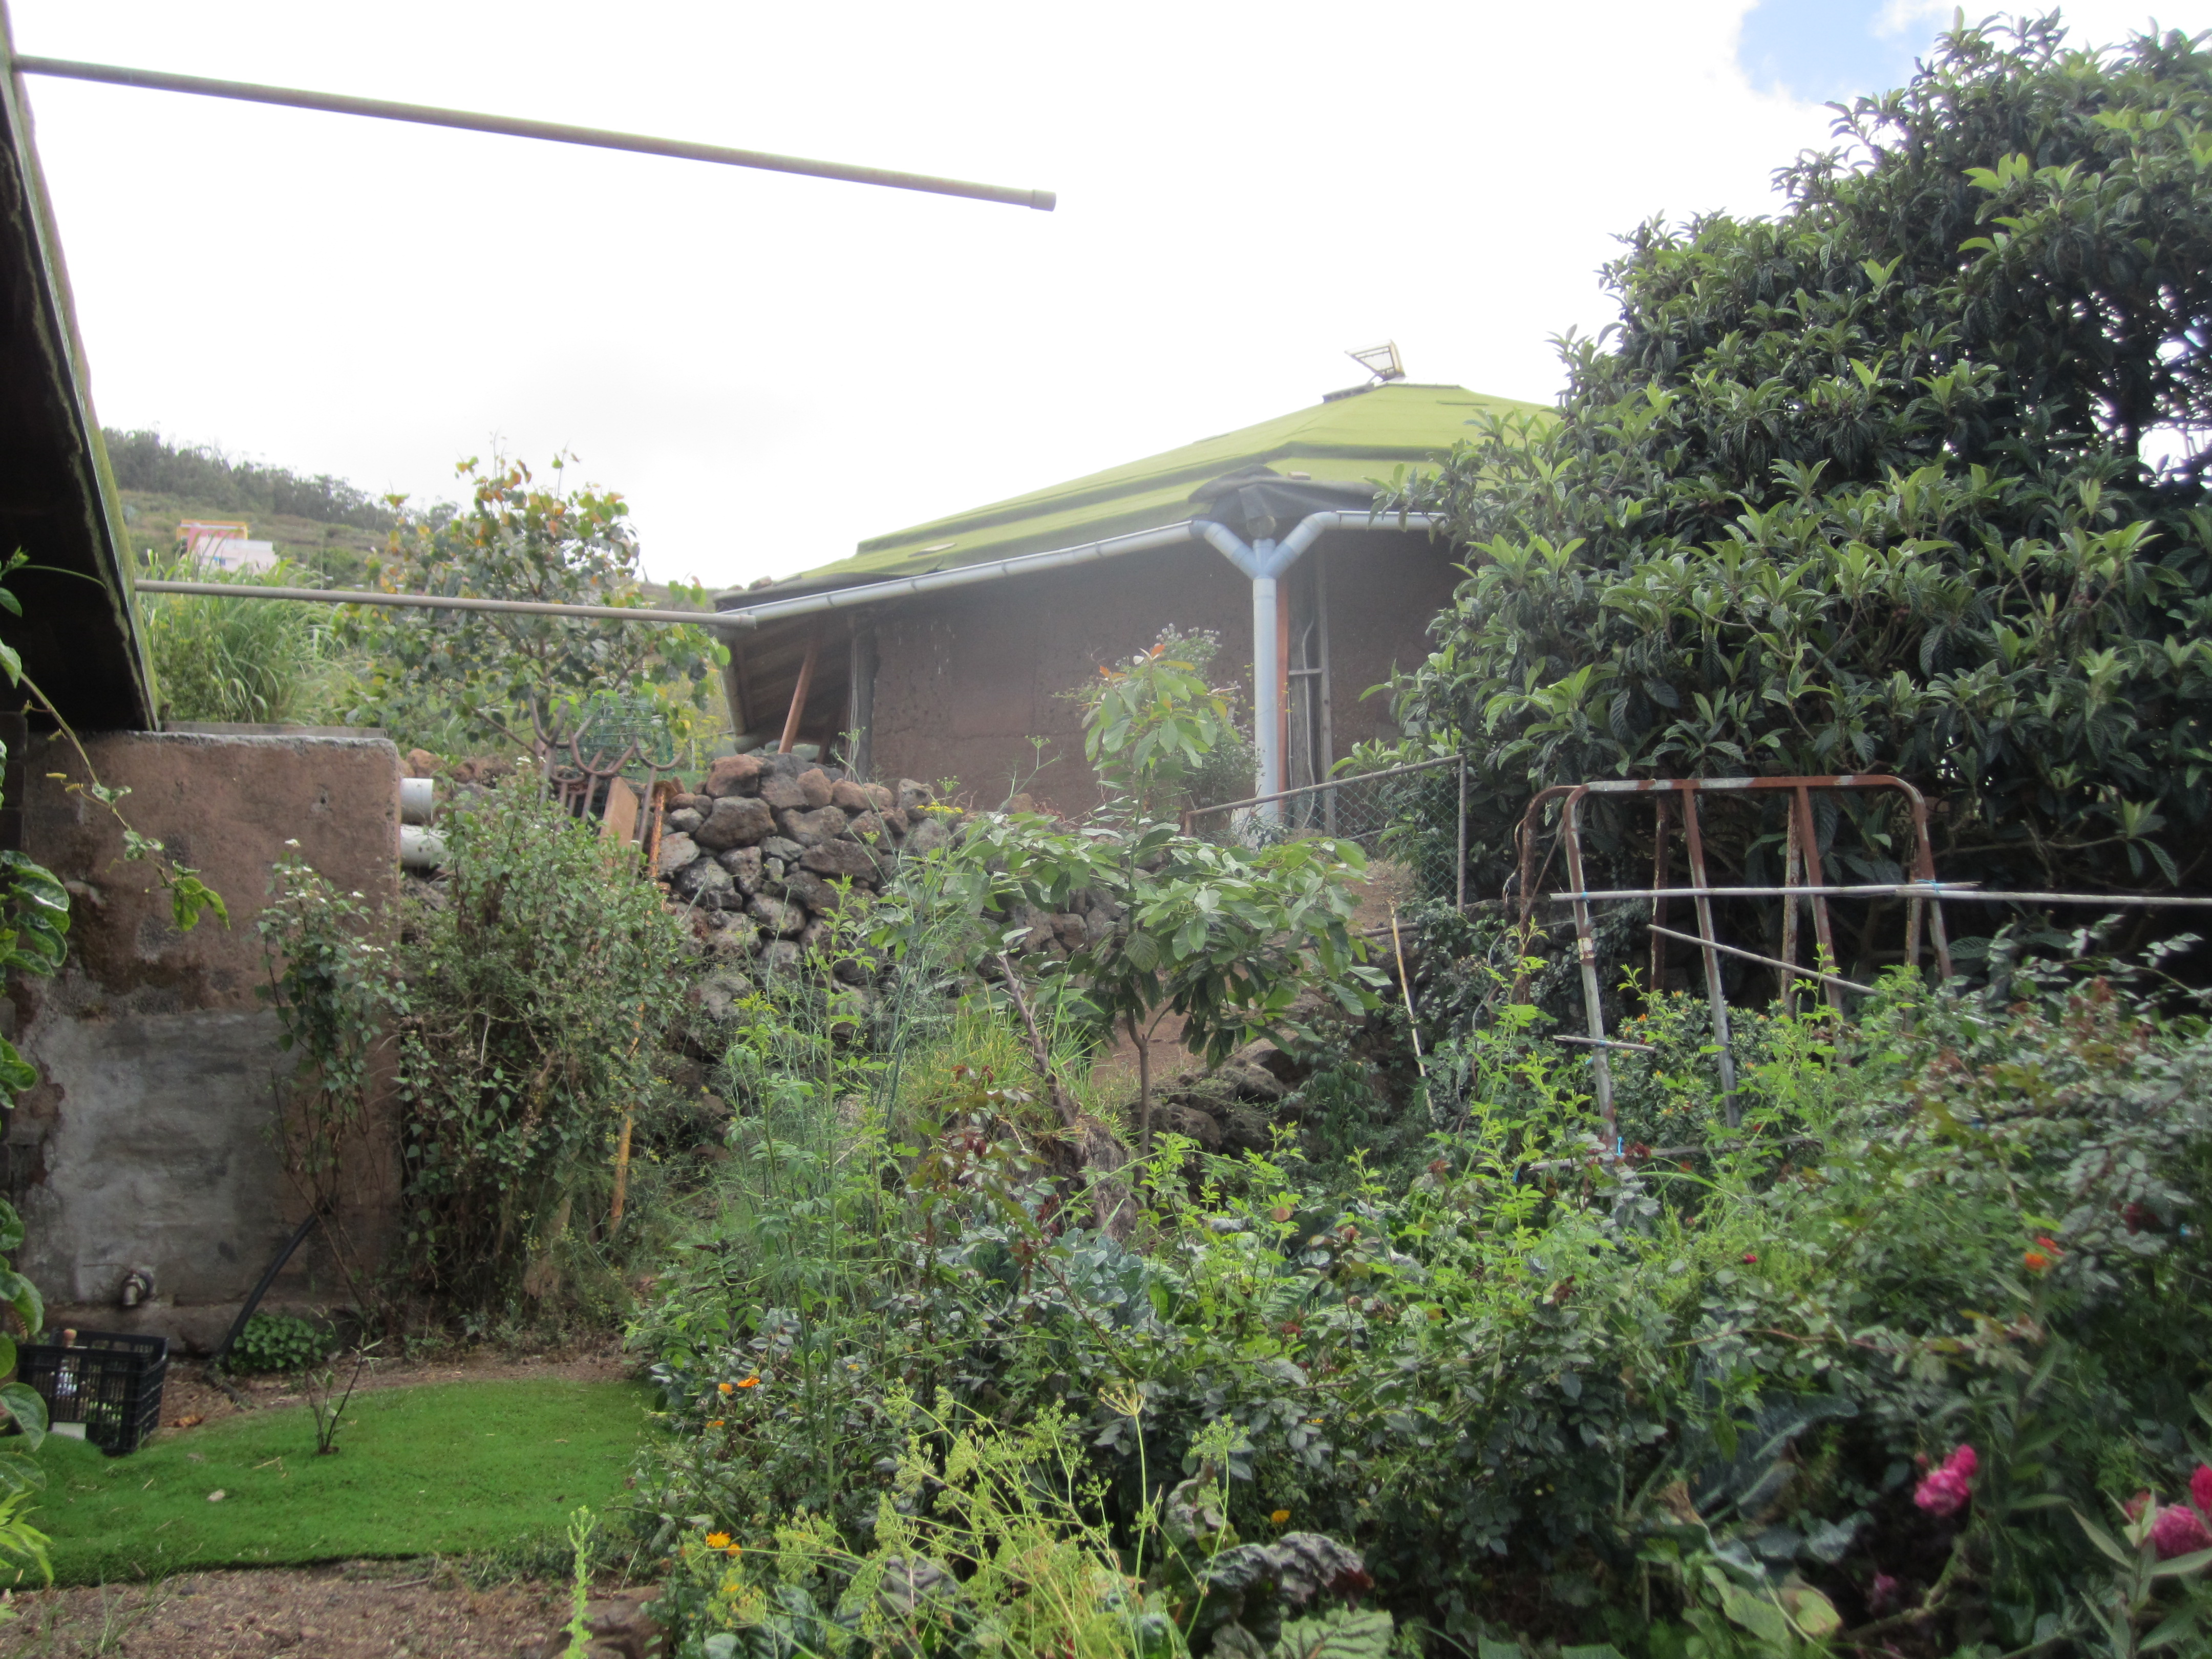
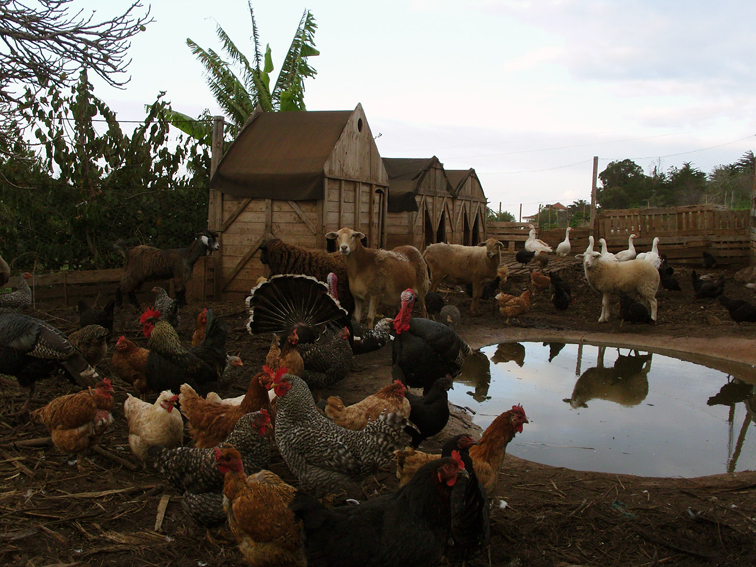
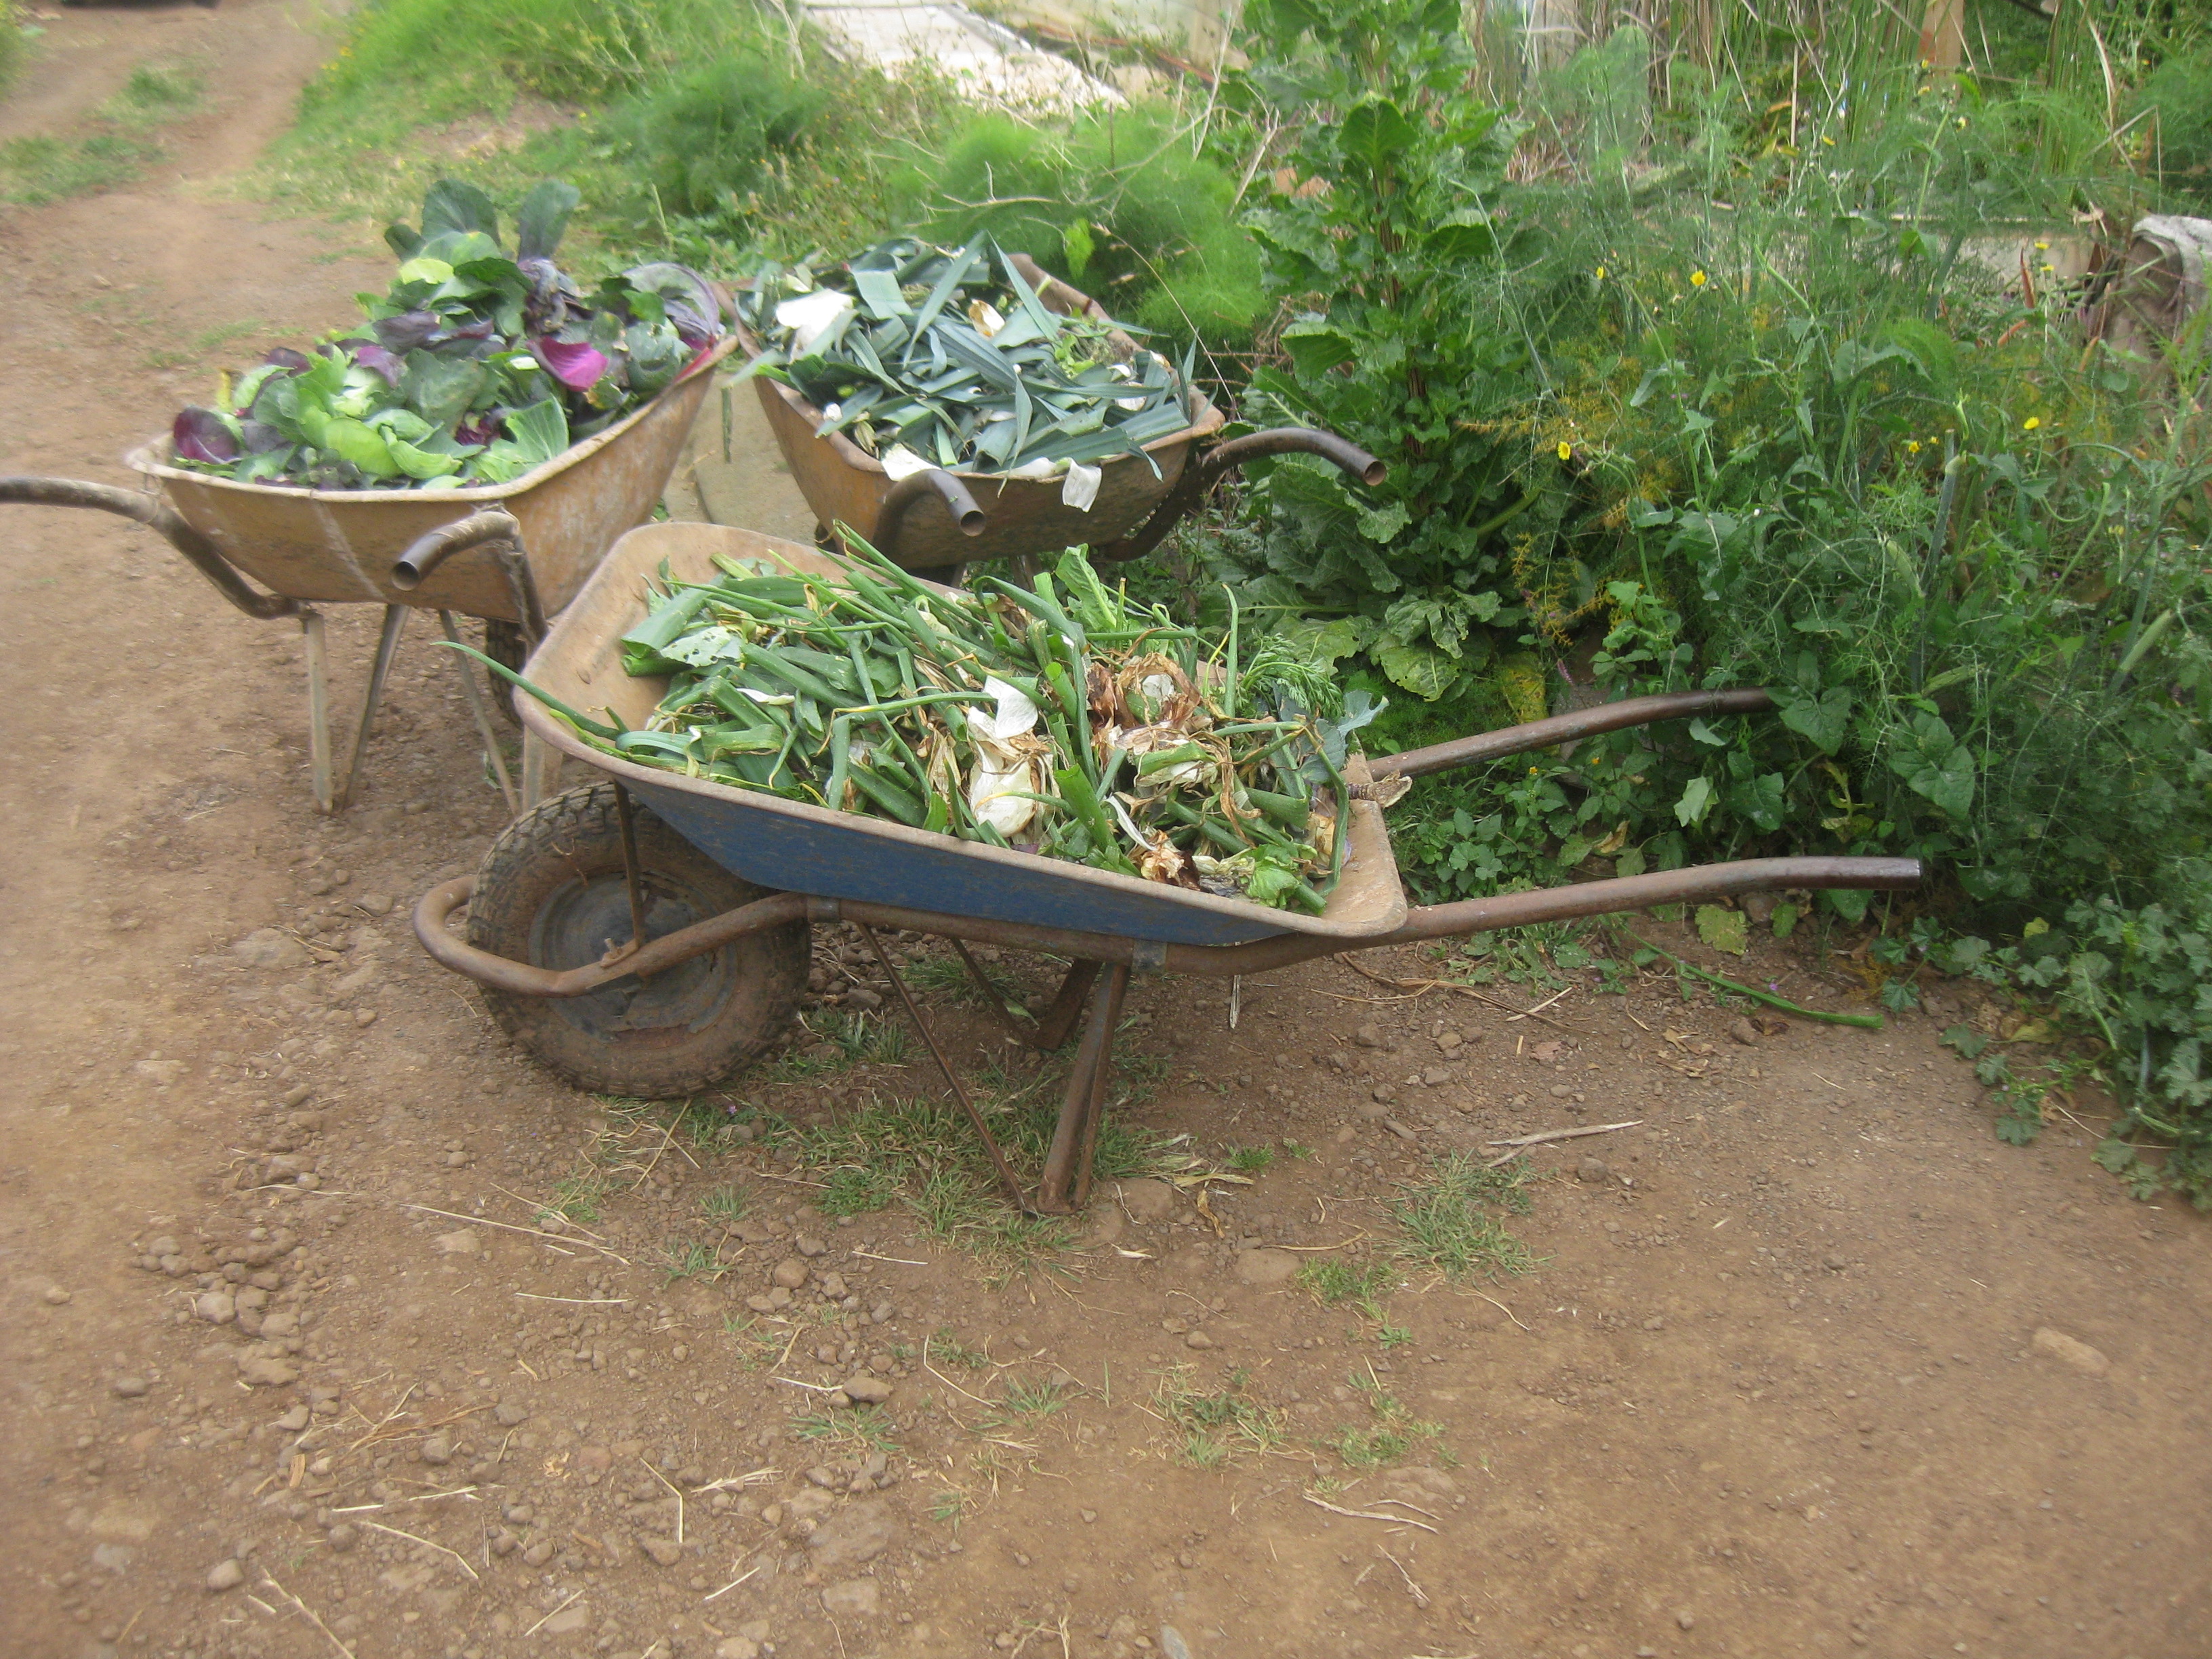
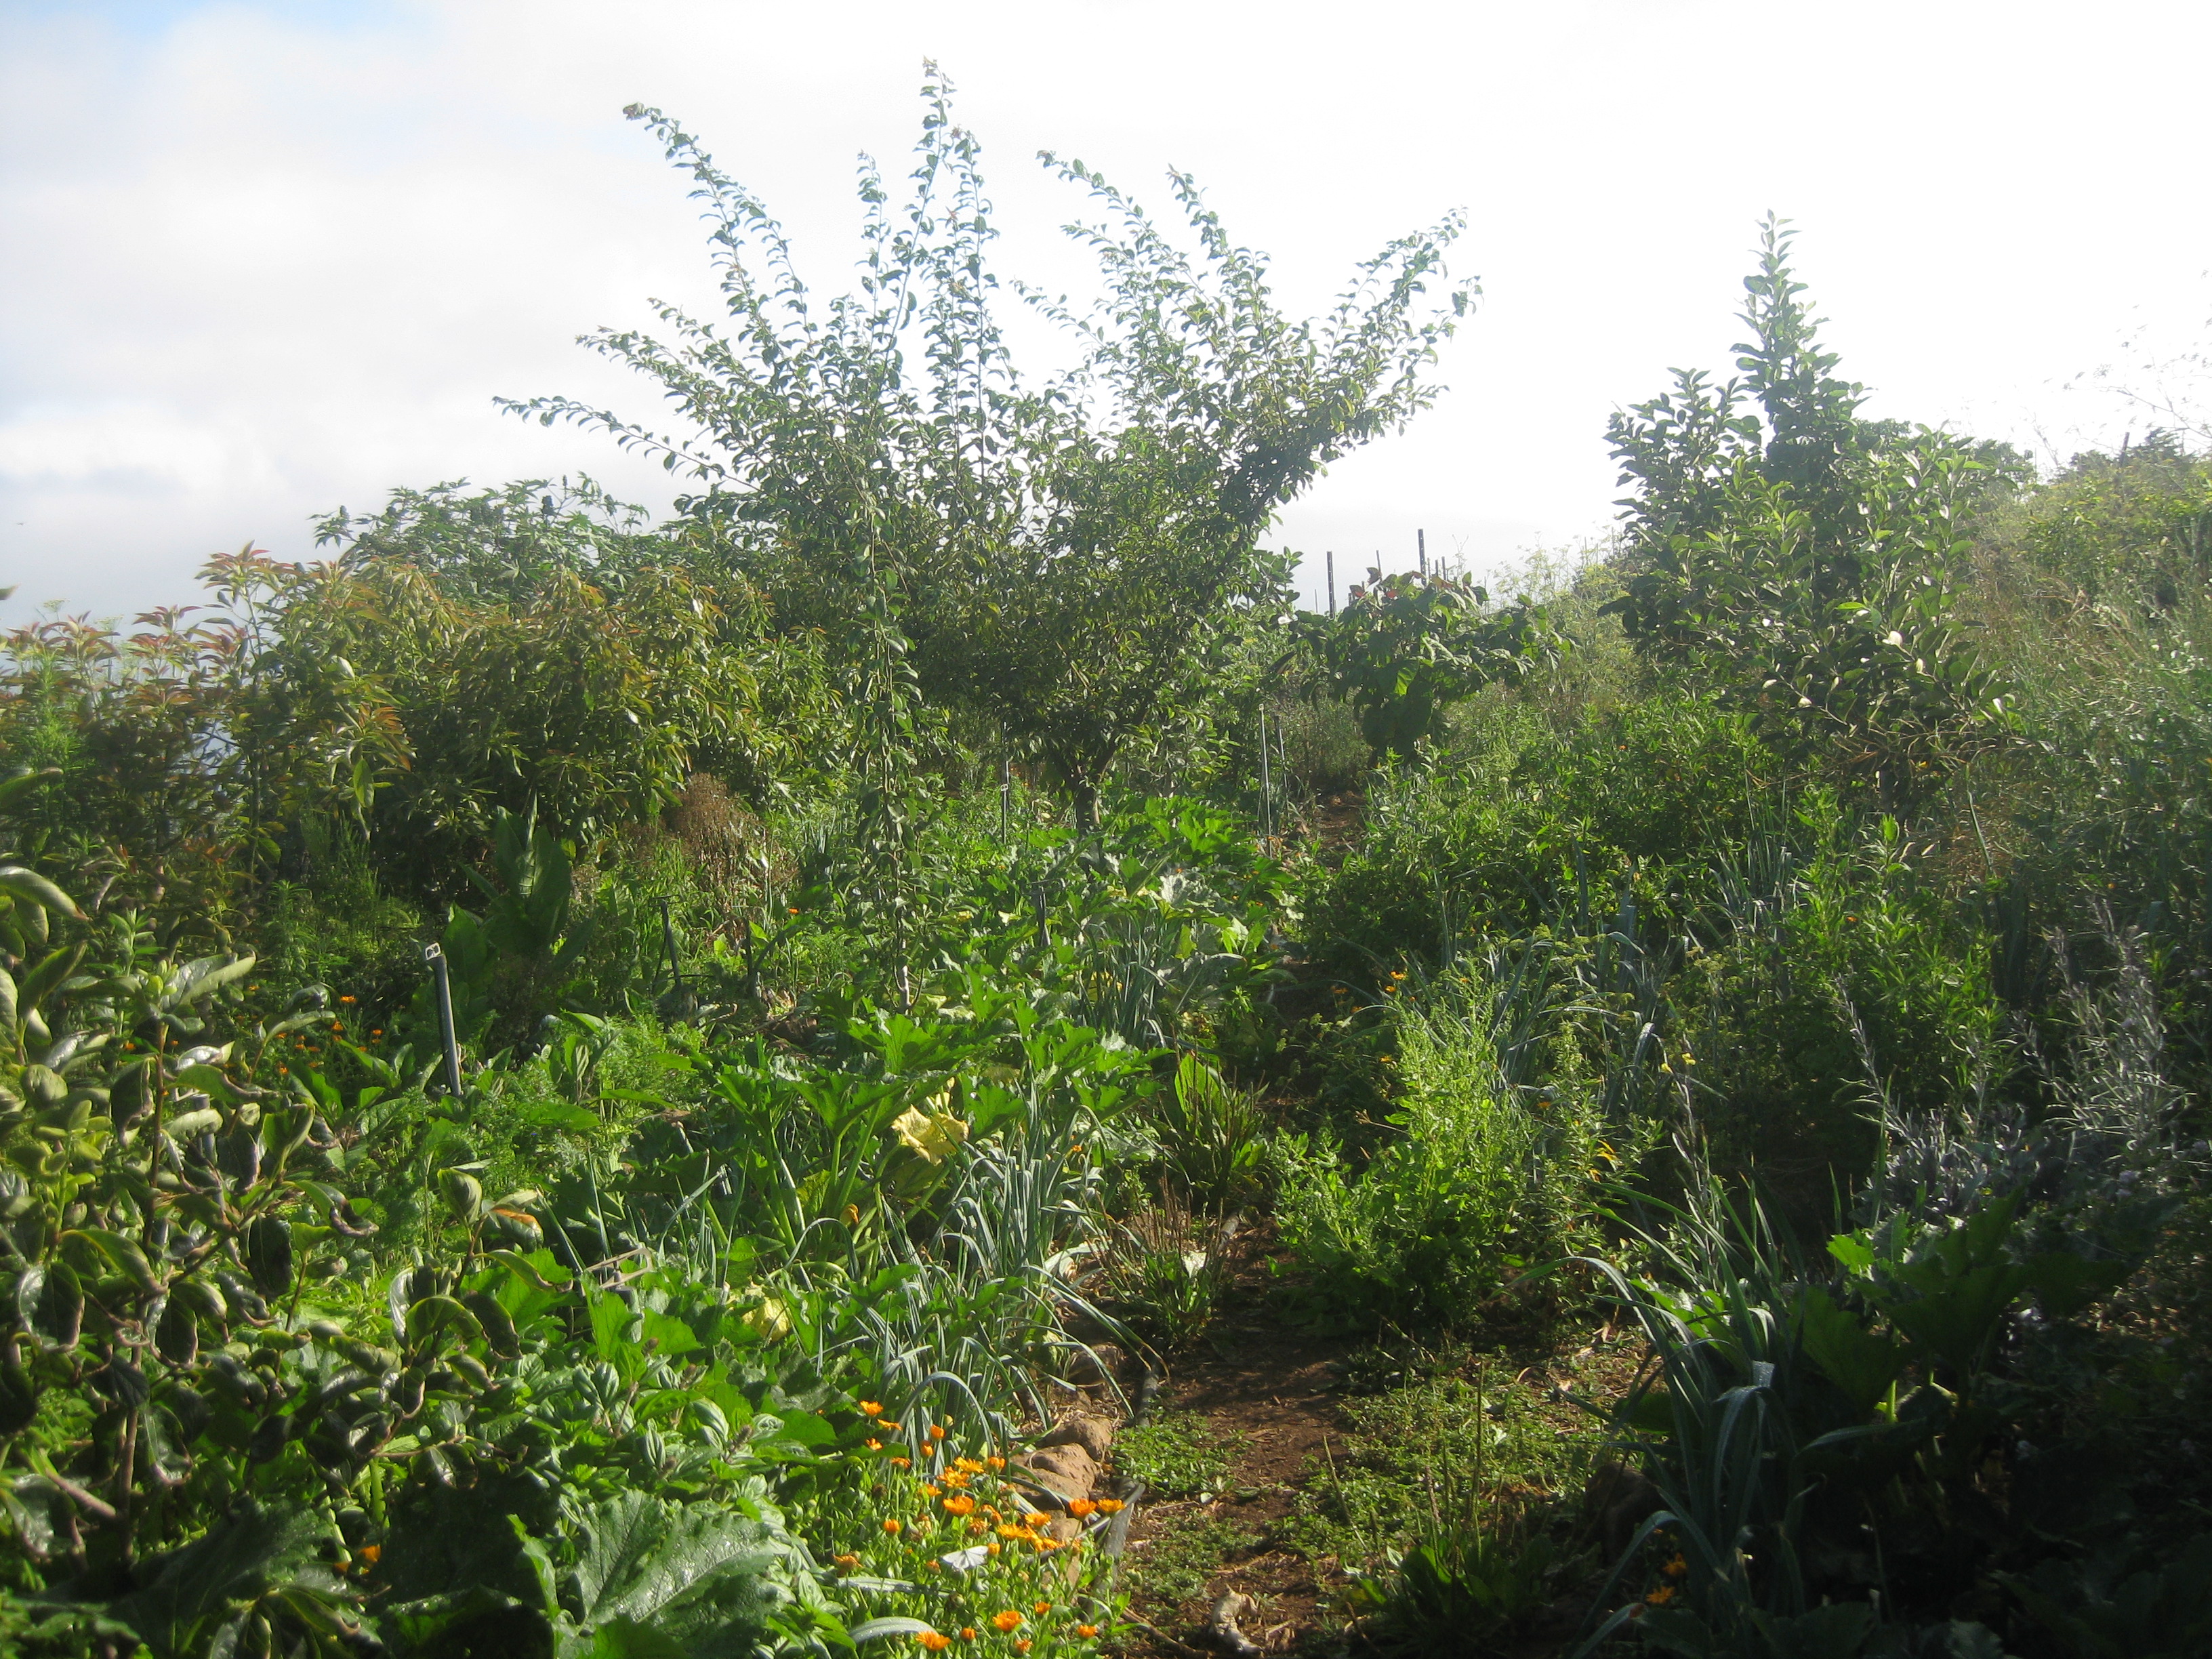
Figure II.4.- Different images showing the links of the project in terms of closed cycles
The systemic nature of Permaculture ensures networking between the different elements of the project. Every element meets different functions interconnected and supported by each other.
In the following paragraphs we will talk about the importance of different components of the design of the place –such as water resources, hedges, biotopes, the “pollinator volcano” and the waste/resource network.
II.3 Water harvesting
Water is a very important resource and has to be strategically designed in the project. Most of the water resources of the therapy center will probably come out of external water supplies. However, some other water resources can be generated through water catchment and waste water treatment. We will talk about these resources under the concept of water harvesting.
Whether we are designing a new place or redesigning an existing one, the possibility to divert rainwater towards swales should be taken into consideration. Swales in paths and roads can be used benefiting from any land inclination (Figure II.5). The swales are long excavations in contour lines made along the ground that allow the infiltration of the water into the subsoil. The width between swales is about 3-15 meters approximately, depending on the land unevenness and extension (Figure II.6).

Figure II.5.- Water diversion channels in the road
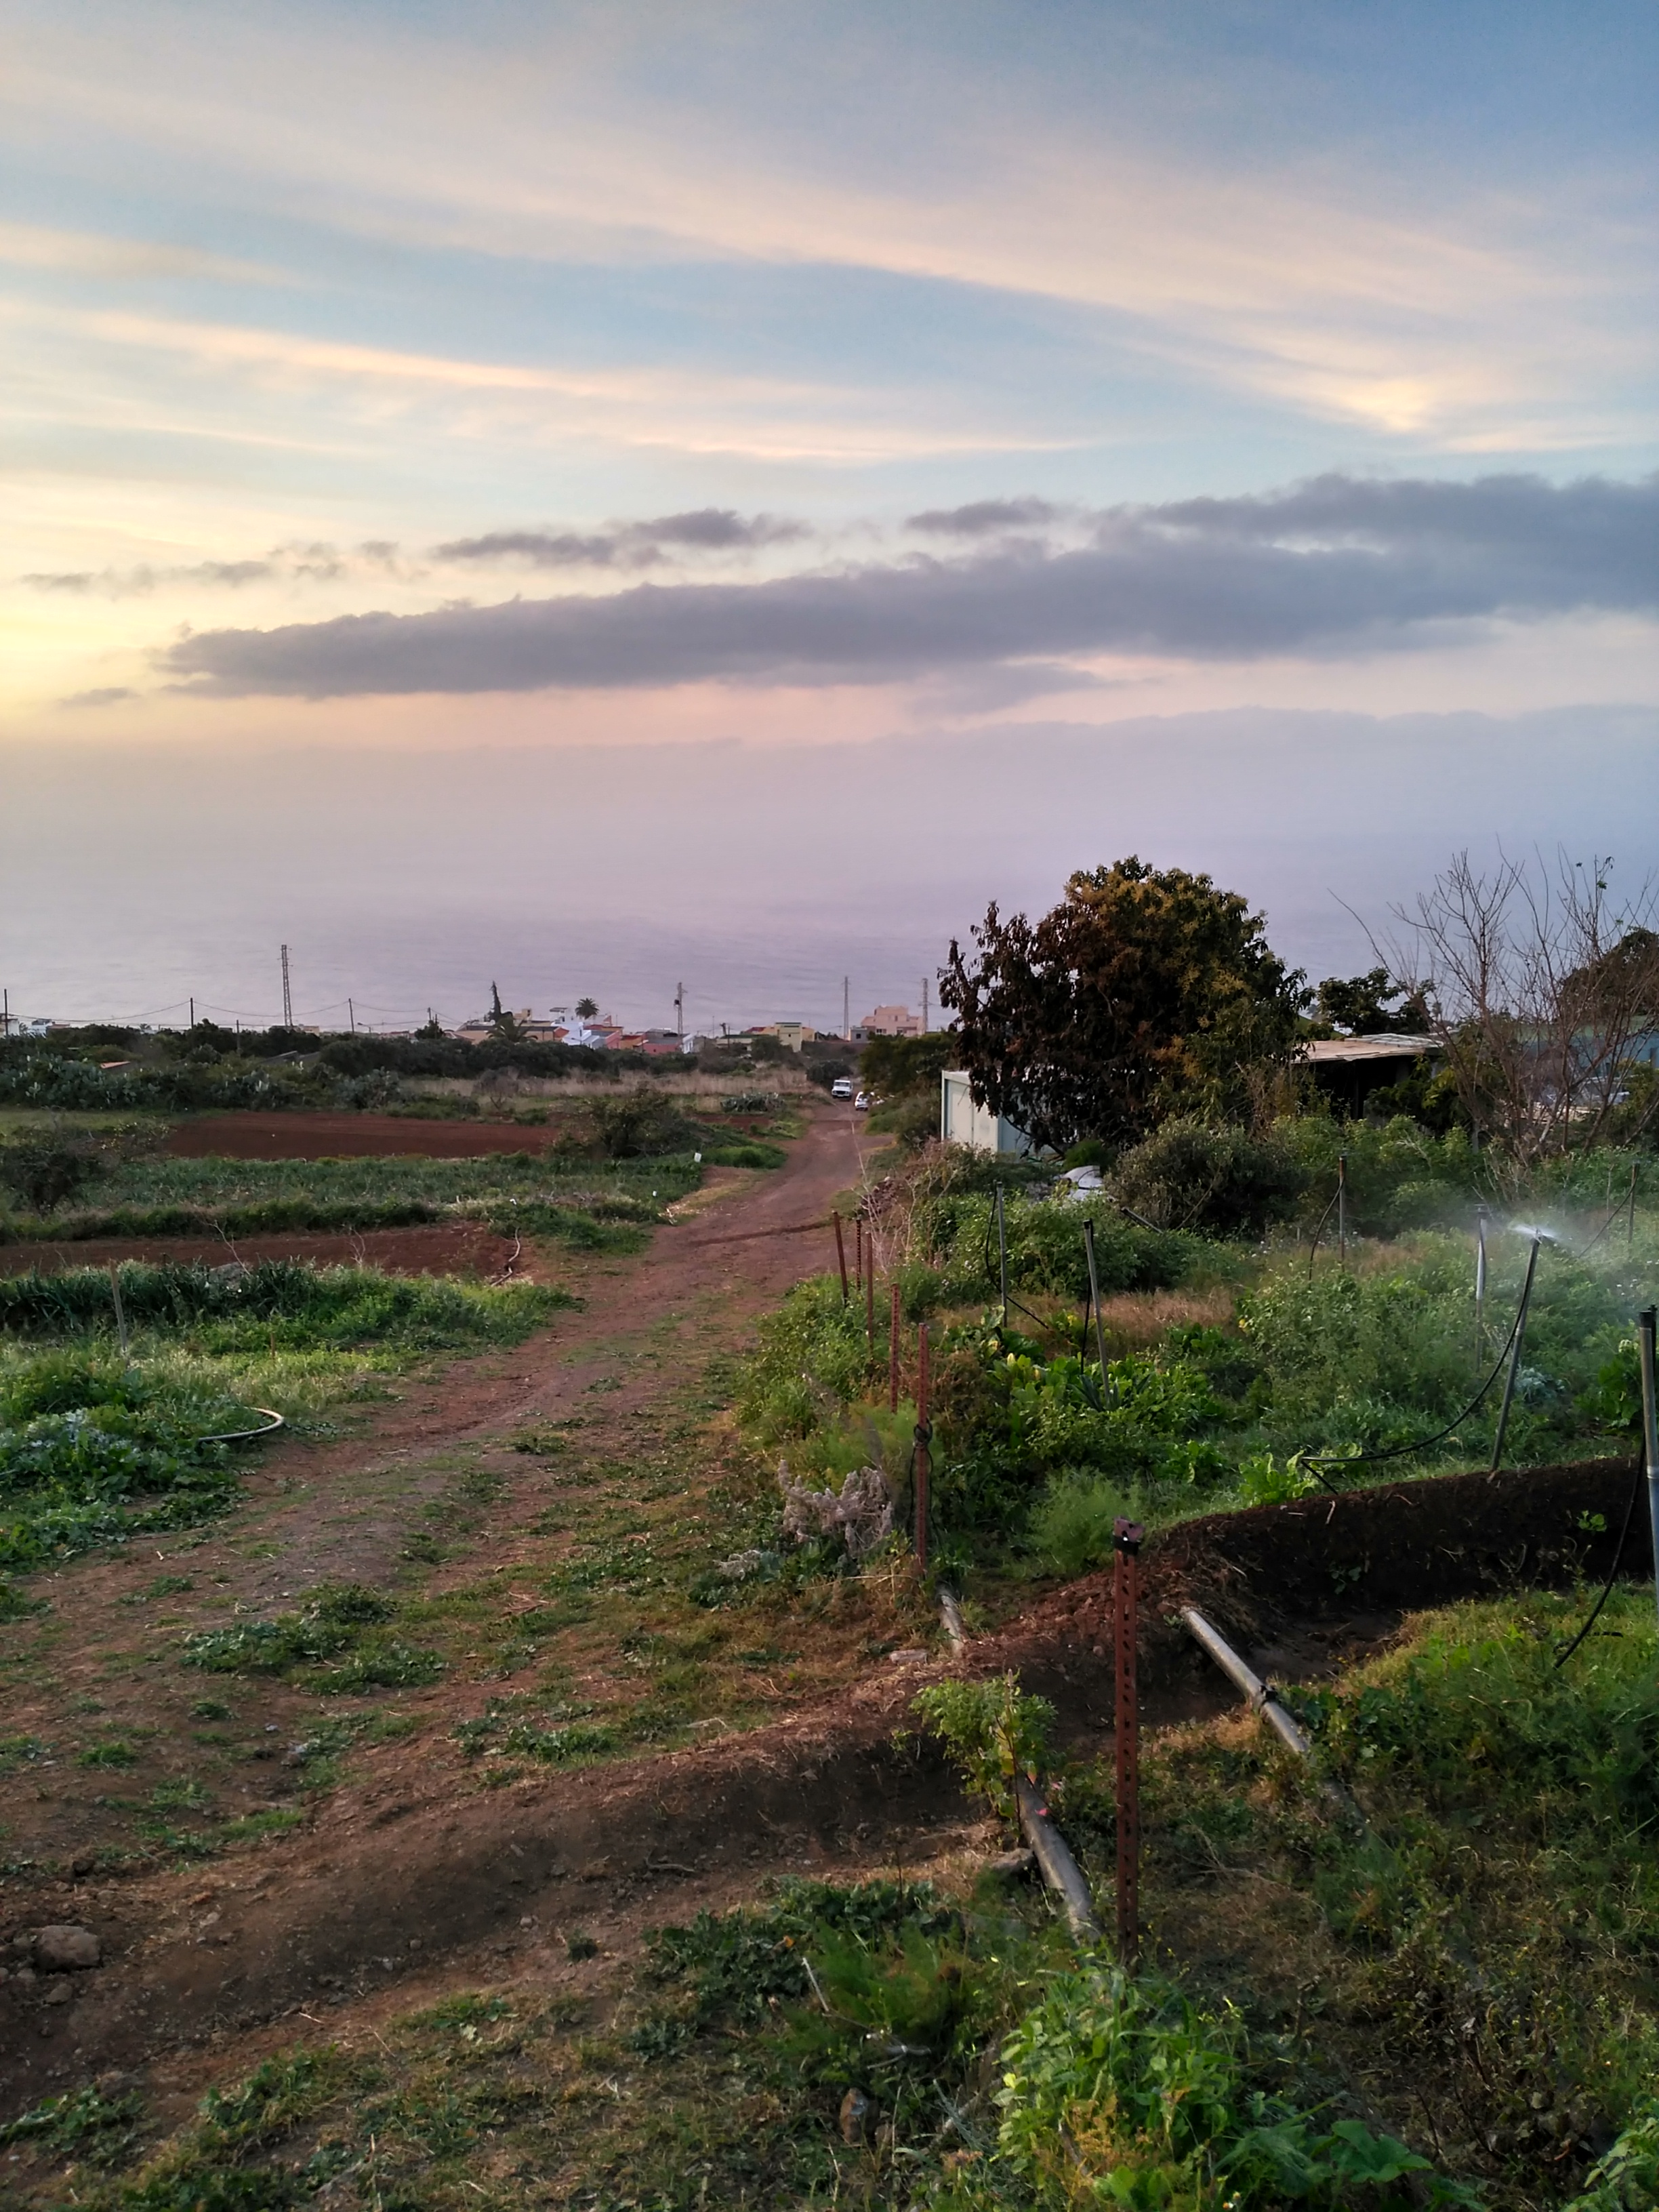
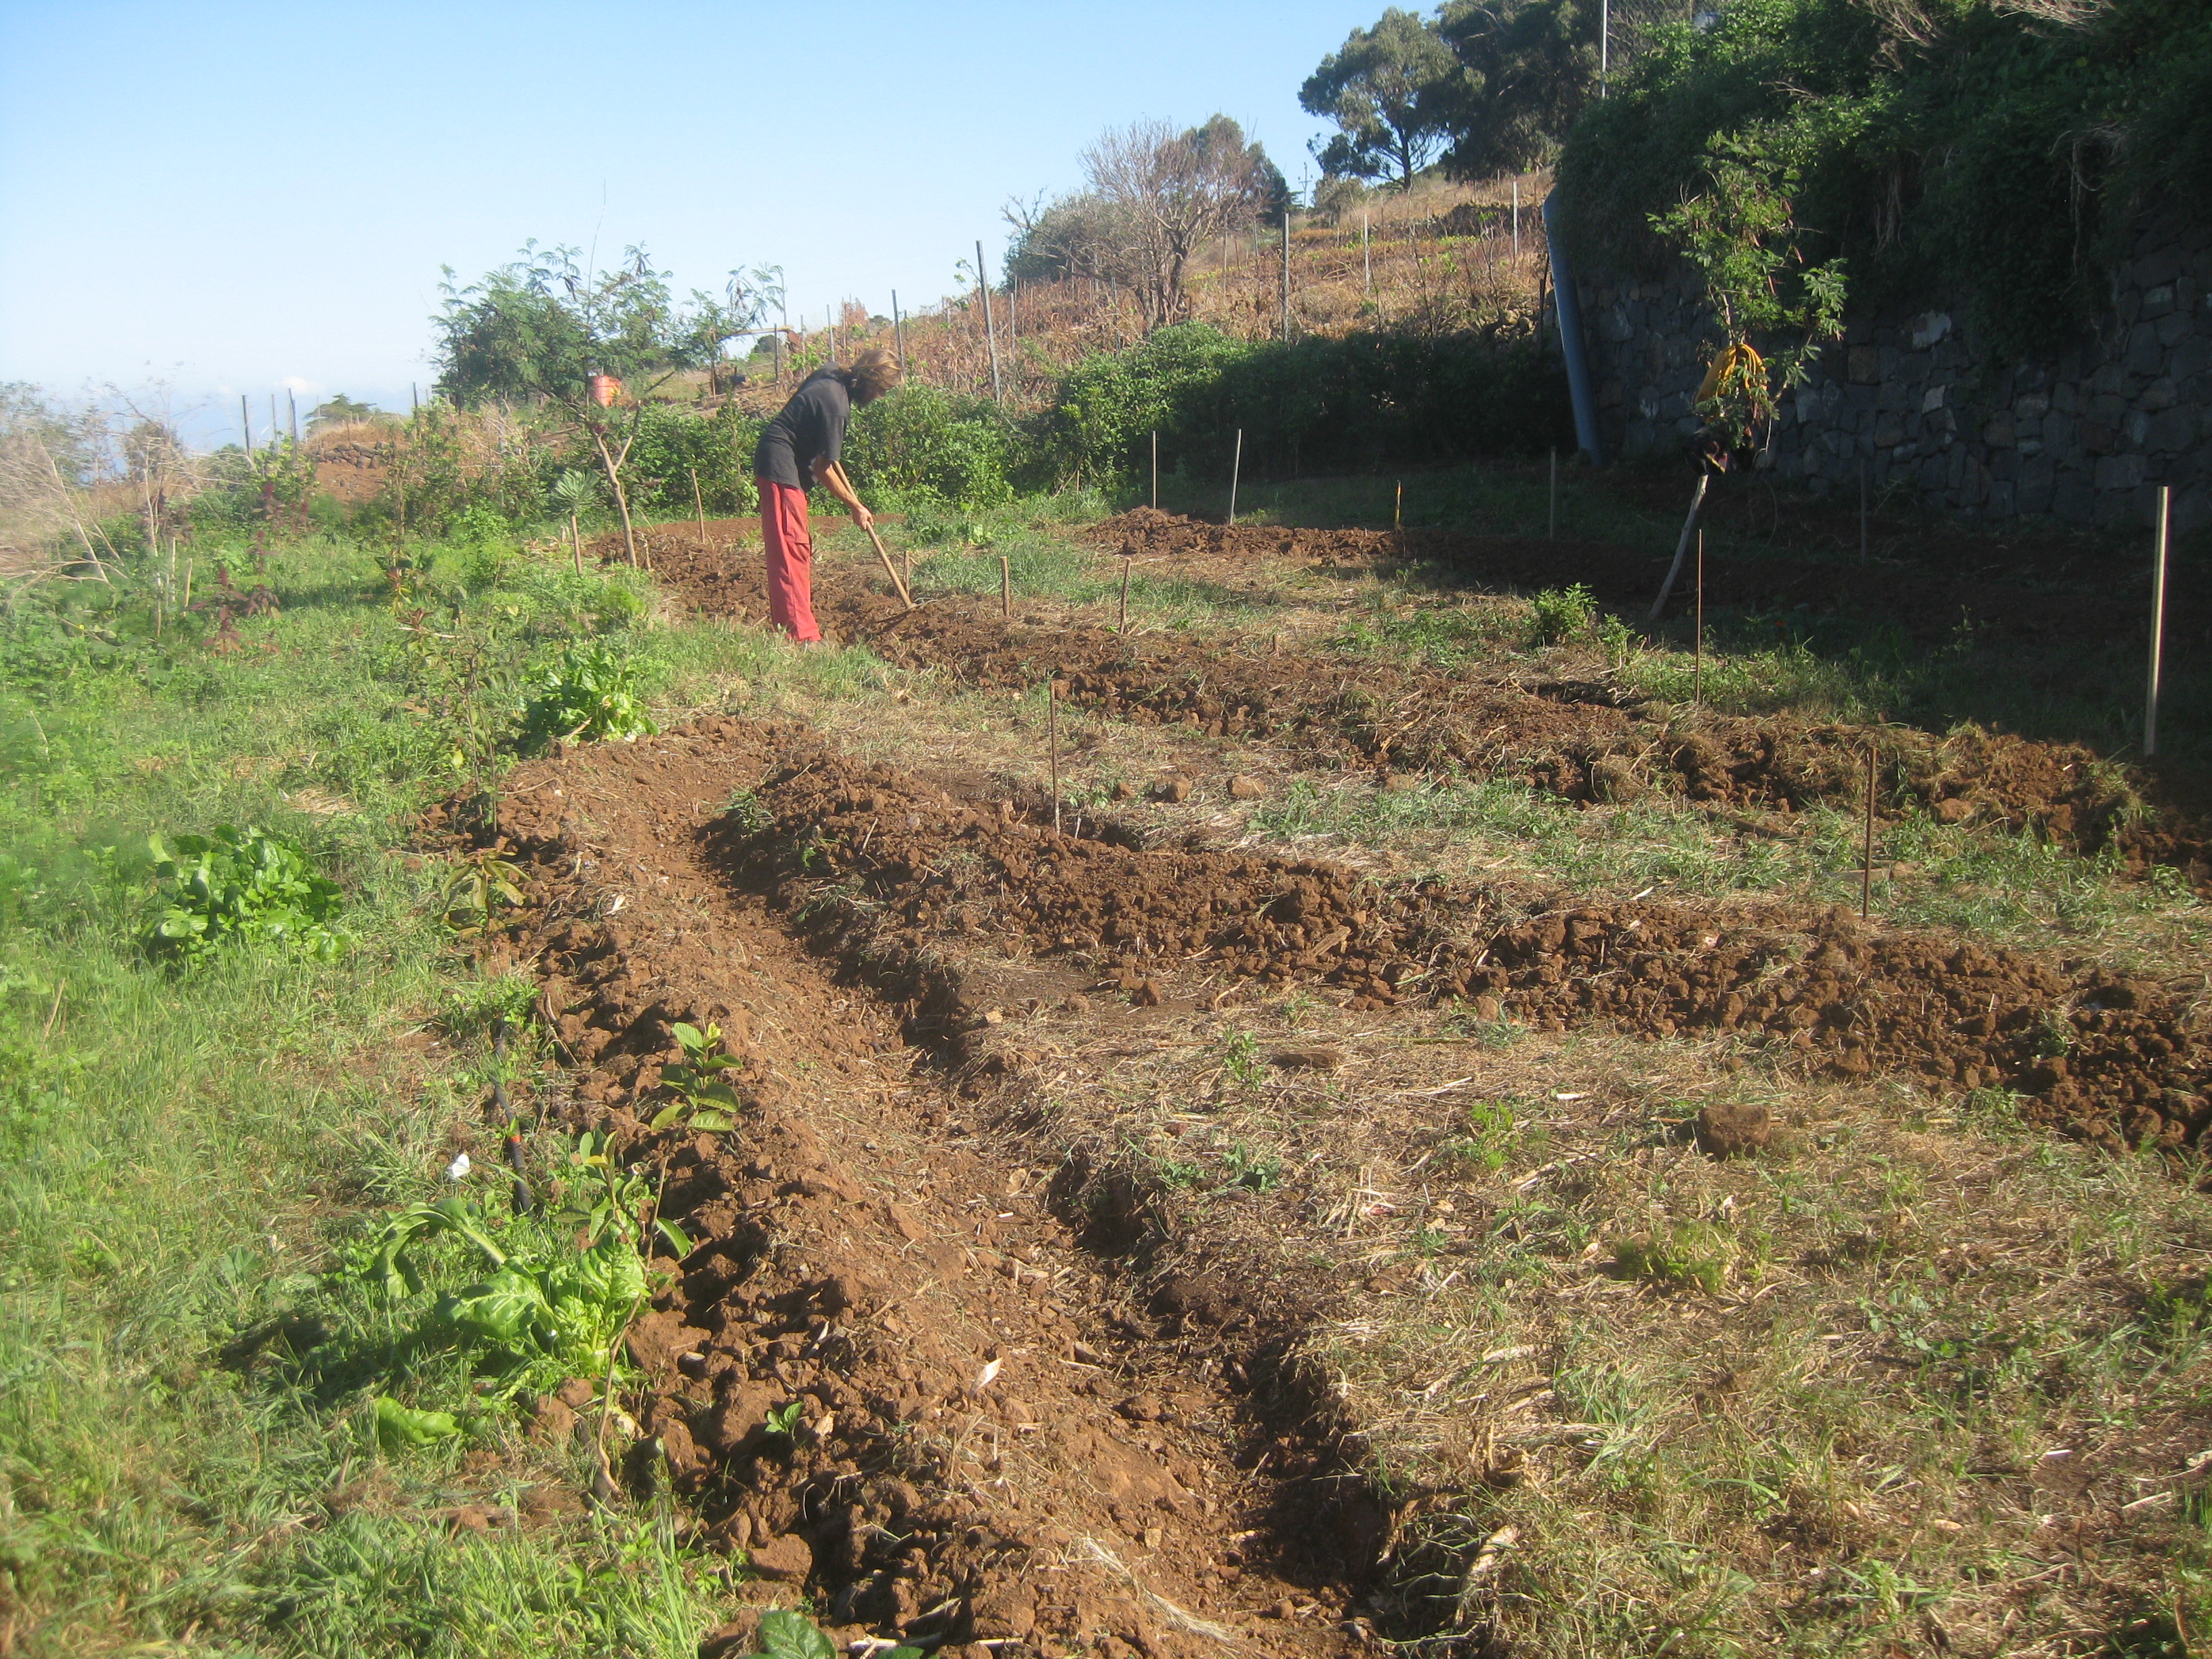
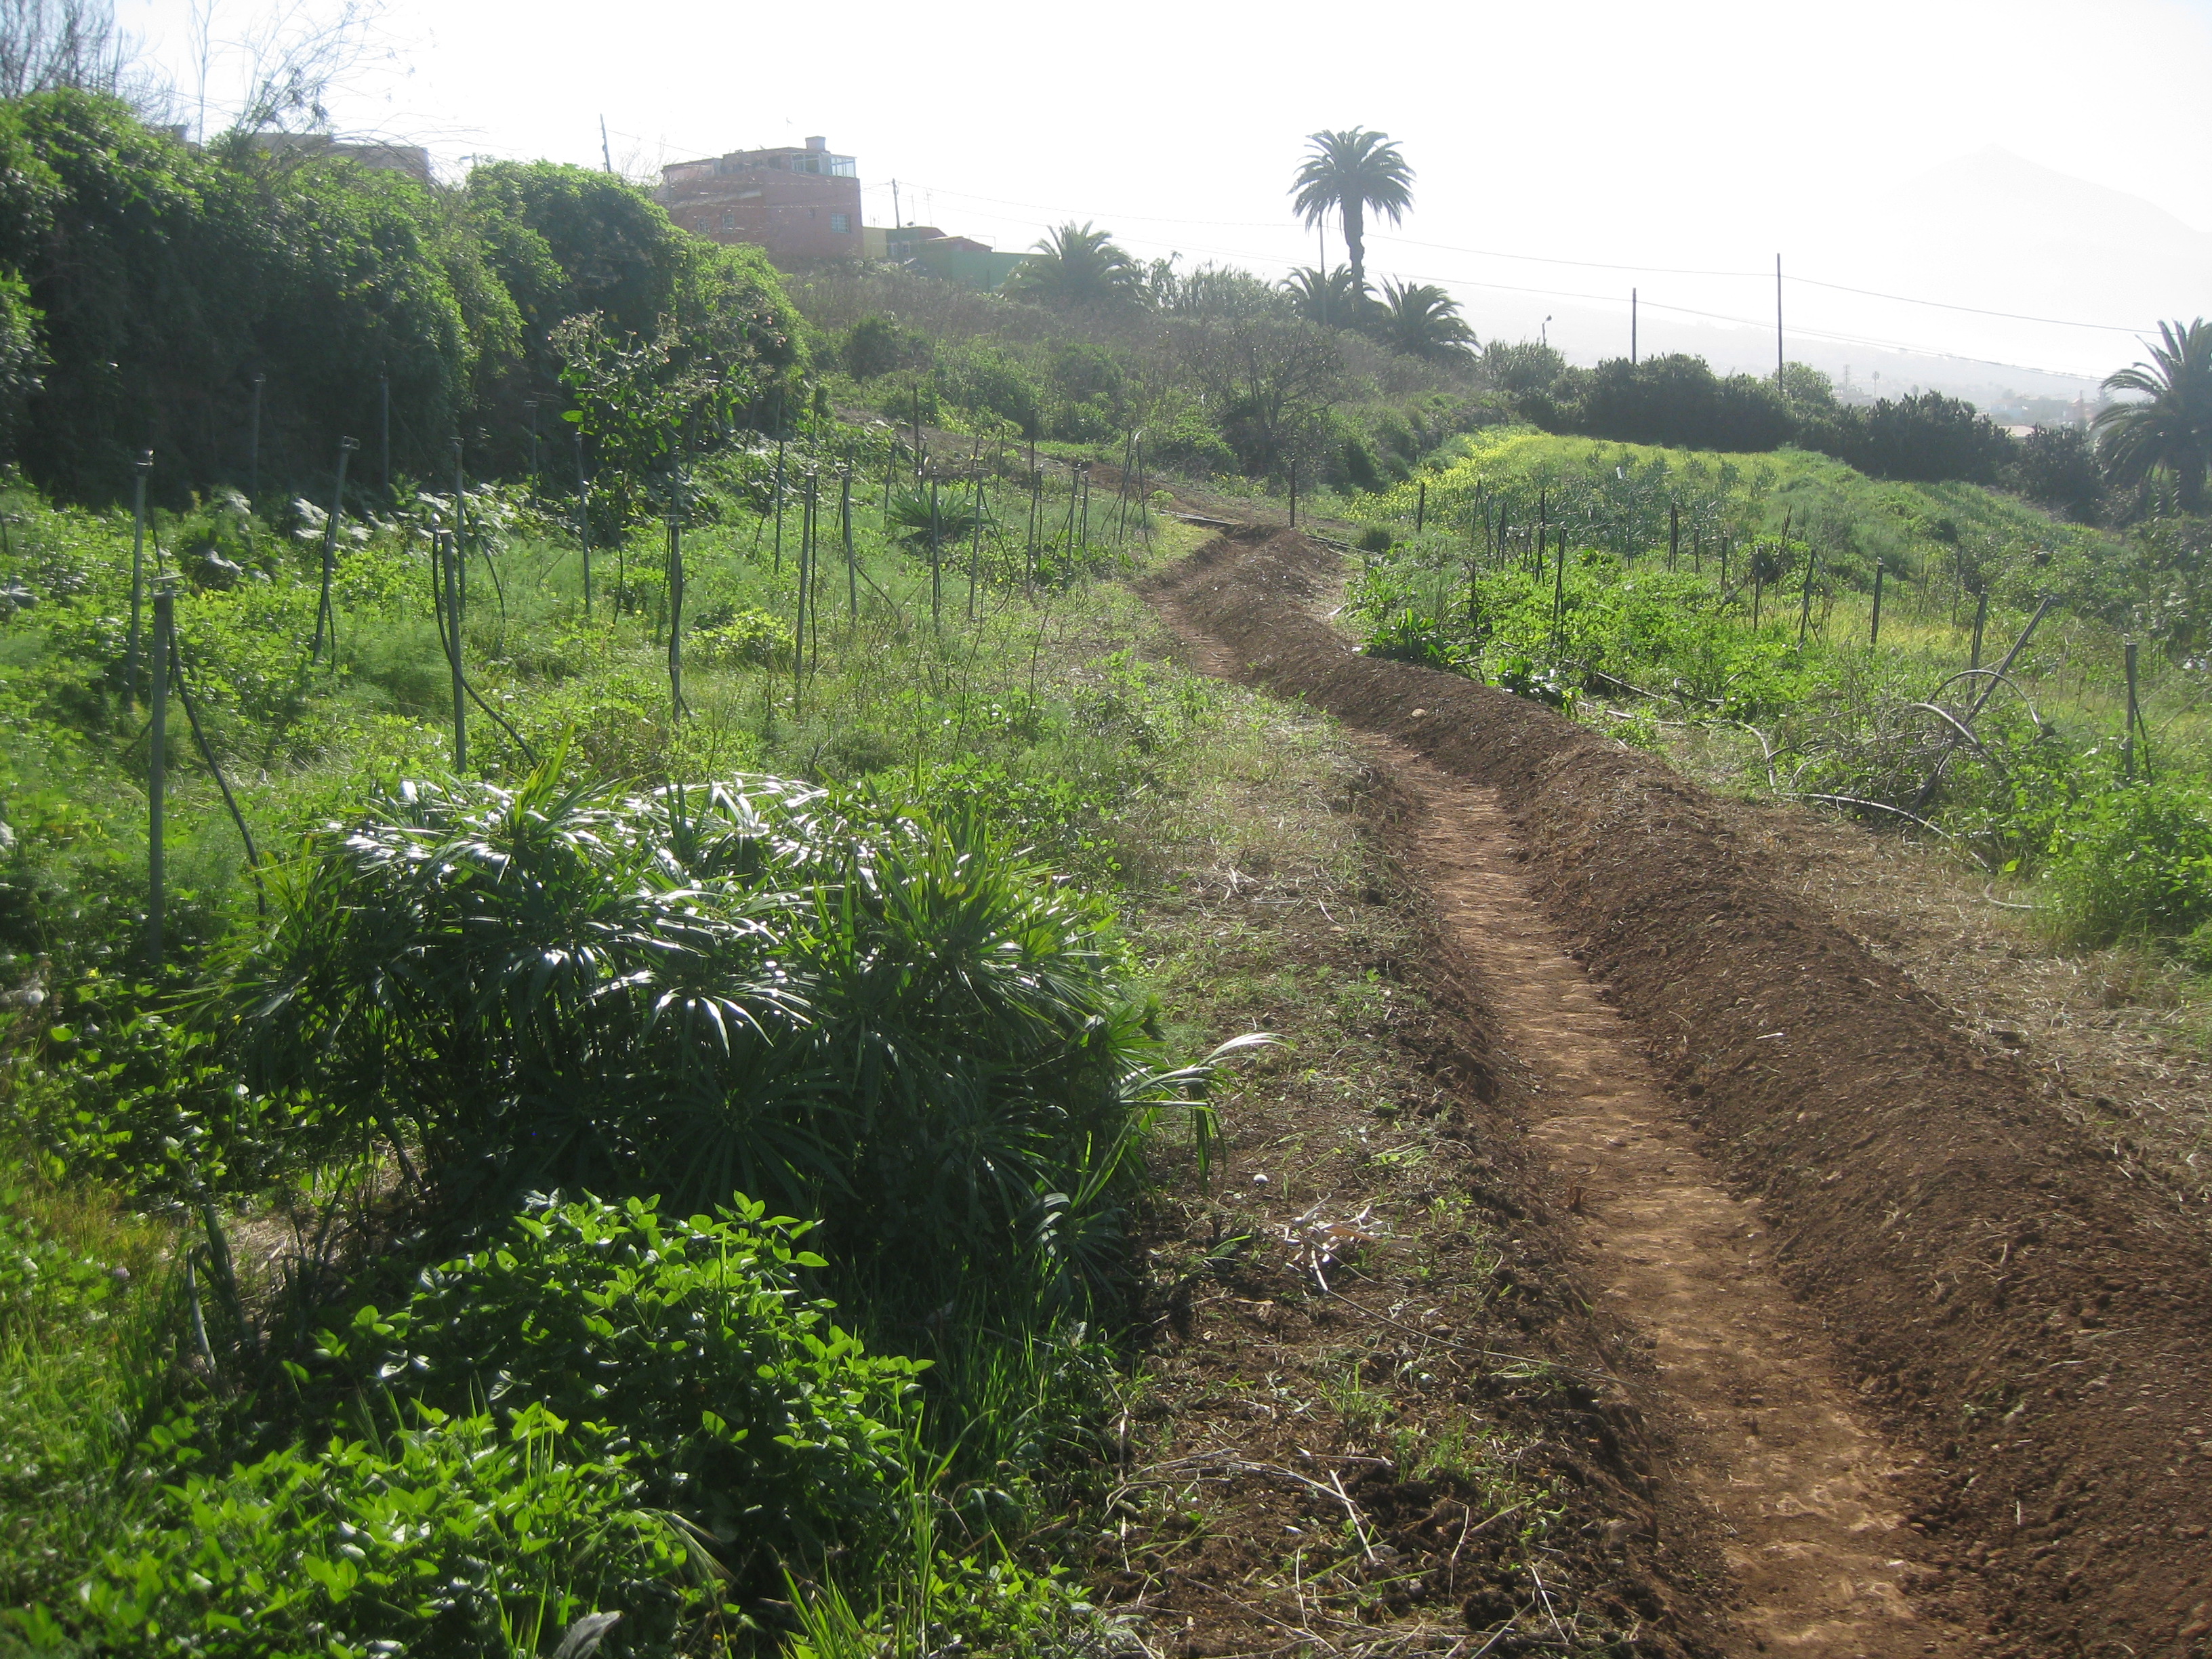
Figure II.6.- Swales for the rainwater in the plot
In case we have infrastructure with roofs but don’t have a pond to store water, the water can also be diverted towards these channels. That way we benefit from the nutrients entailed, elevate the groundwater level of the area and avoid erosion.This contributes to more available underground water, which is very beneficial for the roots of the trees, especially during droughts and summer.
This rainwater catchment system consists of helping the rainwater to enter the water diversion channel in the top part of the slope. From this top channel the water continues gently until it reaches the overflow at the other end of the channel.
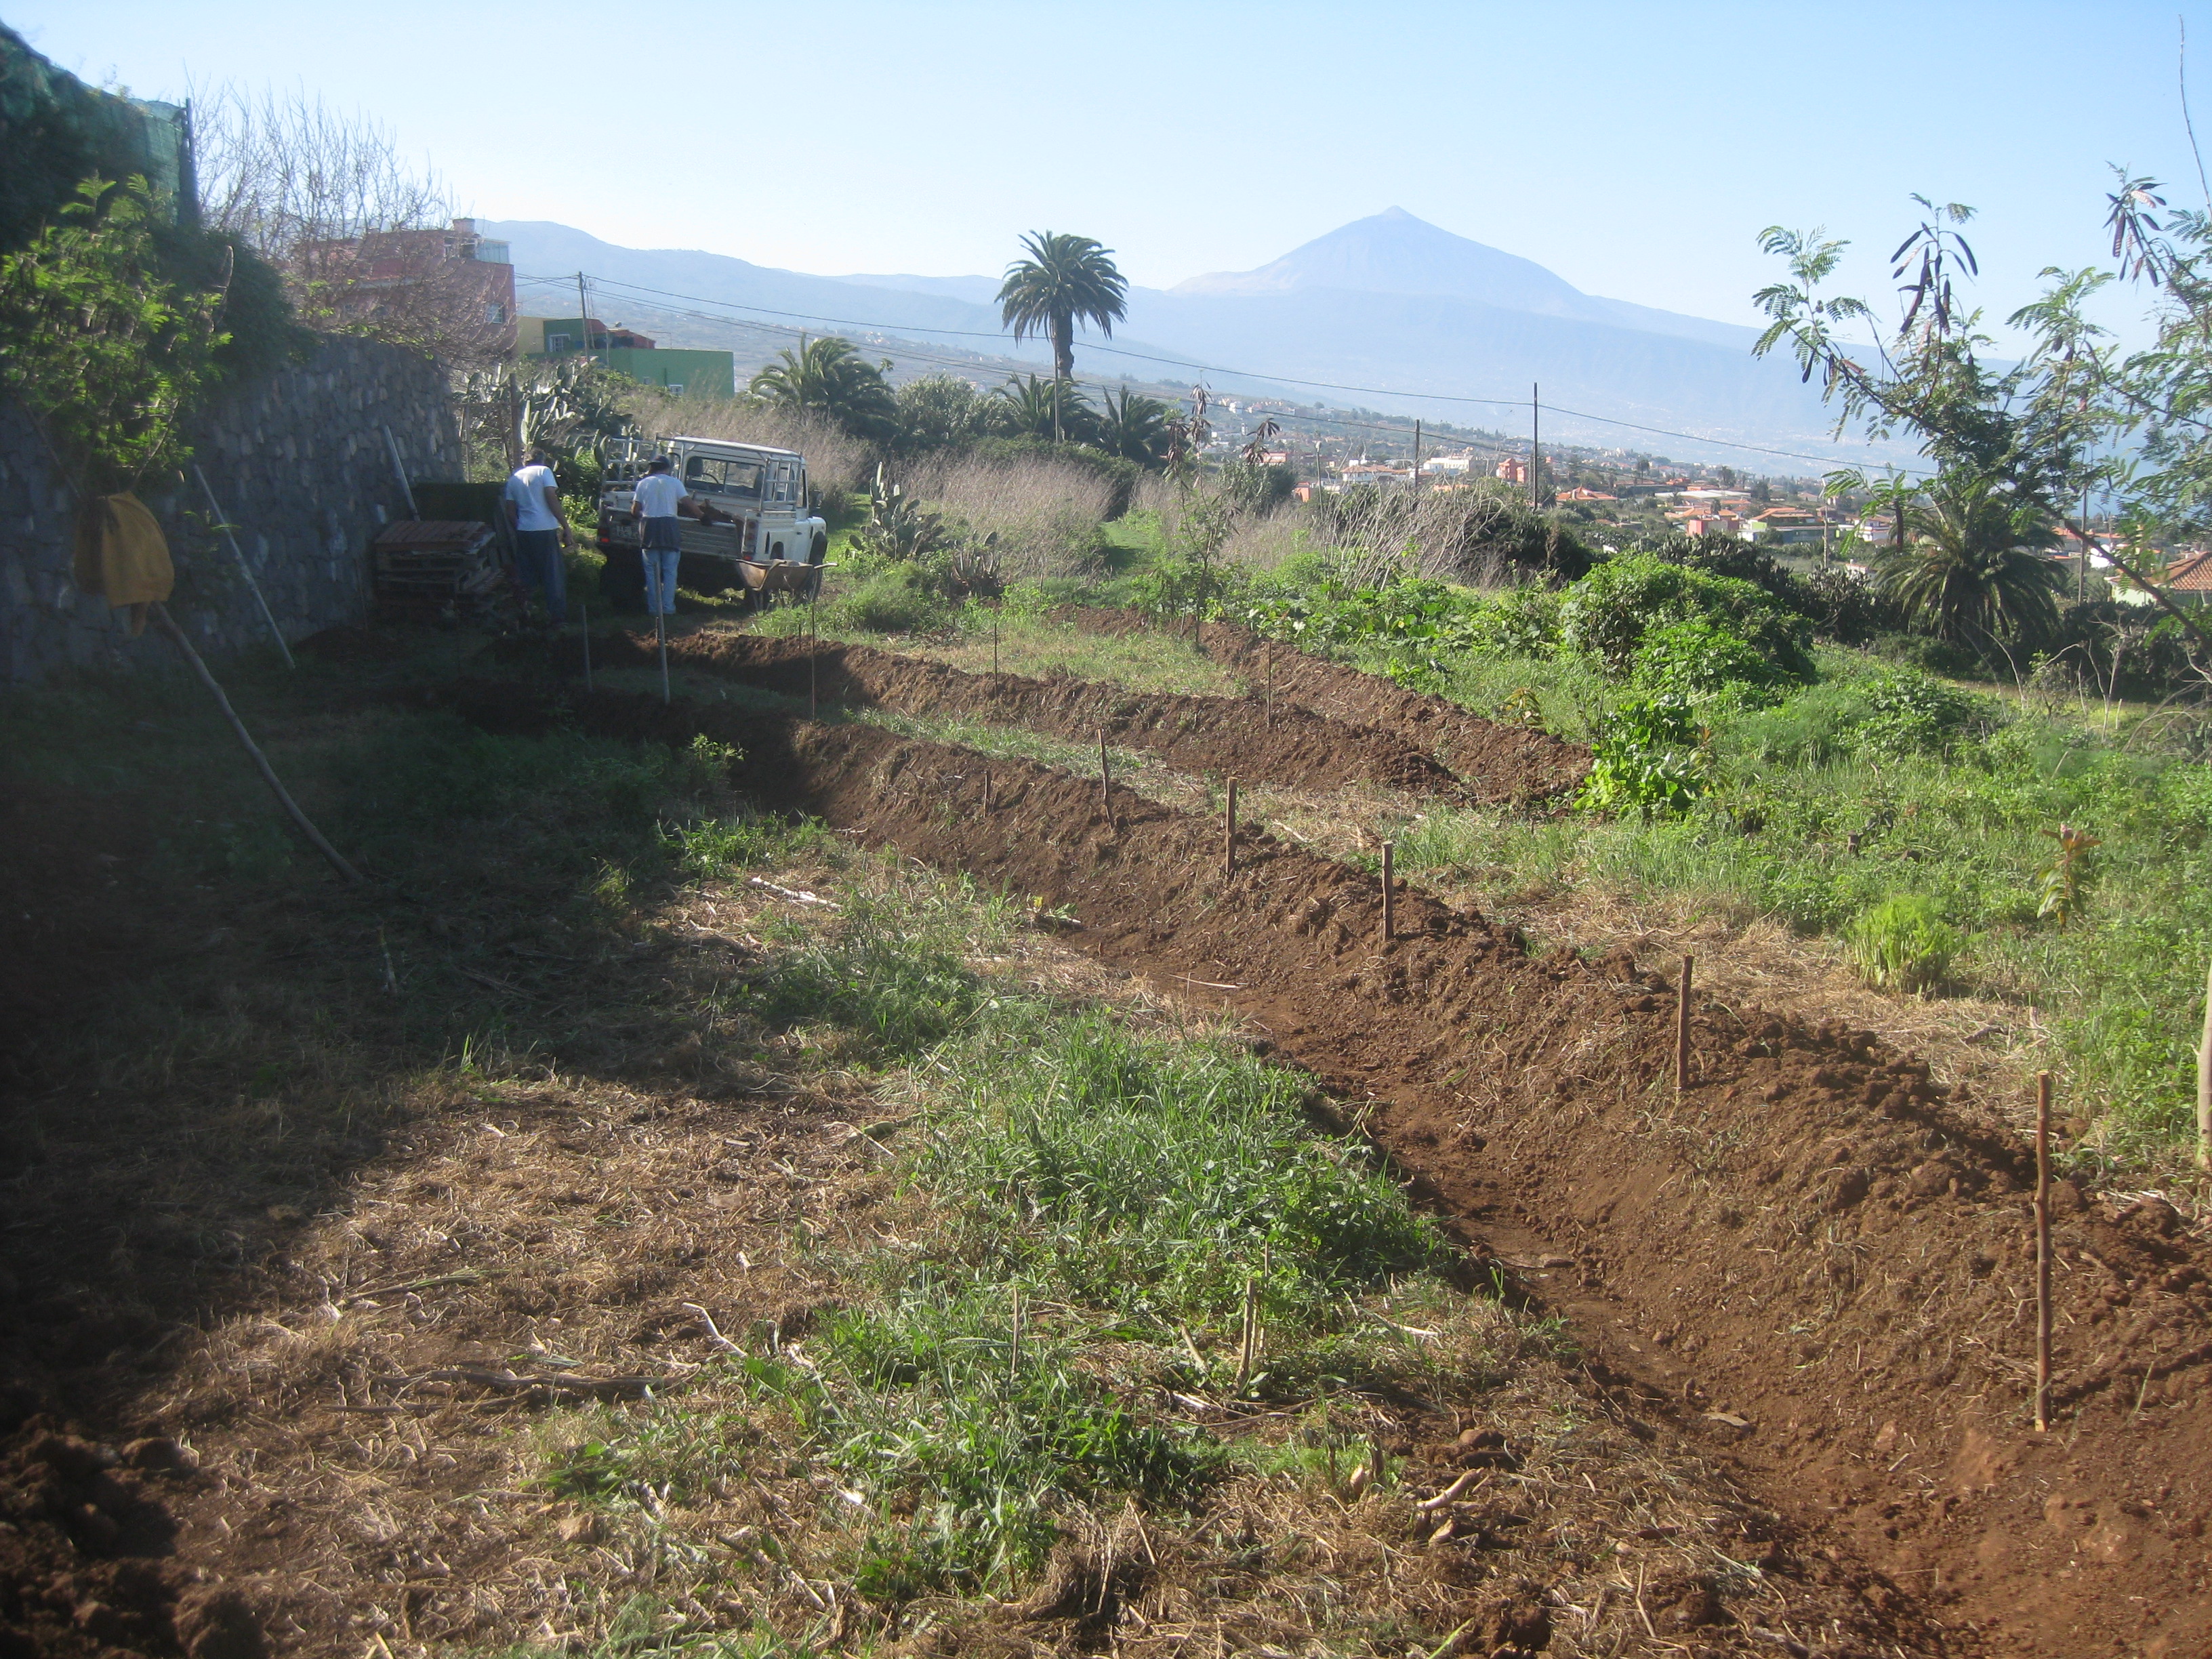
In case of heavy rain, when the volume of the water getting into the swale is bigger than the water currently filtering, the water level would rise and the overflowed water would pass into a second swale connected to the first one (Figure II.7). And so forth until the water reached the swale in the lowest part of the slope, where it would overflow and pass to a path, road or creek.
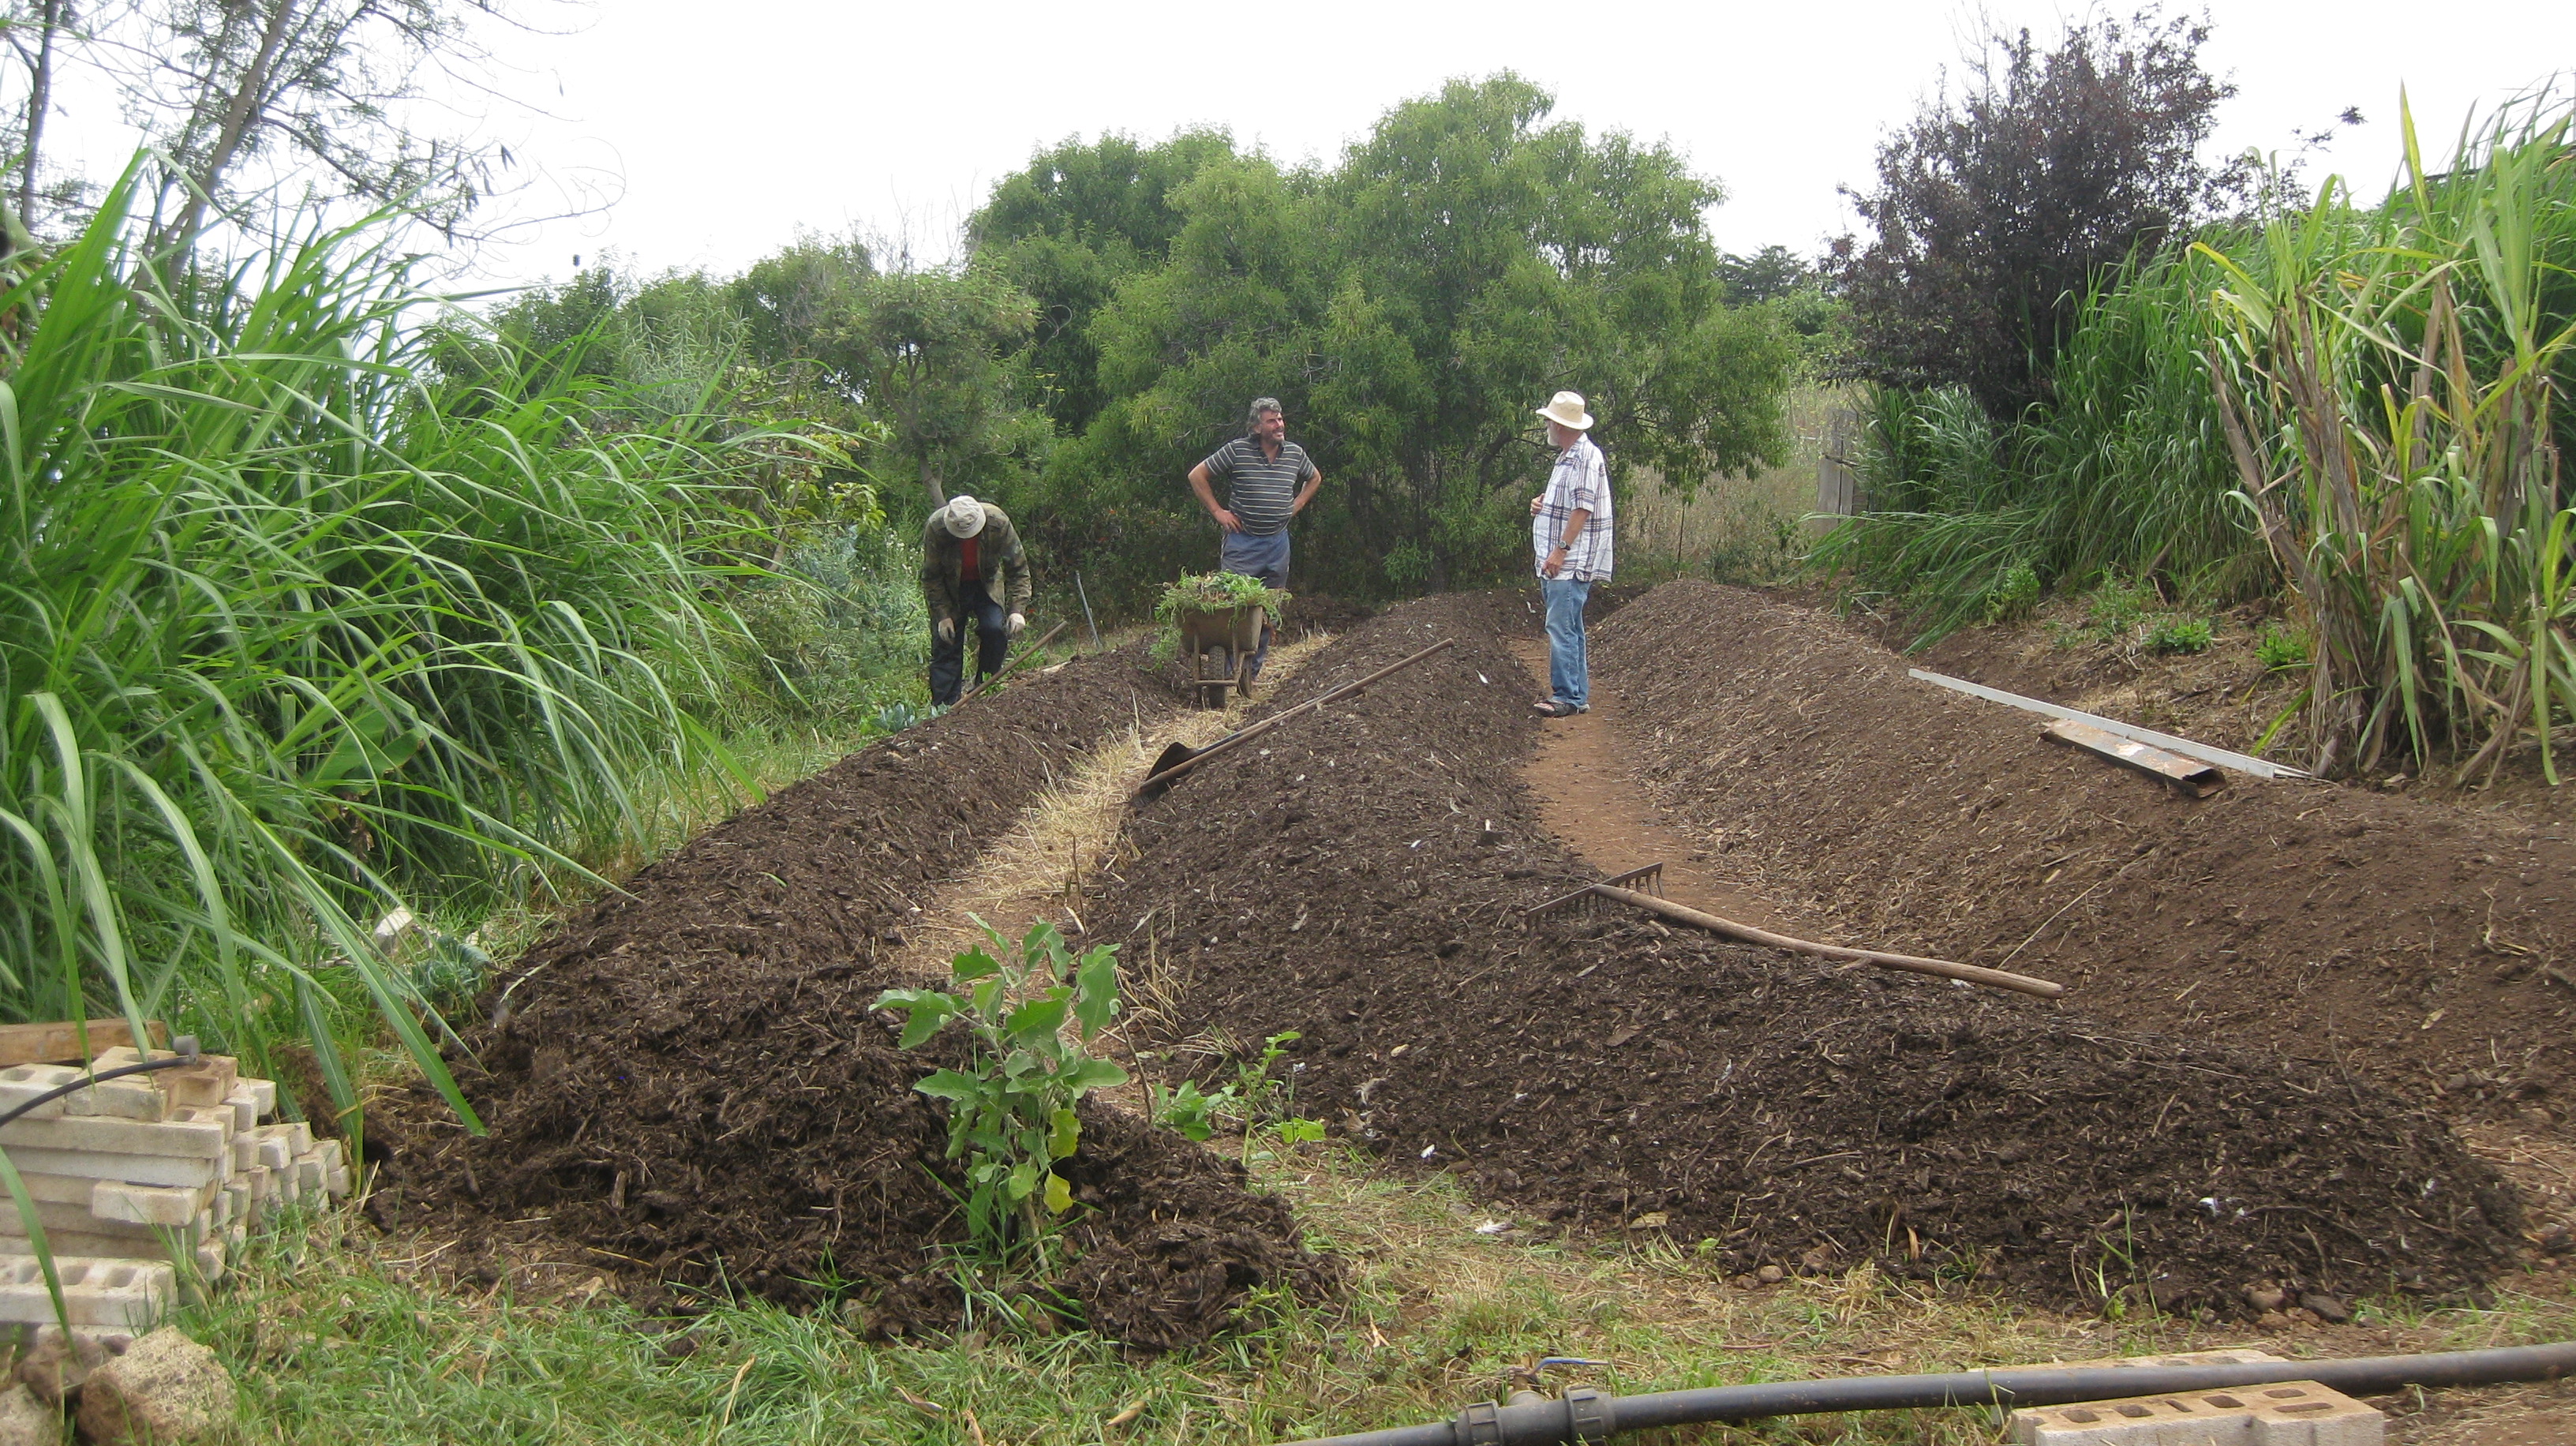
Figure II.7.- Swales inan edible garden with raised beds
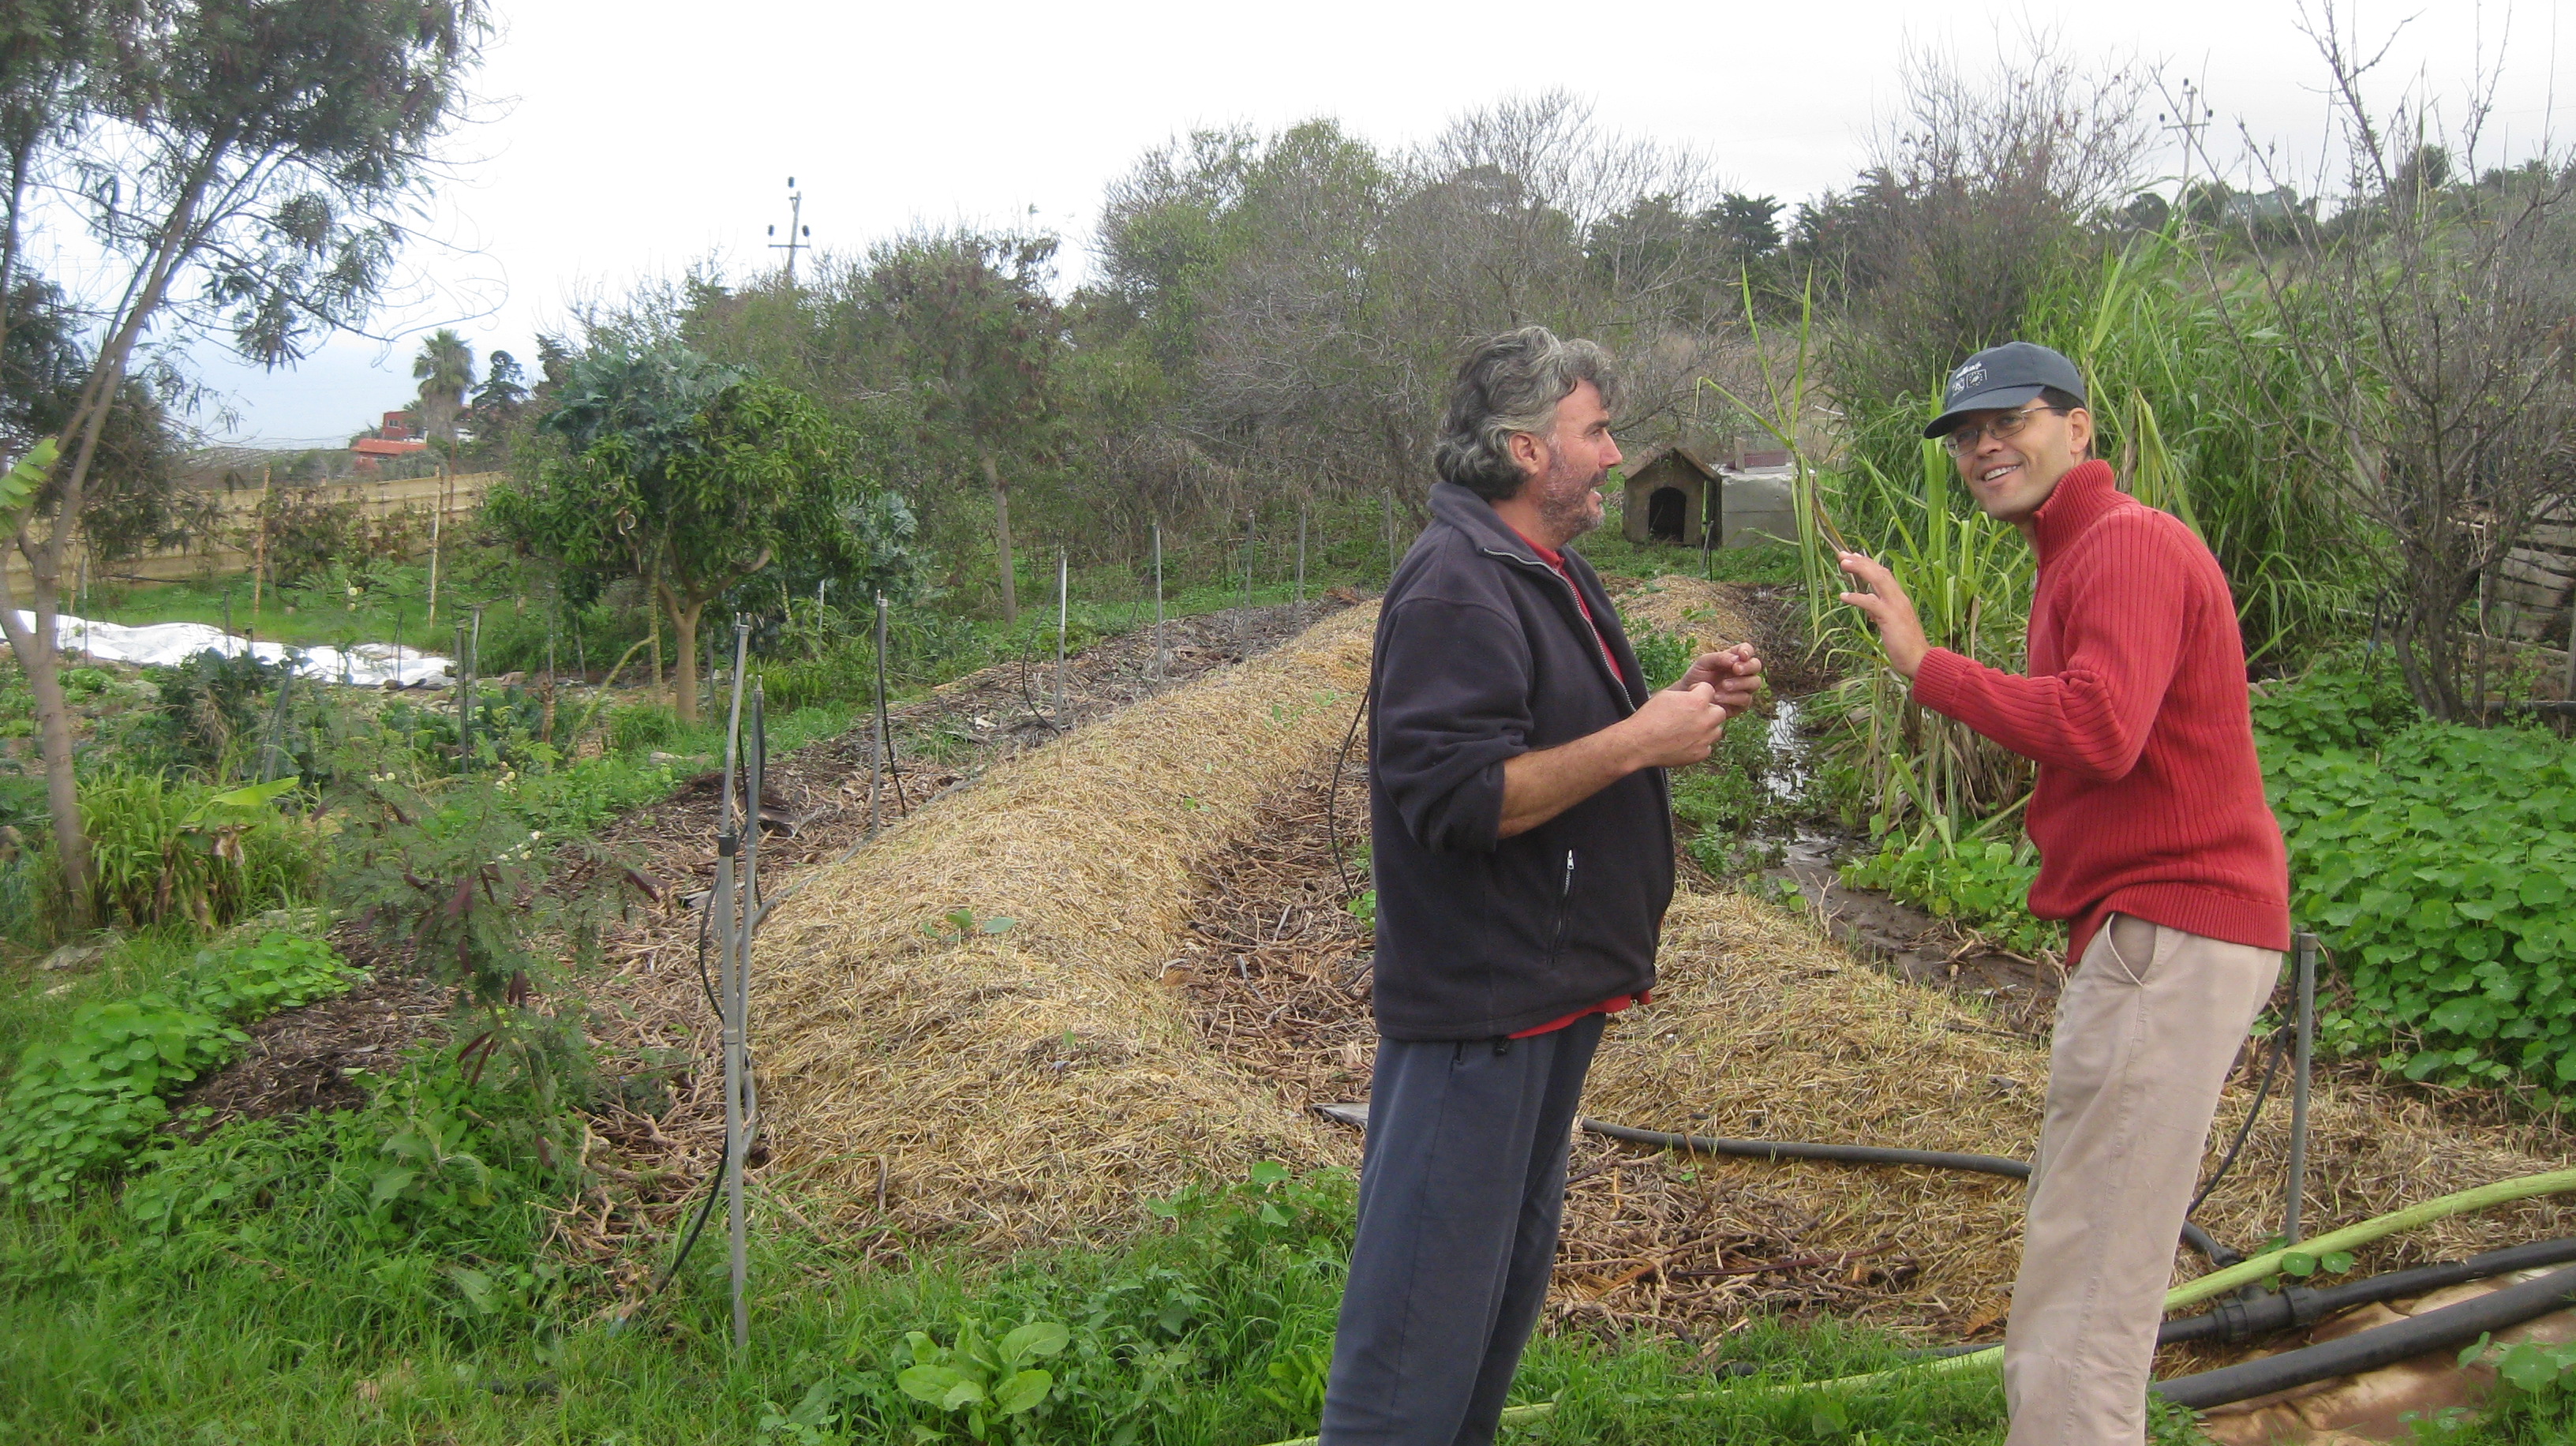
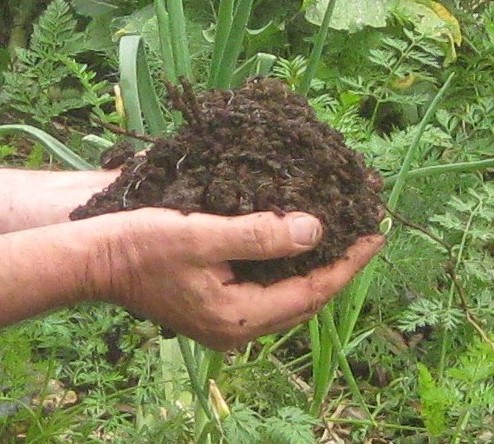
Another way to catch rainwater is to capture it in the soil of the allotment itself. The sponginess of the good cultivated soil –which we will talk about in Didactic Unit III– allows all the rain that falls on the beds and paths of the edible gardens to be absorbed into the soil of the garden (Figure II.8).
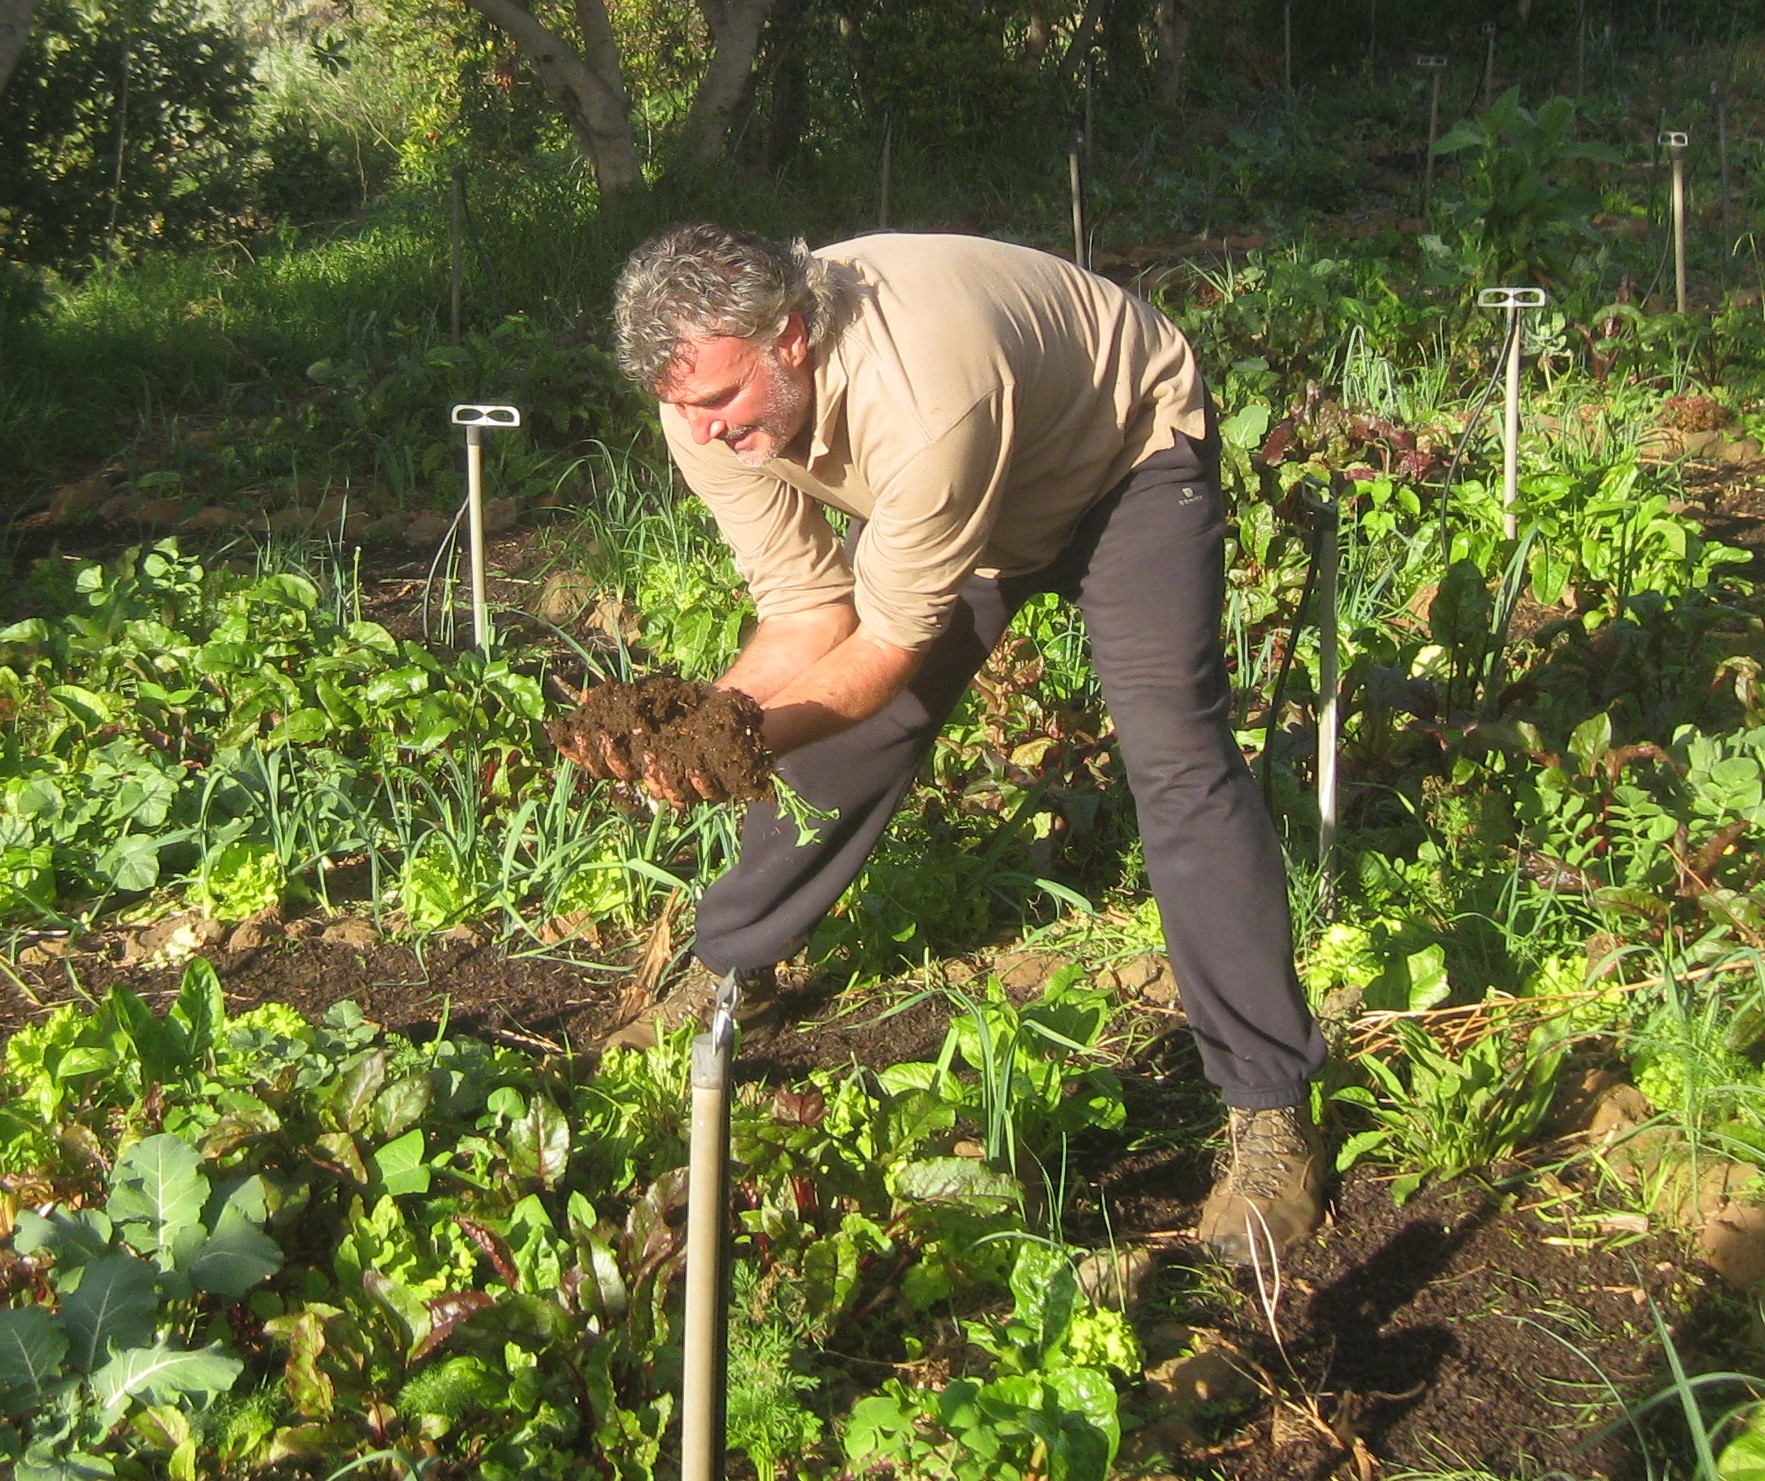
Figure II.8.- Images of the spongy soil
A third way to catch the rainwater is to channel this water by connecting every roof of the infrastructures of the center with the pond –where it is stored for its latter use (Figure II.9).
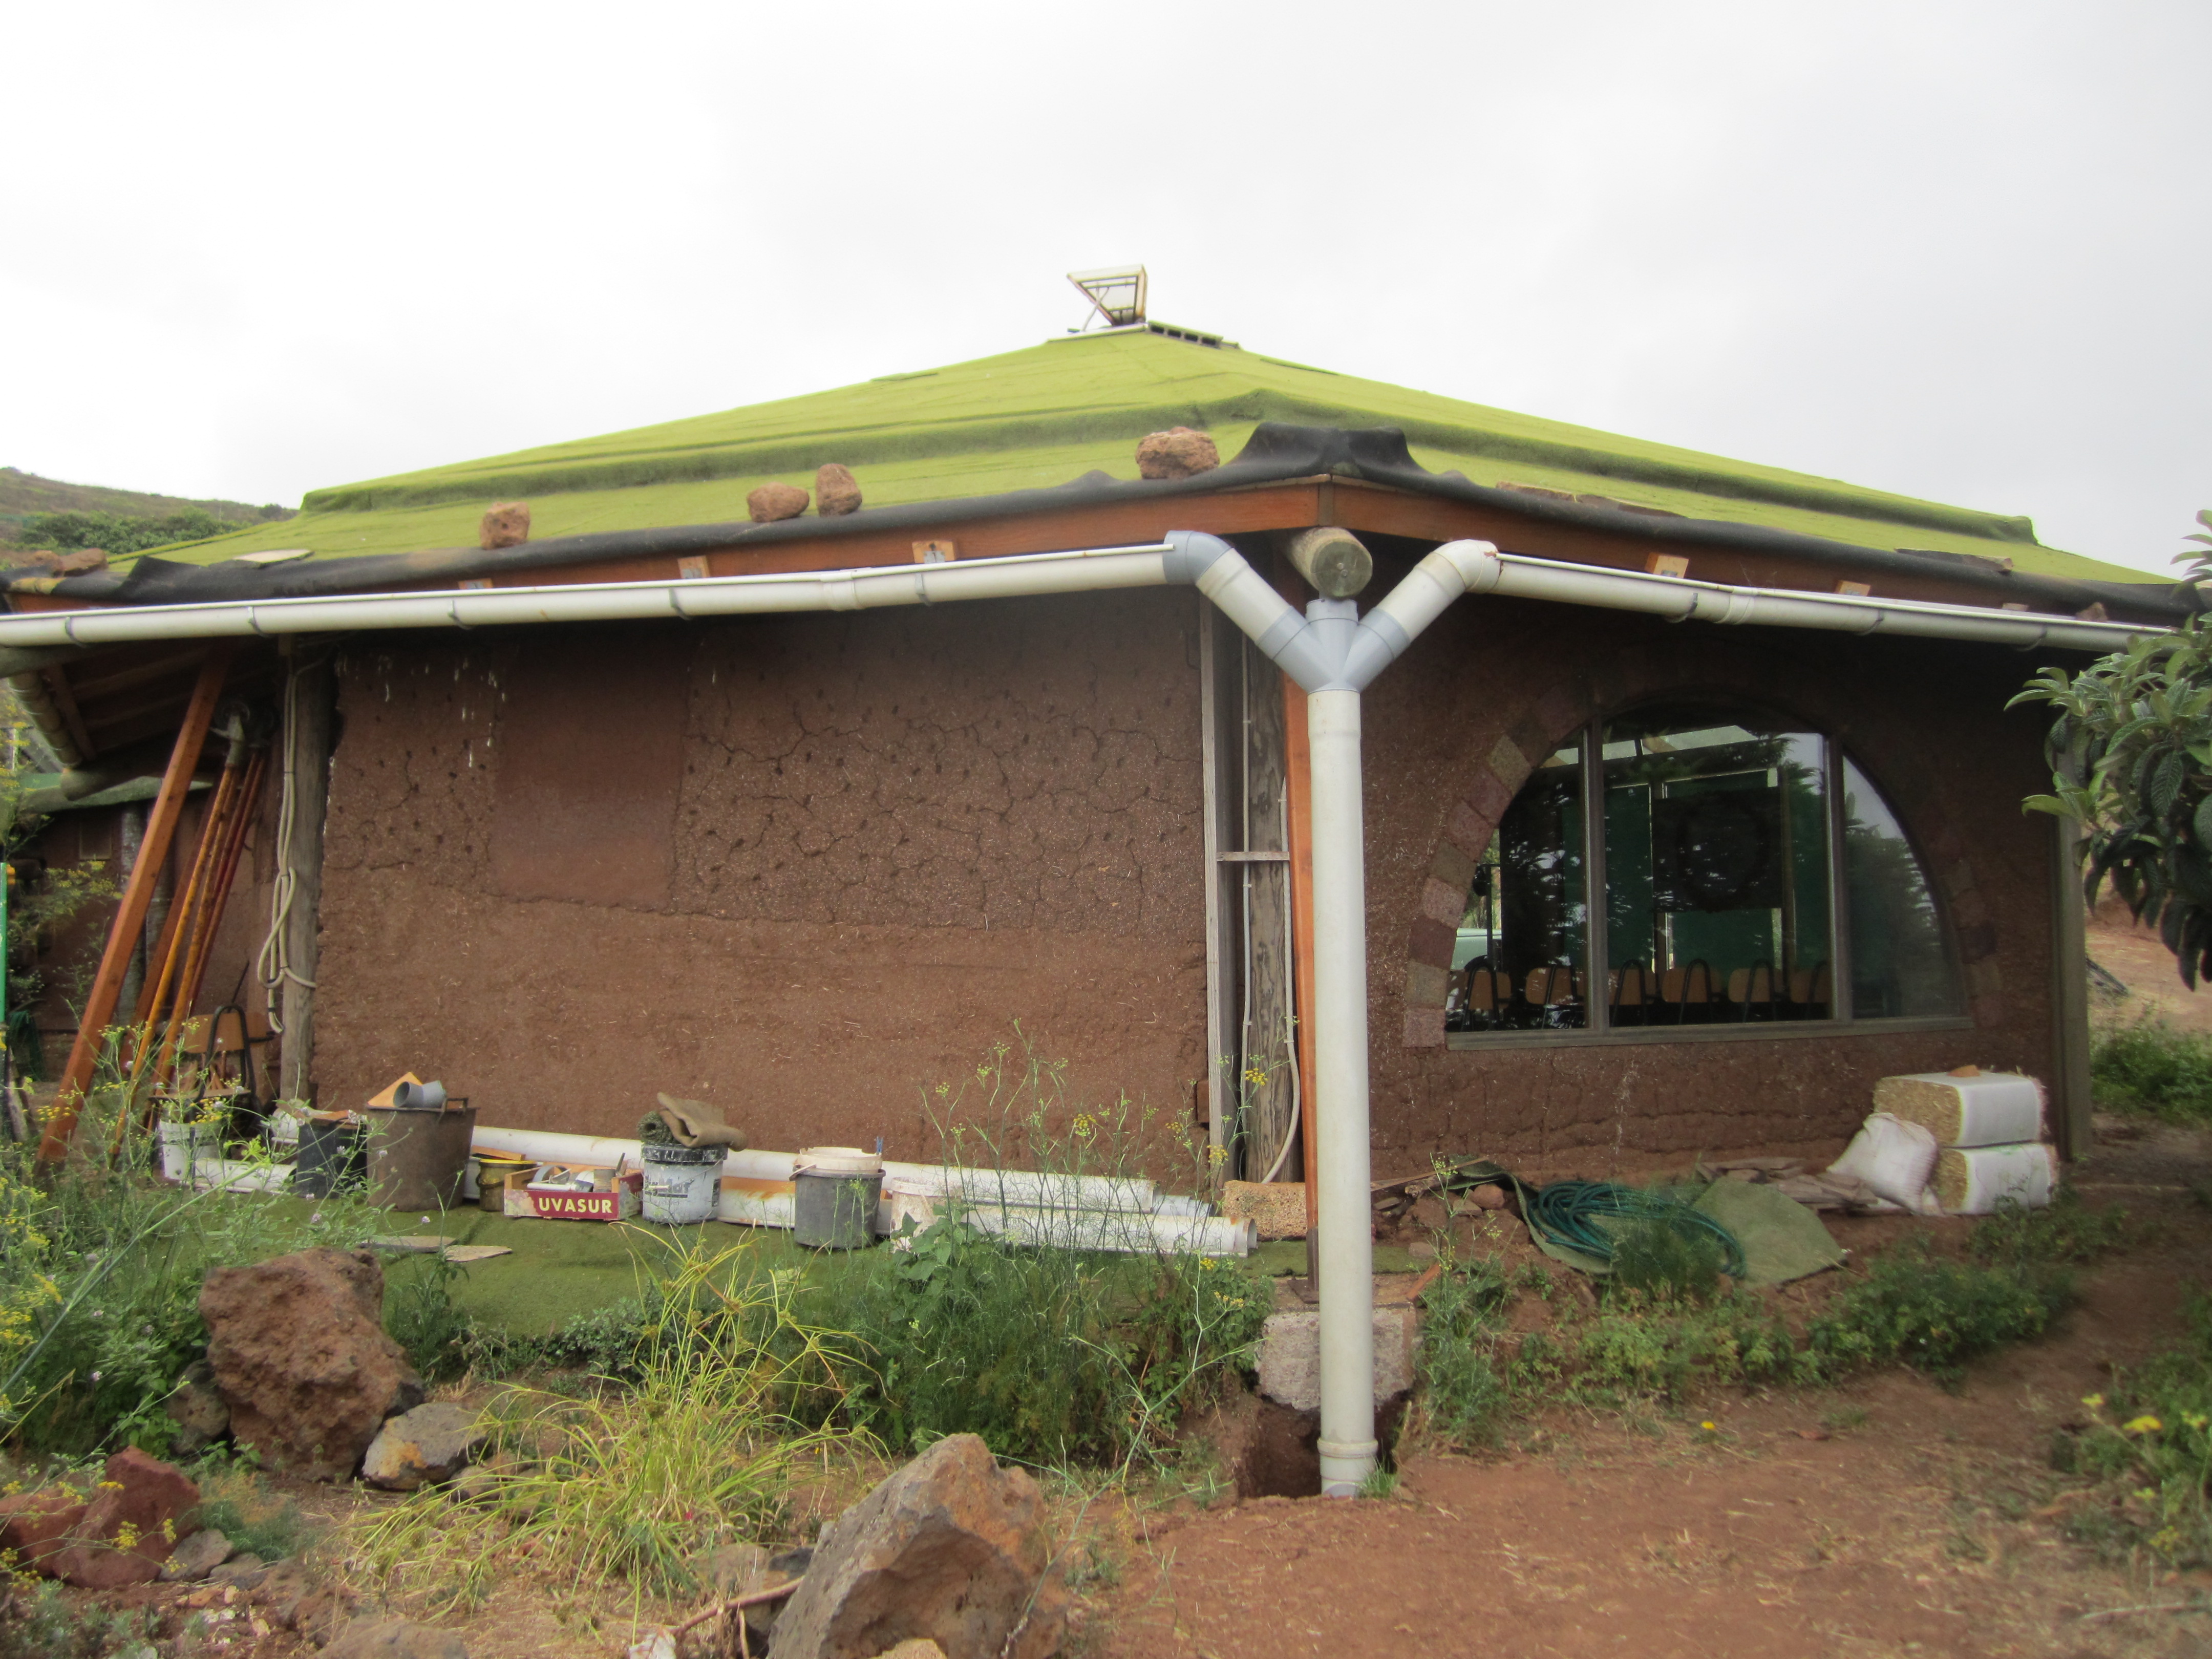
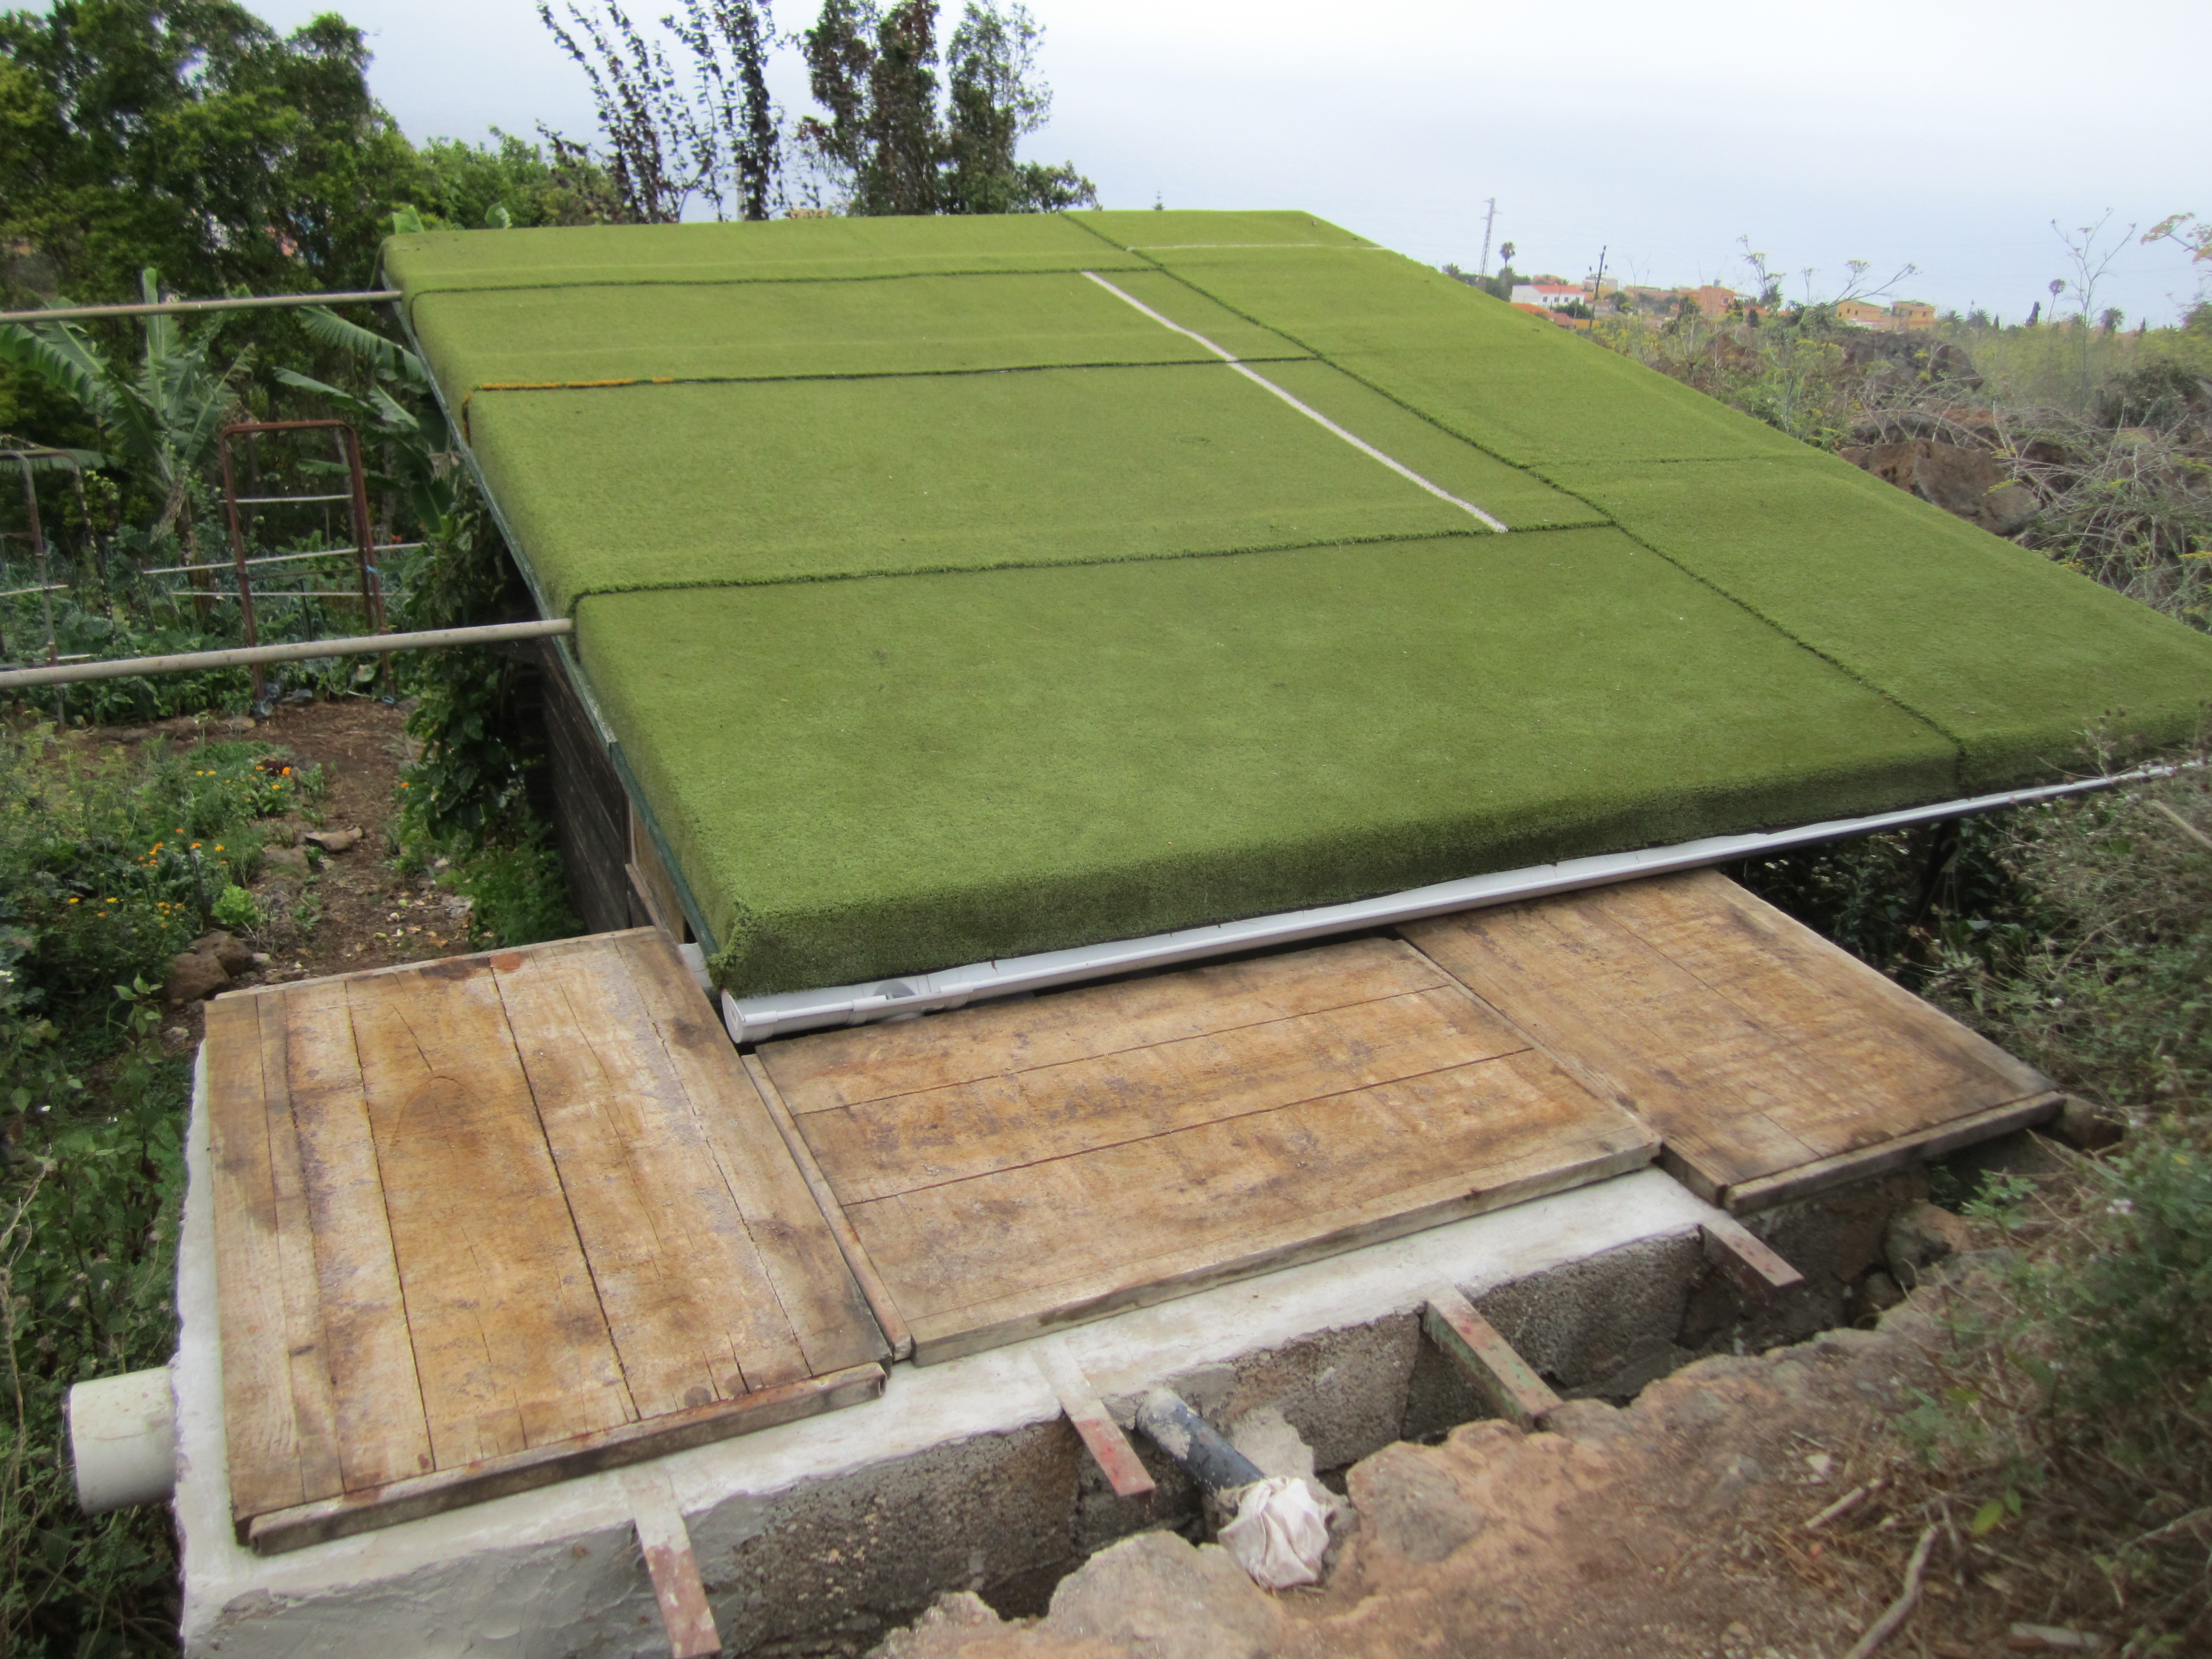
Figure II.9.- Channelling and storage of the rainwater on the different roofs

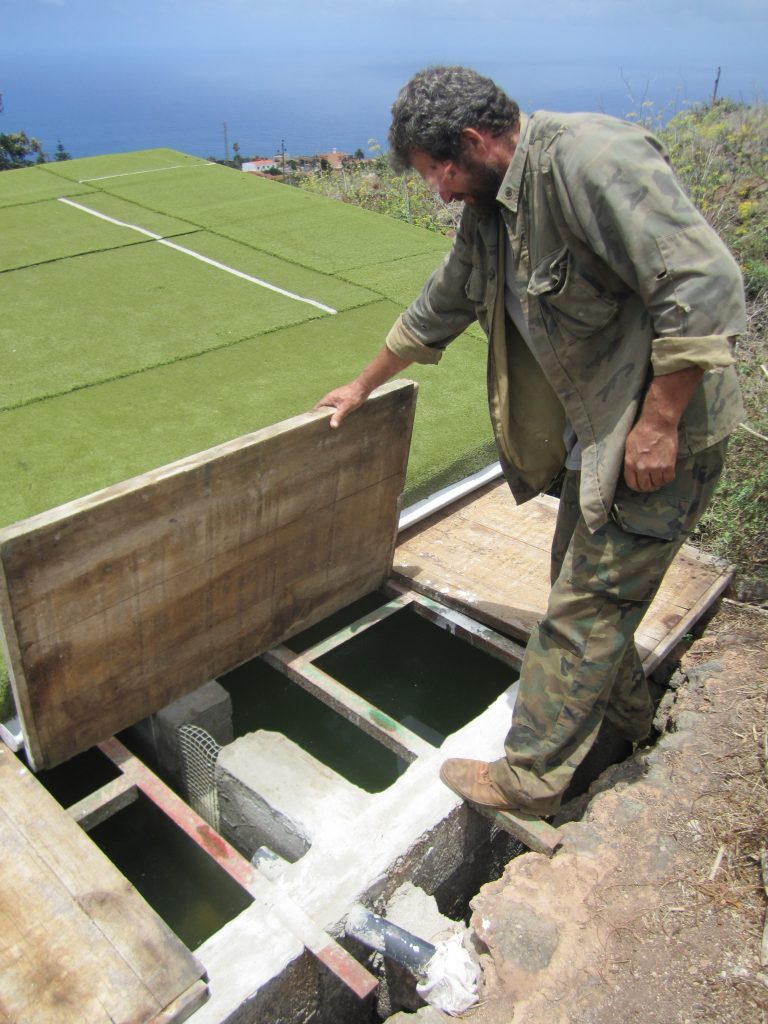
Channelling the rainwater from the paths to a system of little ponds is also a possibility. In this system, the dirty water enters into a first pond where the dirt settles down and the water passes to a second pond. This process is repeated in the next little ponds until the water is clean enough to be stored in a bigger one for its latter use (Figure II.10).
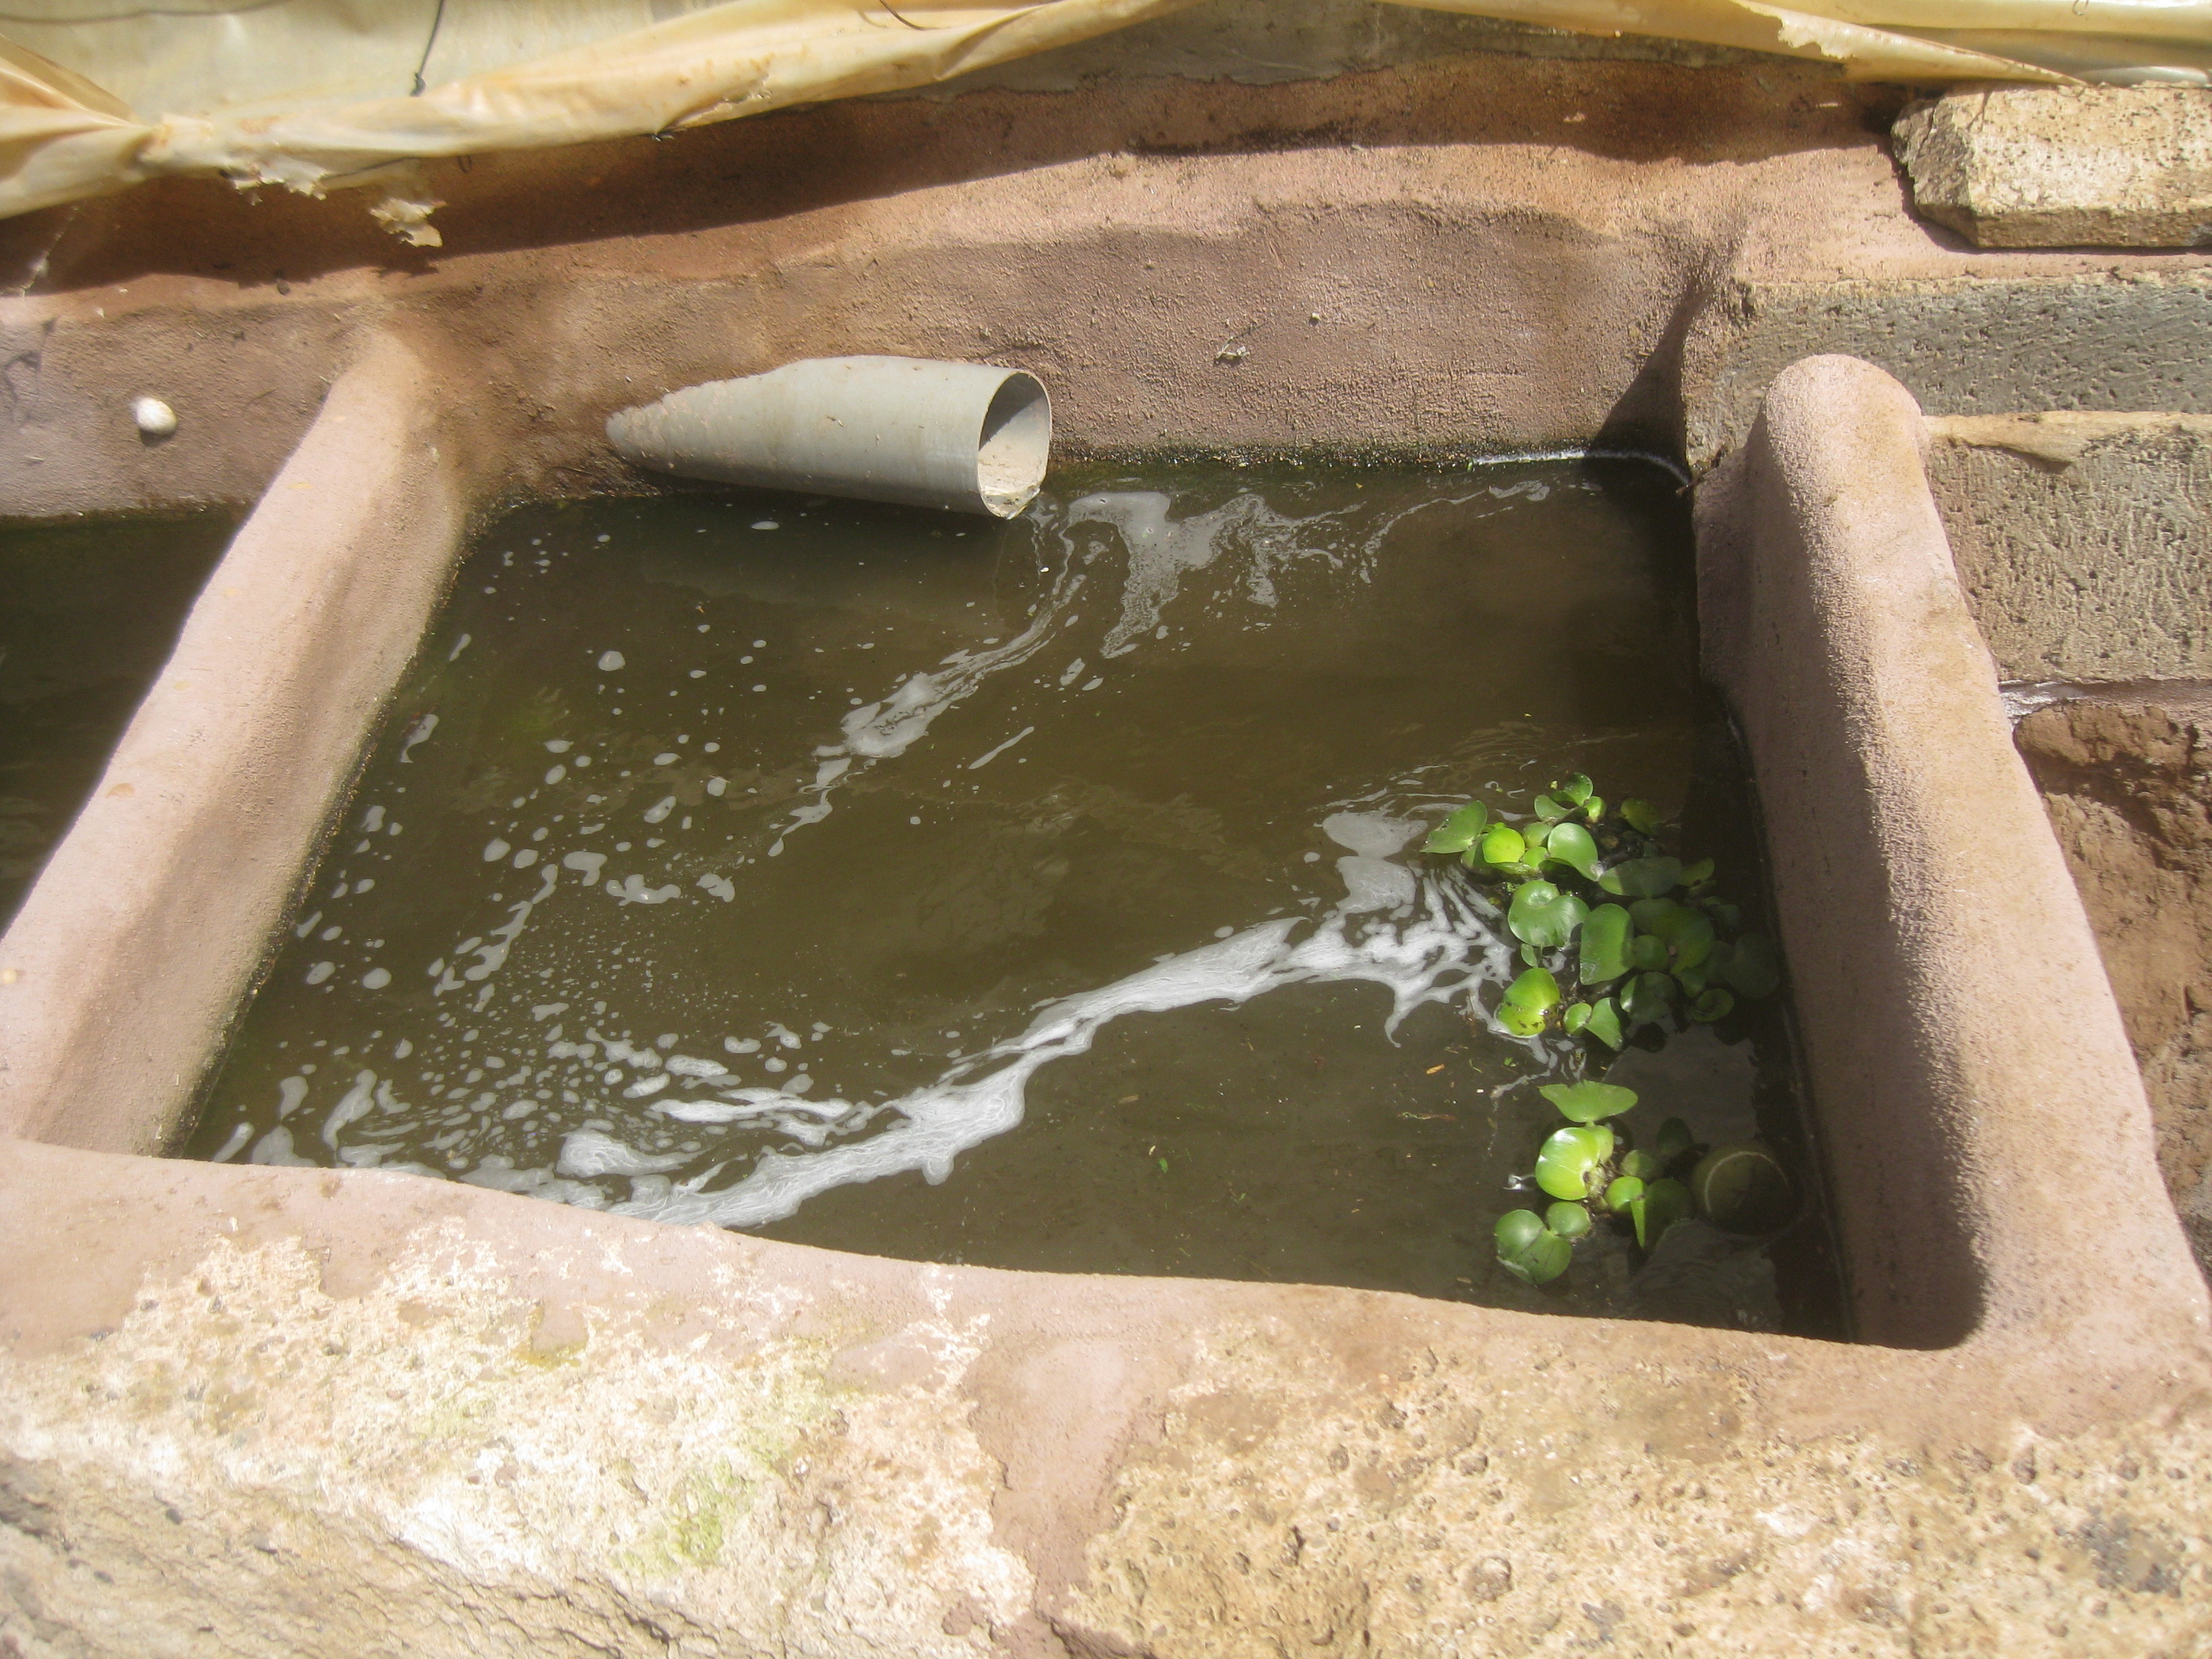
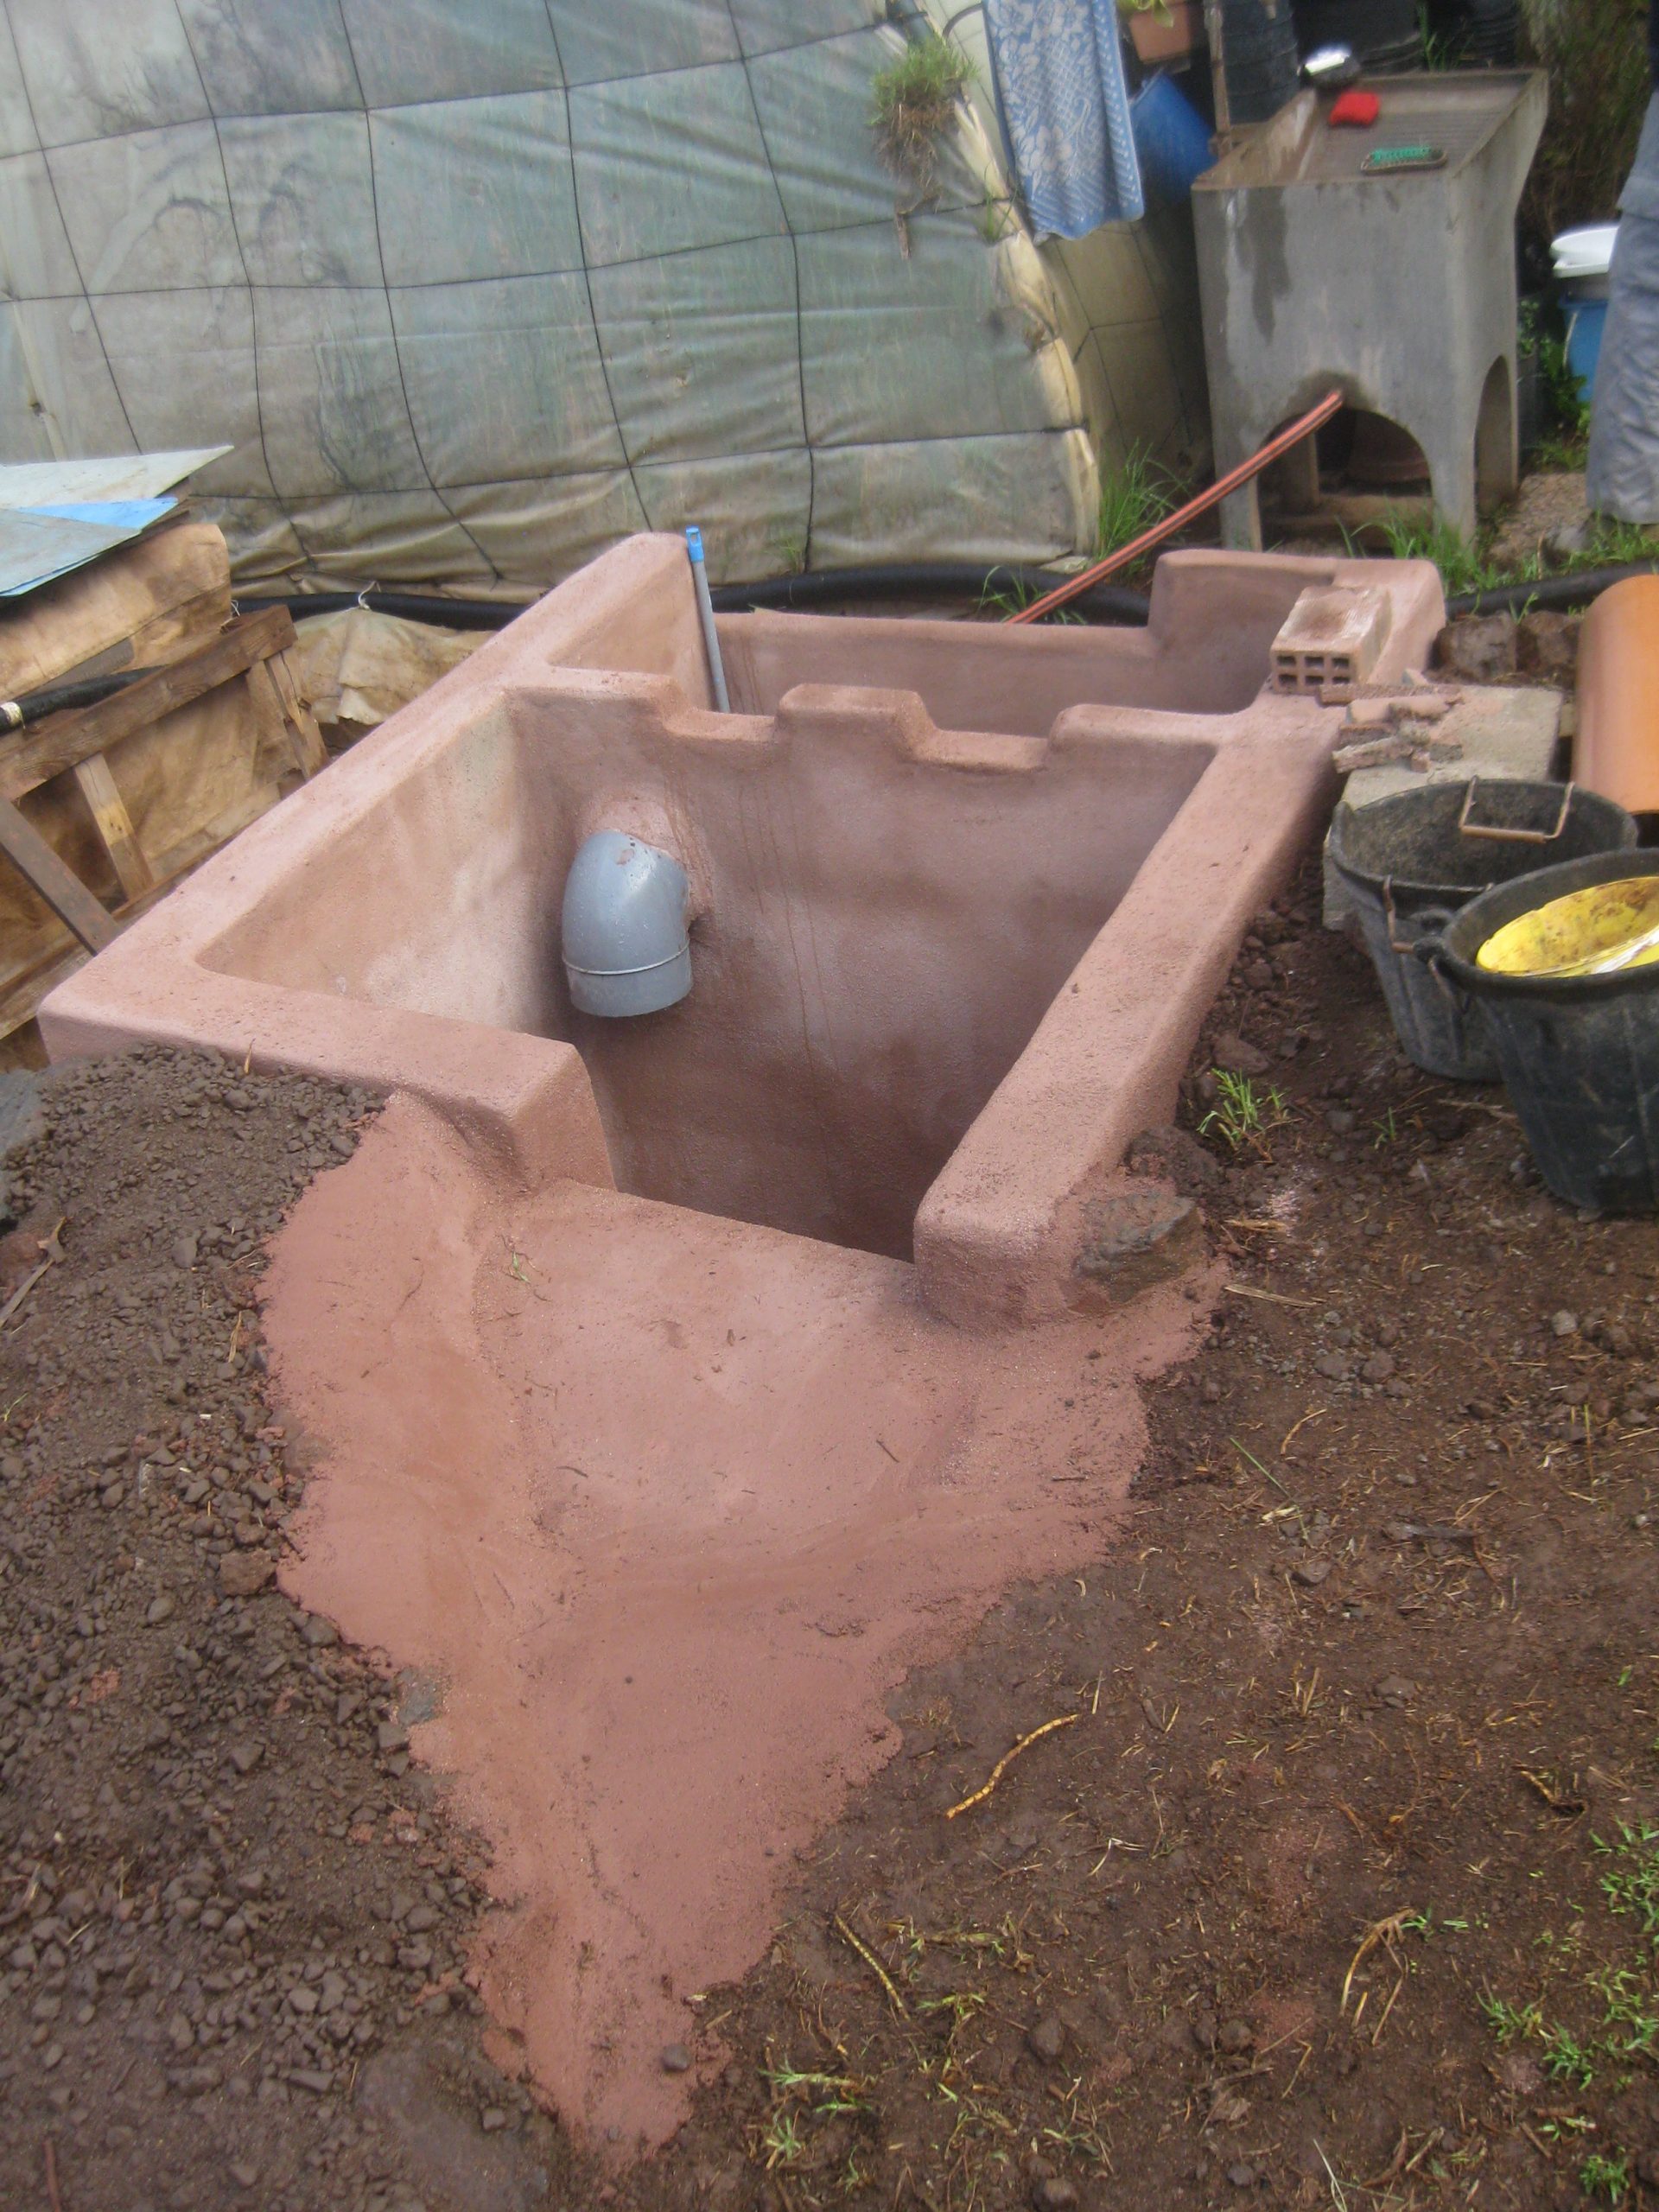
Figure II.10.- Channelling, decantation and storage of rainwater from the paths
Depending on the size and distribution of the place, there may be one or more ponds.
The aim of this water catchment is to keep all –or most of it– in the therapy center so we can efficiently manage rainwater.
In order to close the cycle of the wastewater of the center, we can build a water treatment plant made of plant filters and recycled materials. In any case, it is mandatory to build it under permanent technical supervision in order to size the treatment plant correctly. The amount of water needed by each person and the climate and regulation of the area are to be taken into consideration. Wastewater usually comes from toilets, showers, sinks, washing machines,… Once the water is treated, it can be used to irrigate, stored in ponds or diverted to swales.
By means of example, we explain the construction of a natural wastewater treatment plant for 10 people in the mental health therapy center of the Association for the Development of Permaculture:
First we have to make sure the treatment plant is placed below the level of the wastewater effluent of the center. This way we can collect and divert all the wastewater to the treatment plant so it can be treated and stored.
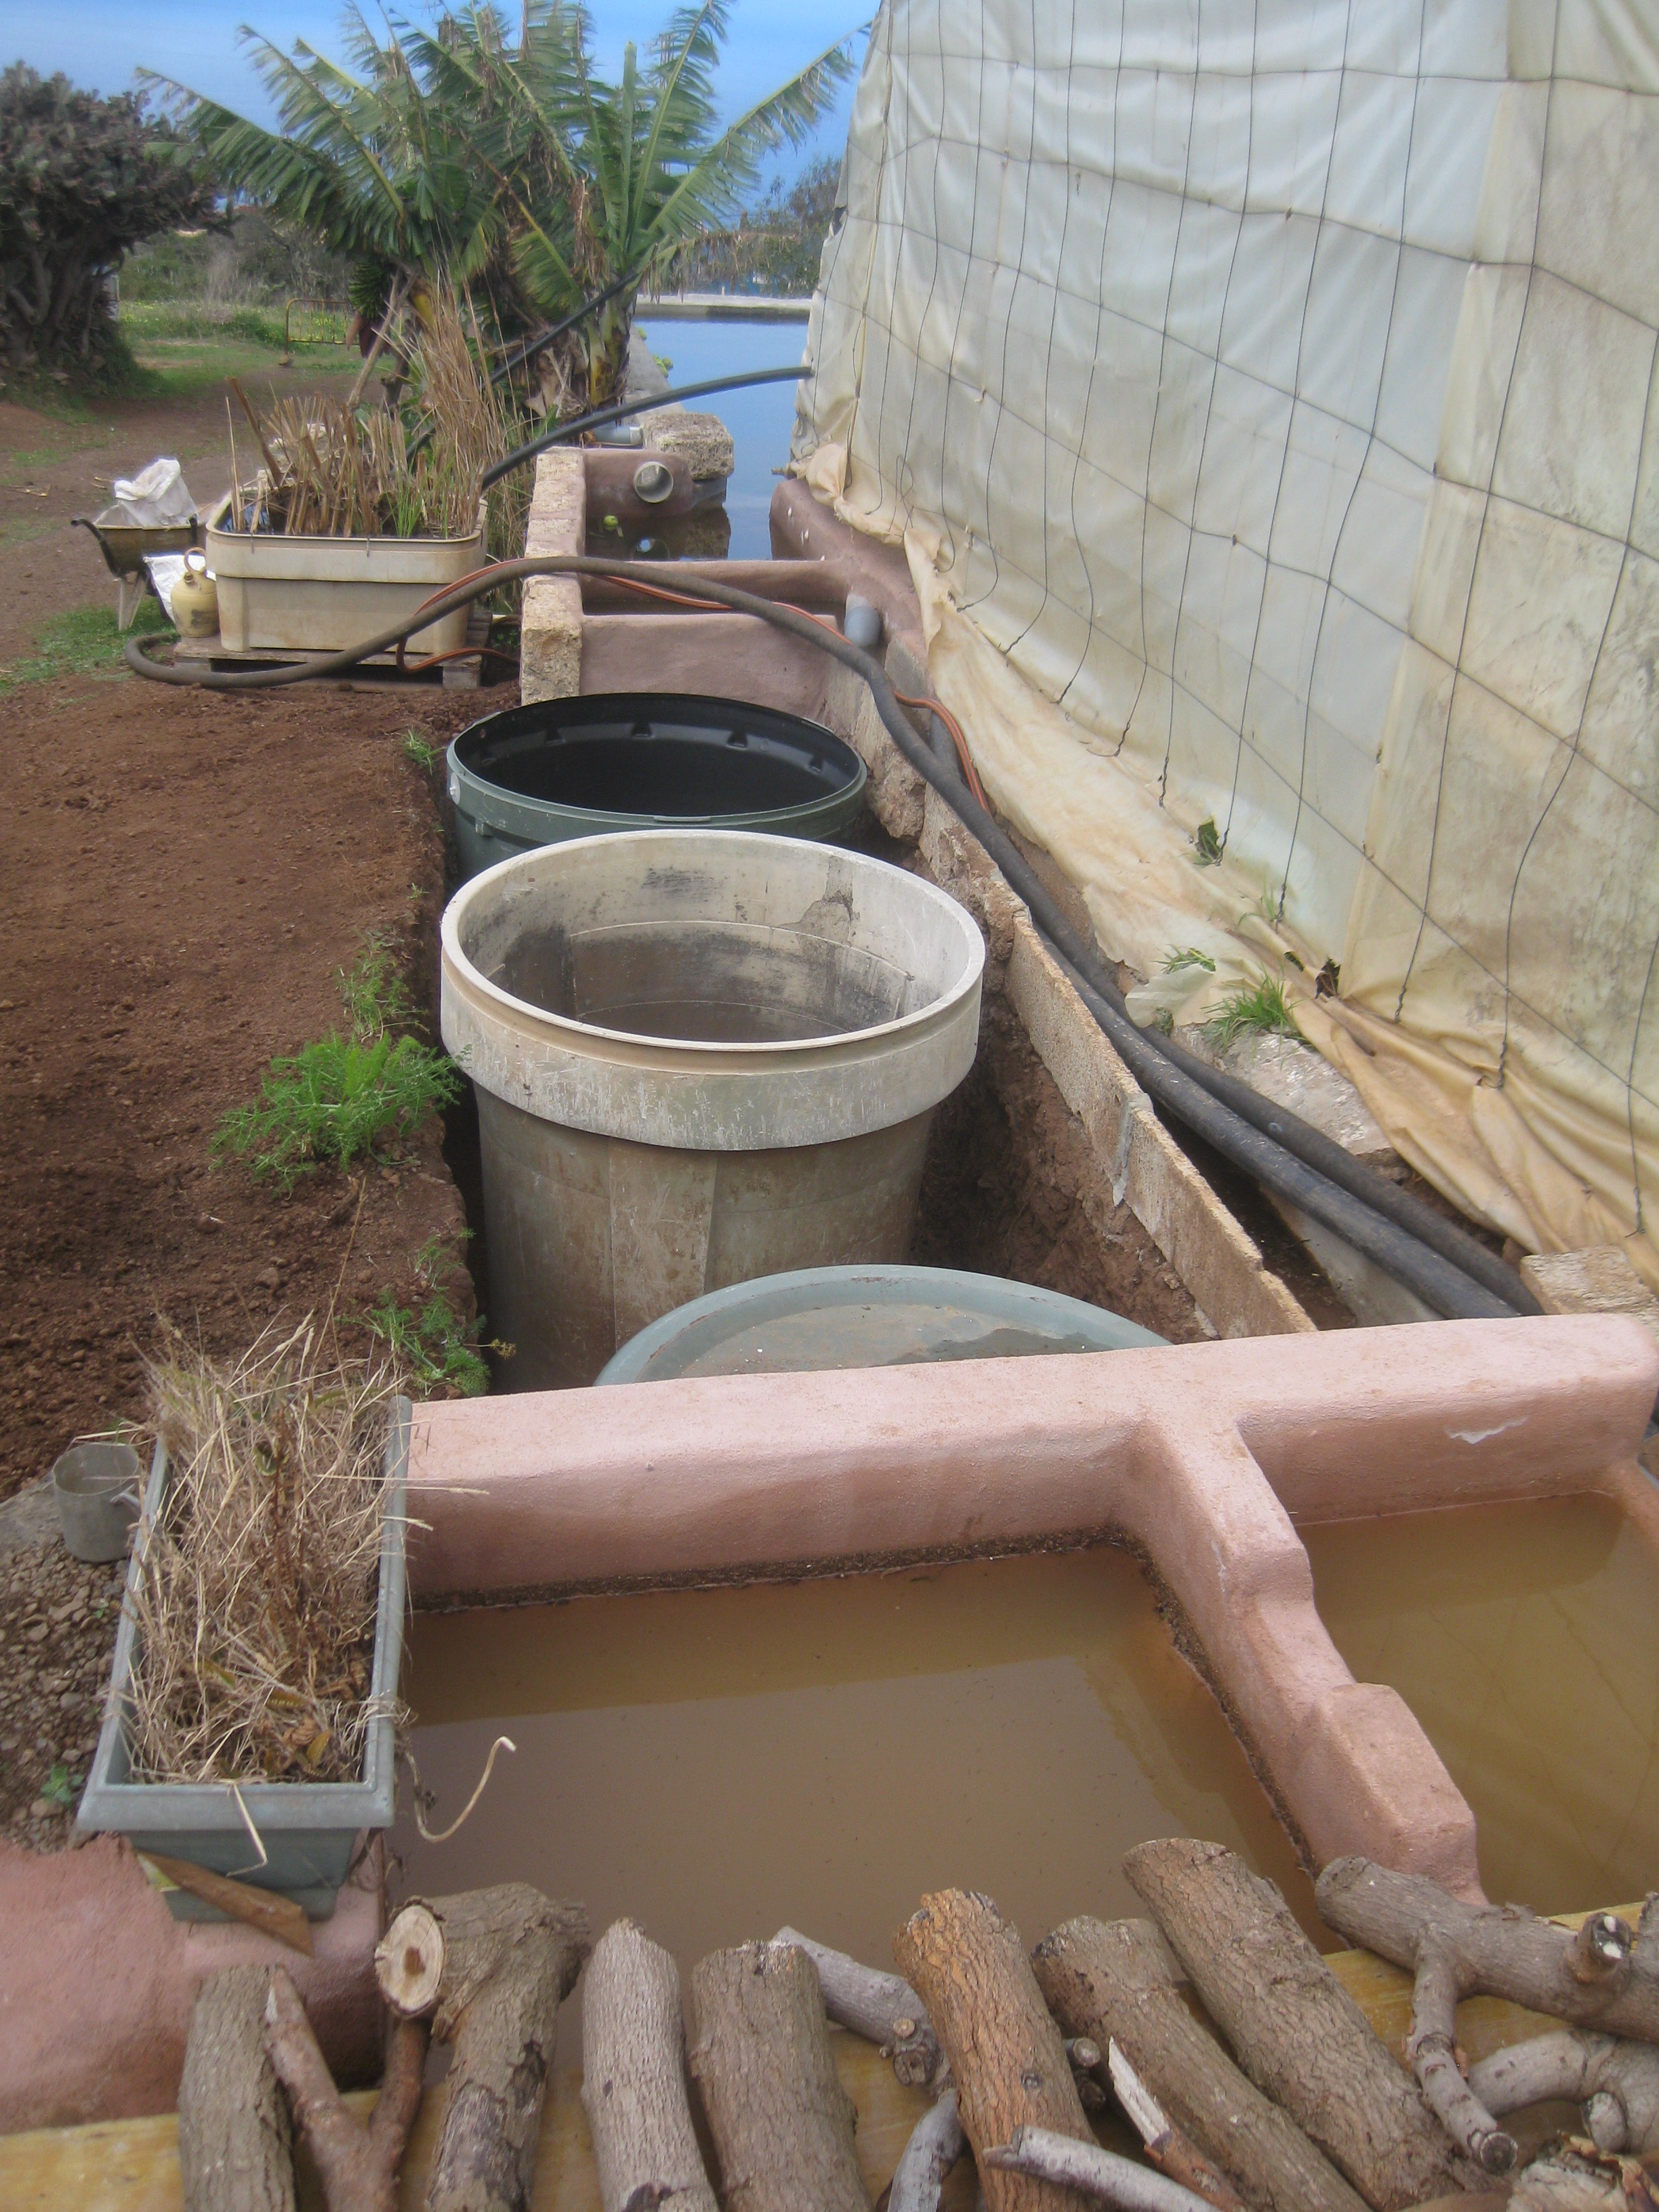
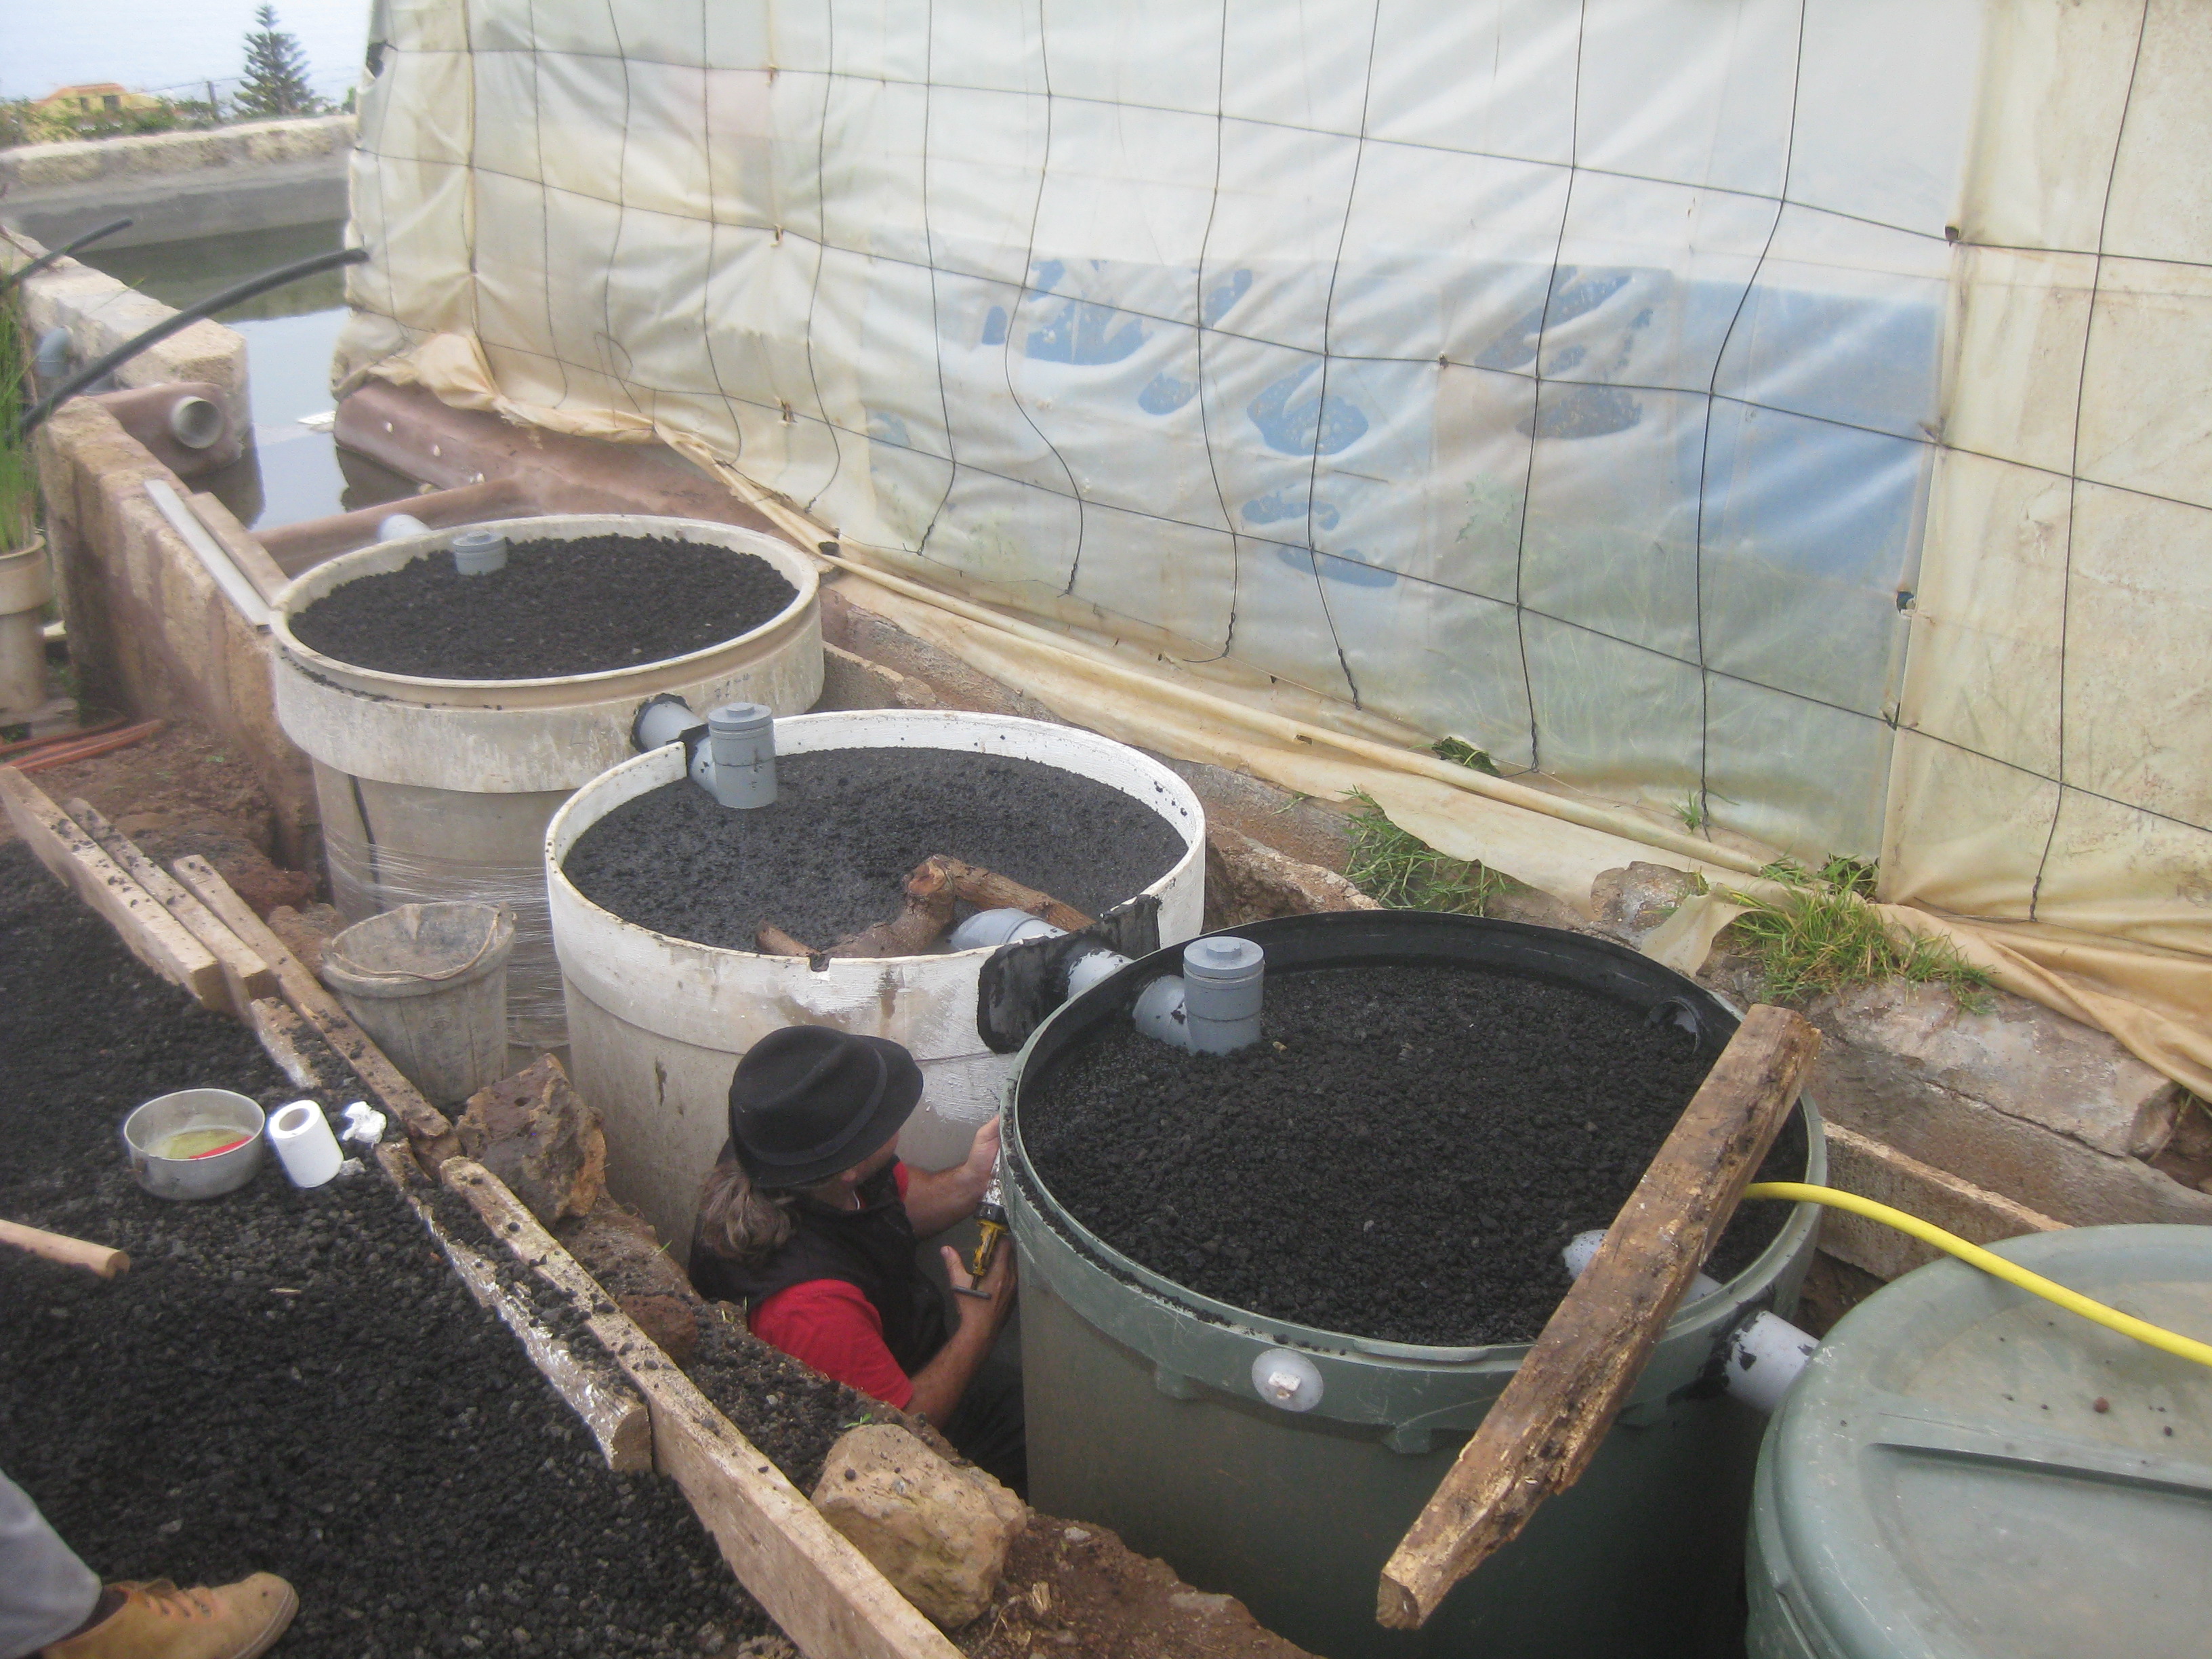
We have made an excavation to bury the vessels below the effluent pipe. We used 4 linked recycled vessels with an approximate capacity of 1000 litres each (Figure II.11). The vessels and their linkages have a slight slope to make the water flow from the first to the fourth vessel by gravity action.
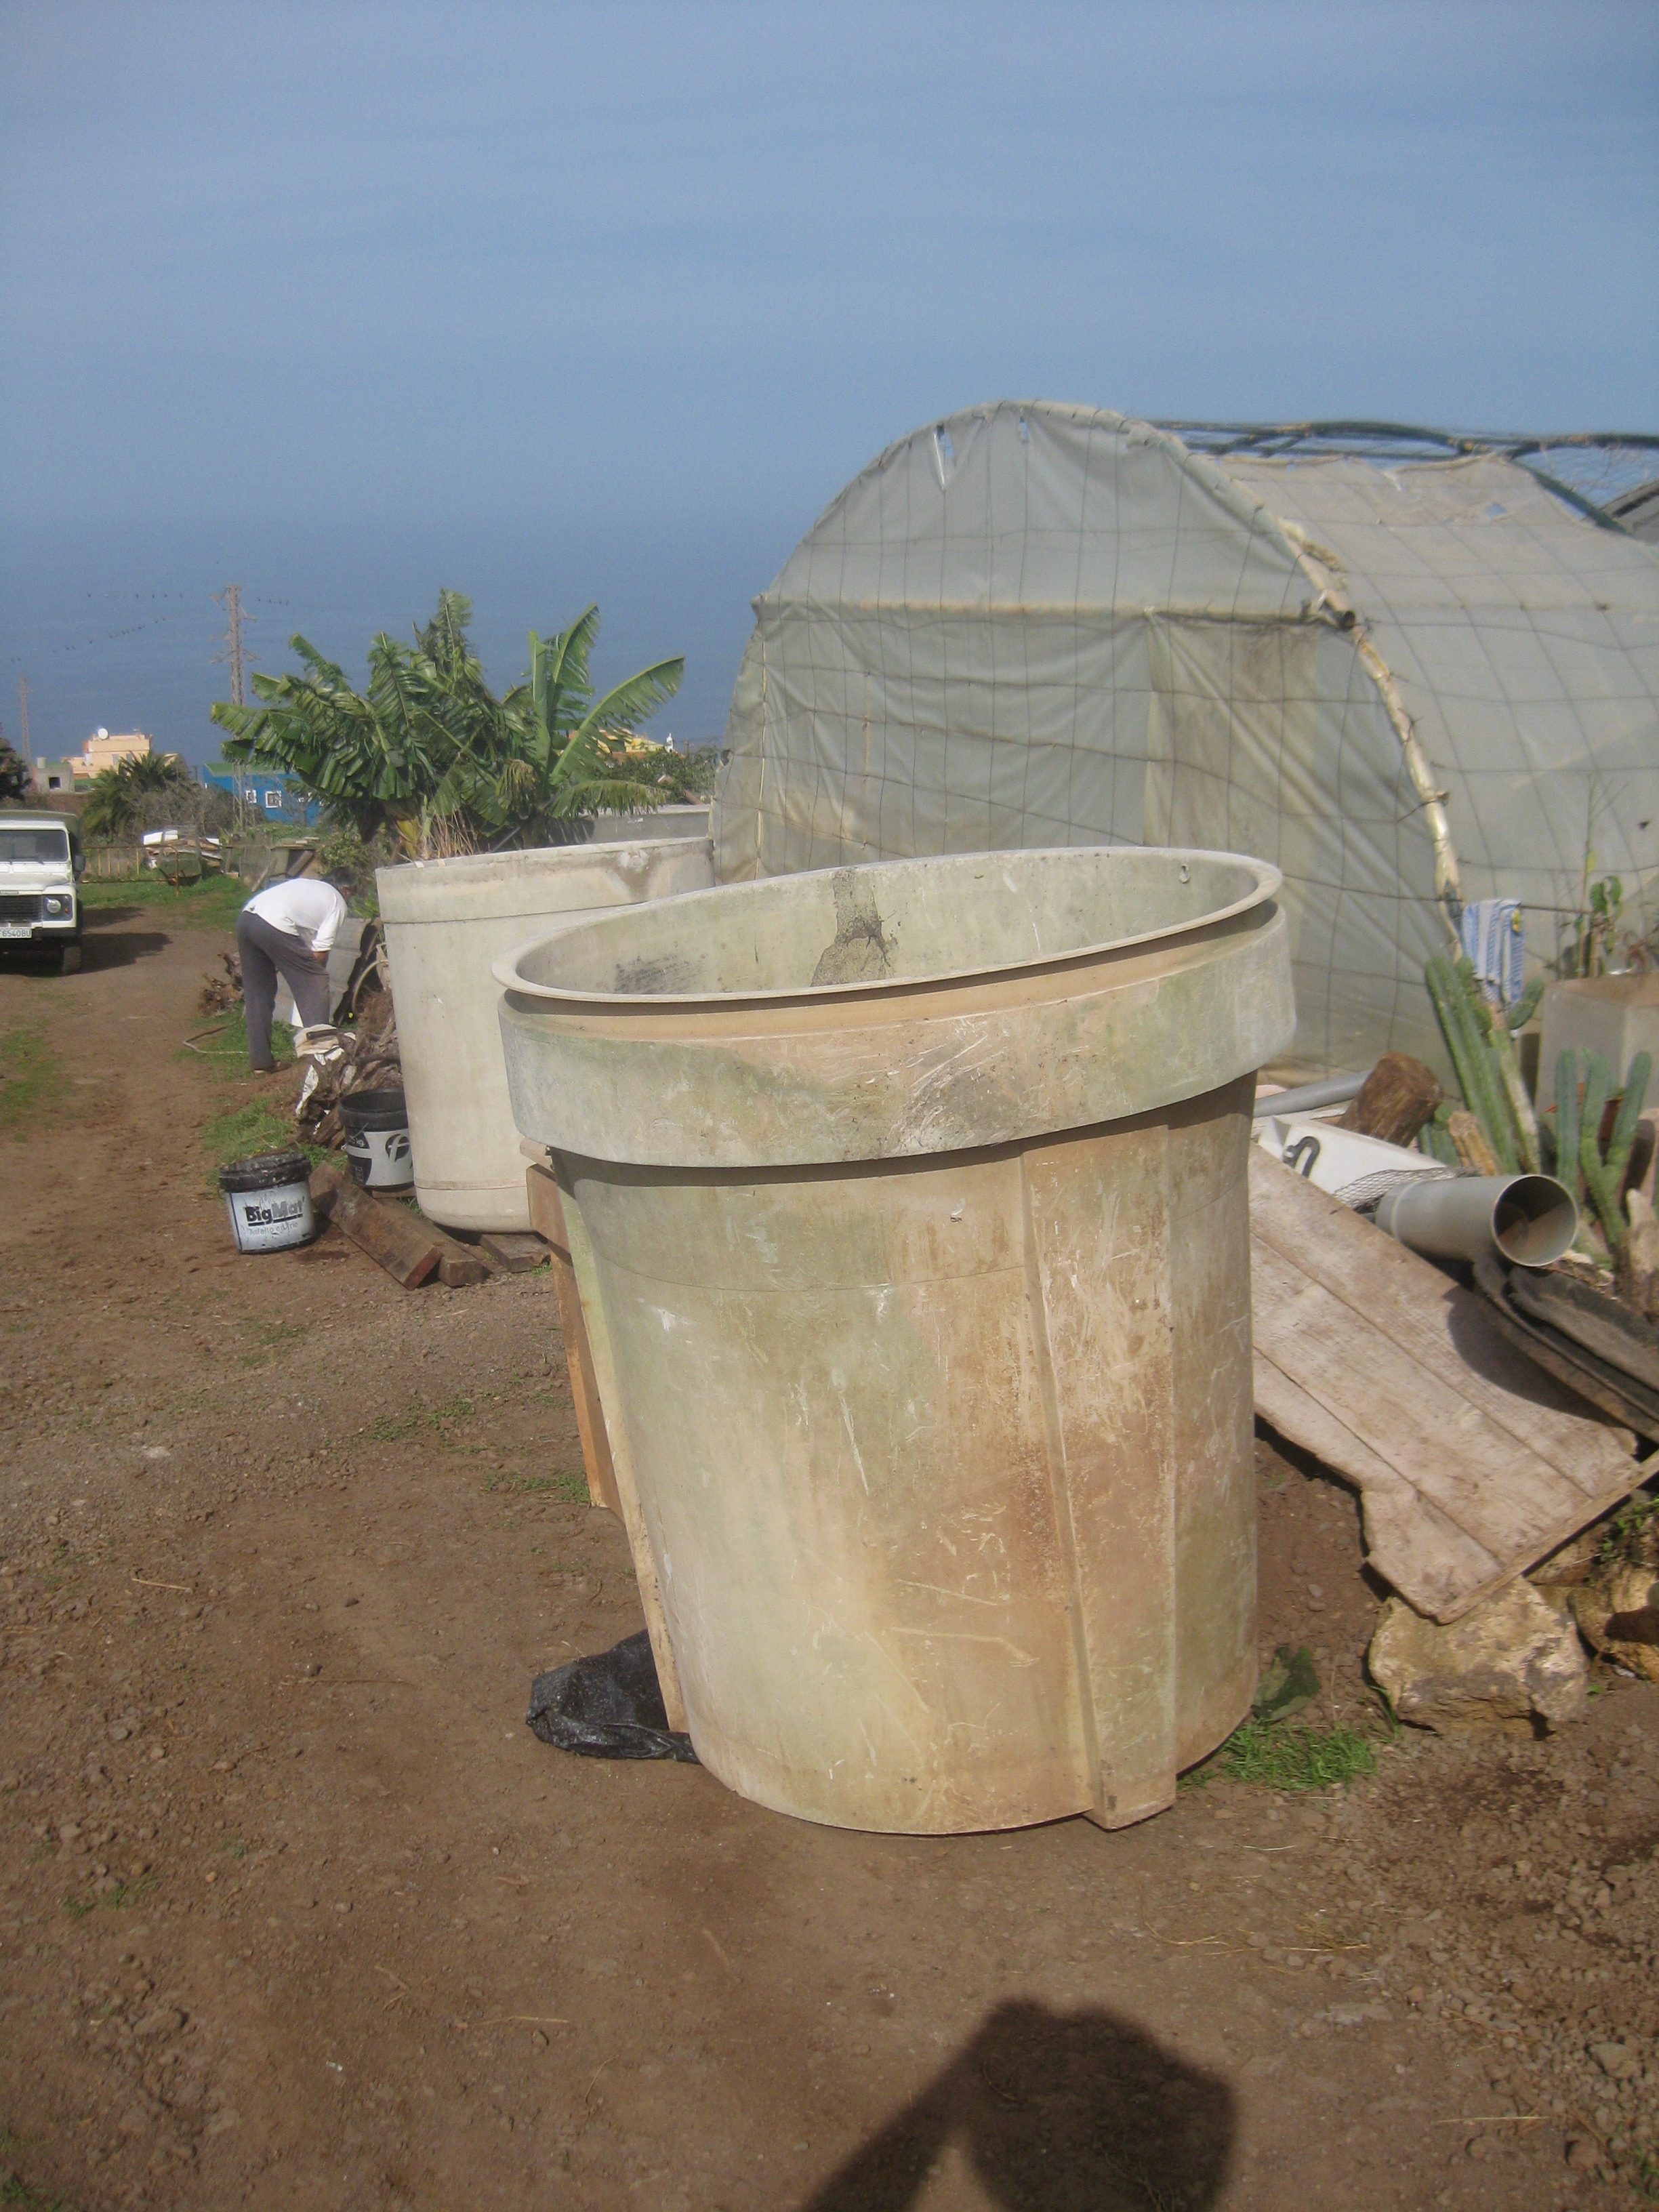
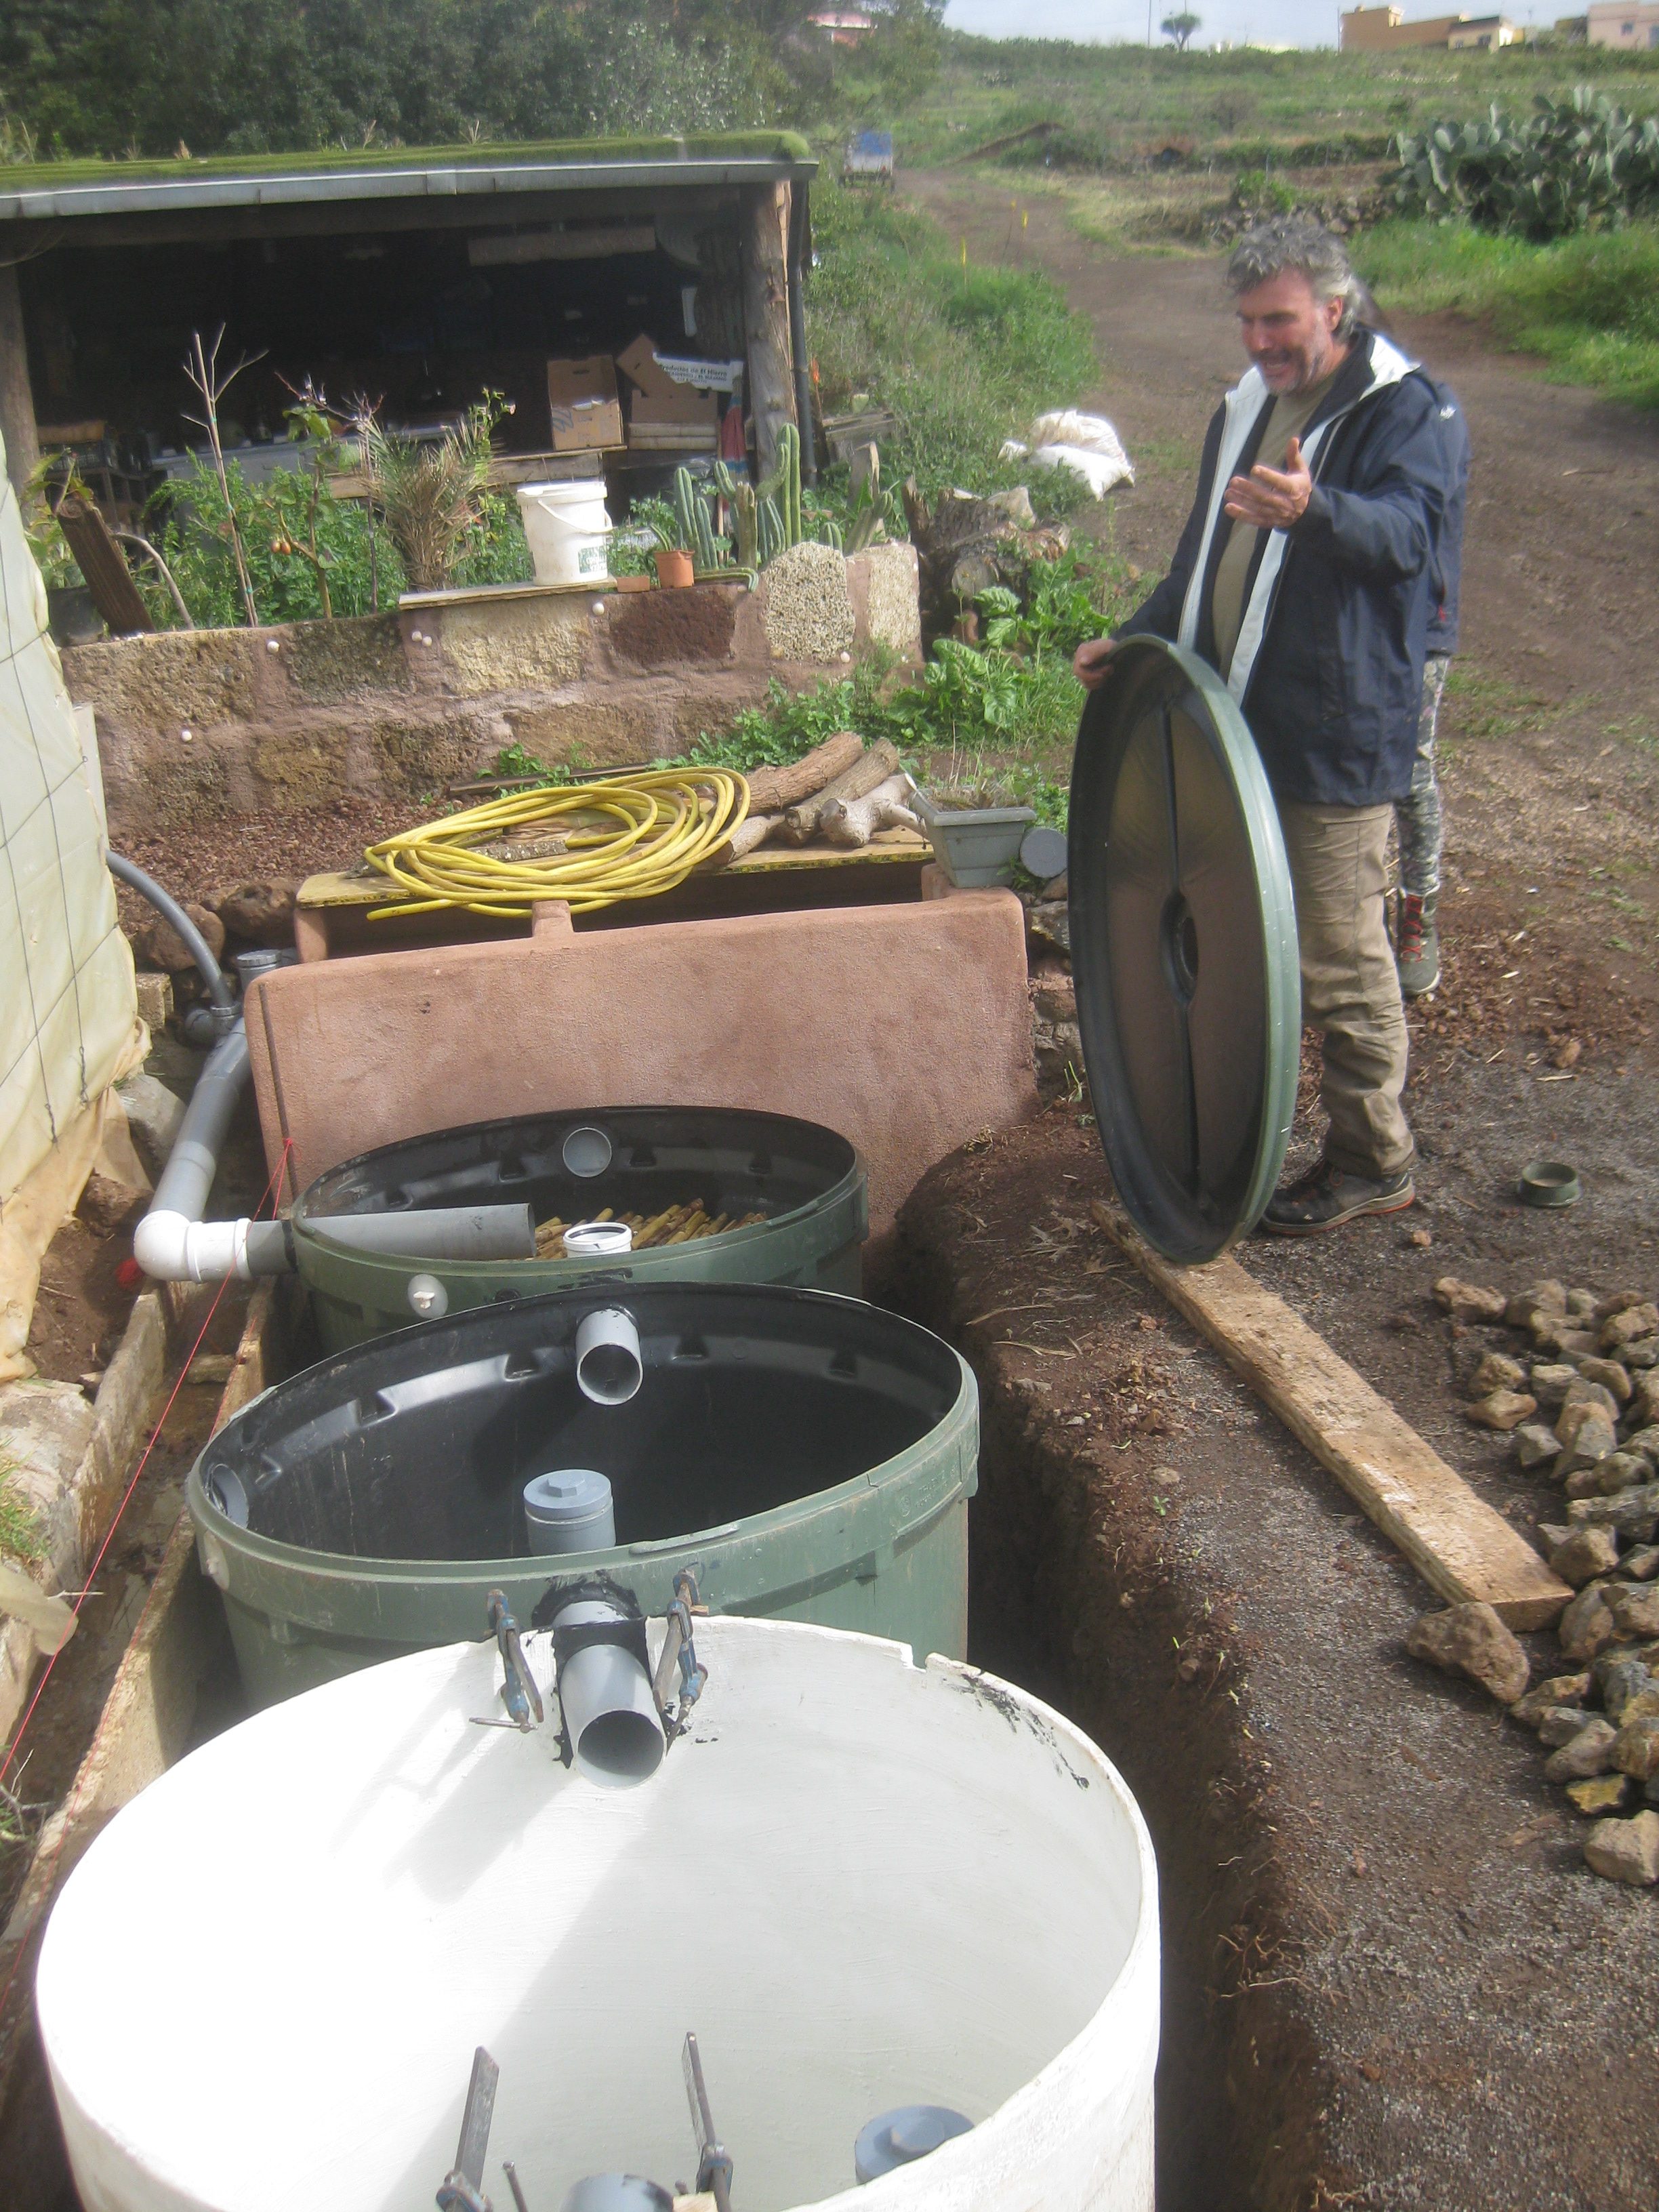
Figure II.11.- Setting of the vessels and linkages
The first vessel is the closest to the effluent of the wastewater and acts as digestion tower for fats, salinity and organic matter. The effluent pipe enters the vessel through the top, at surface level.
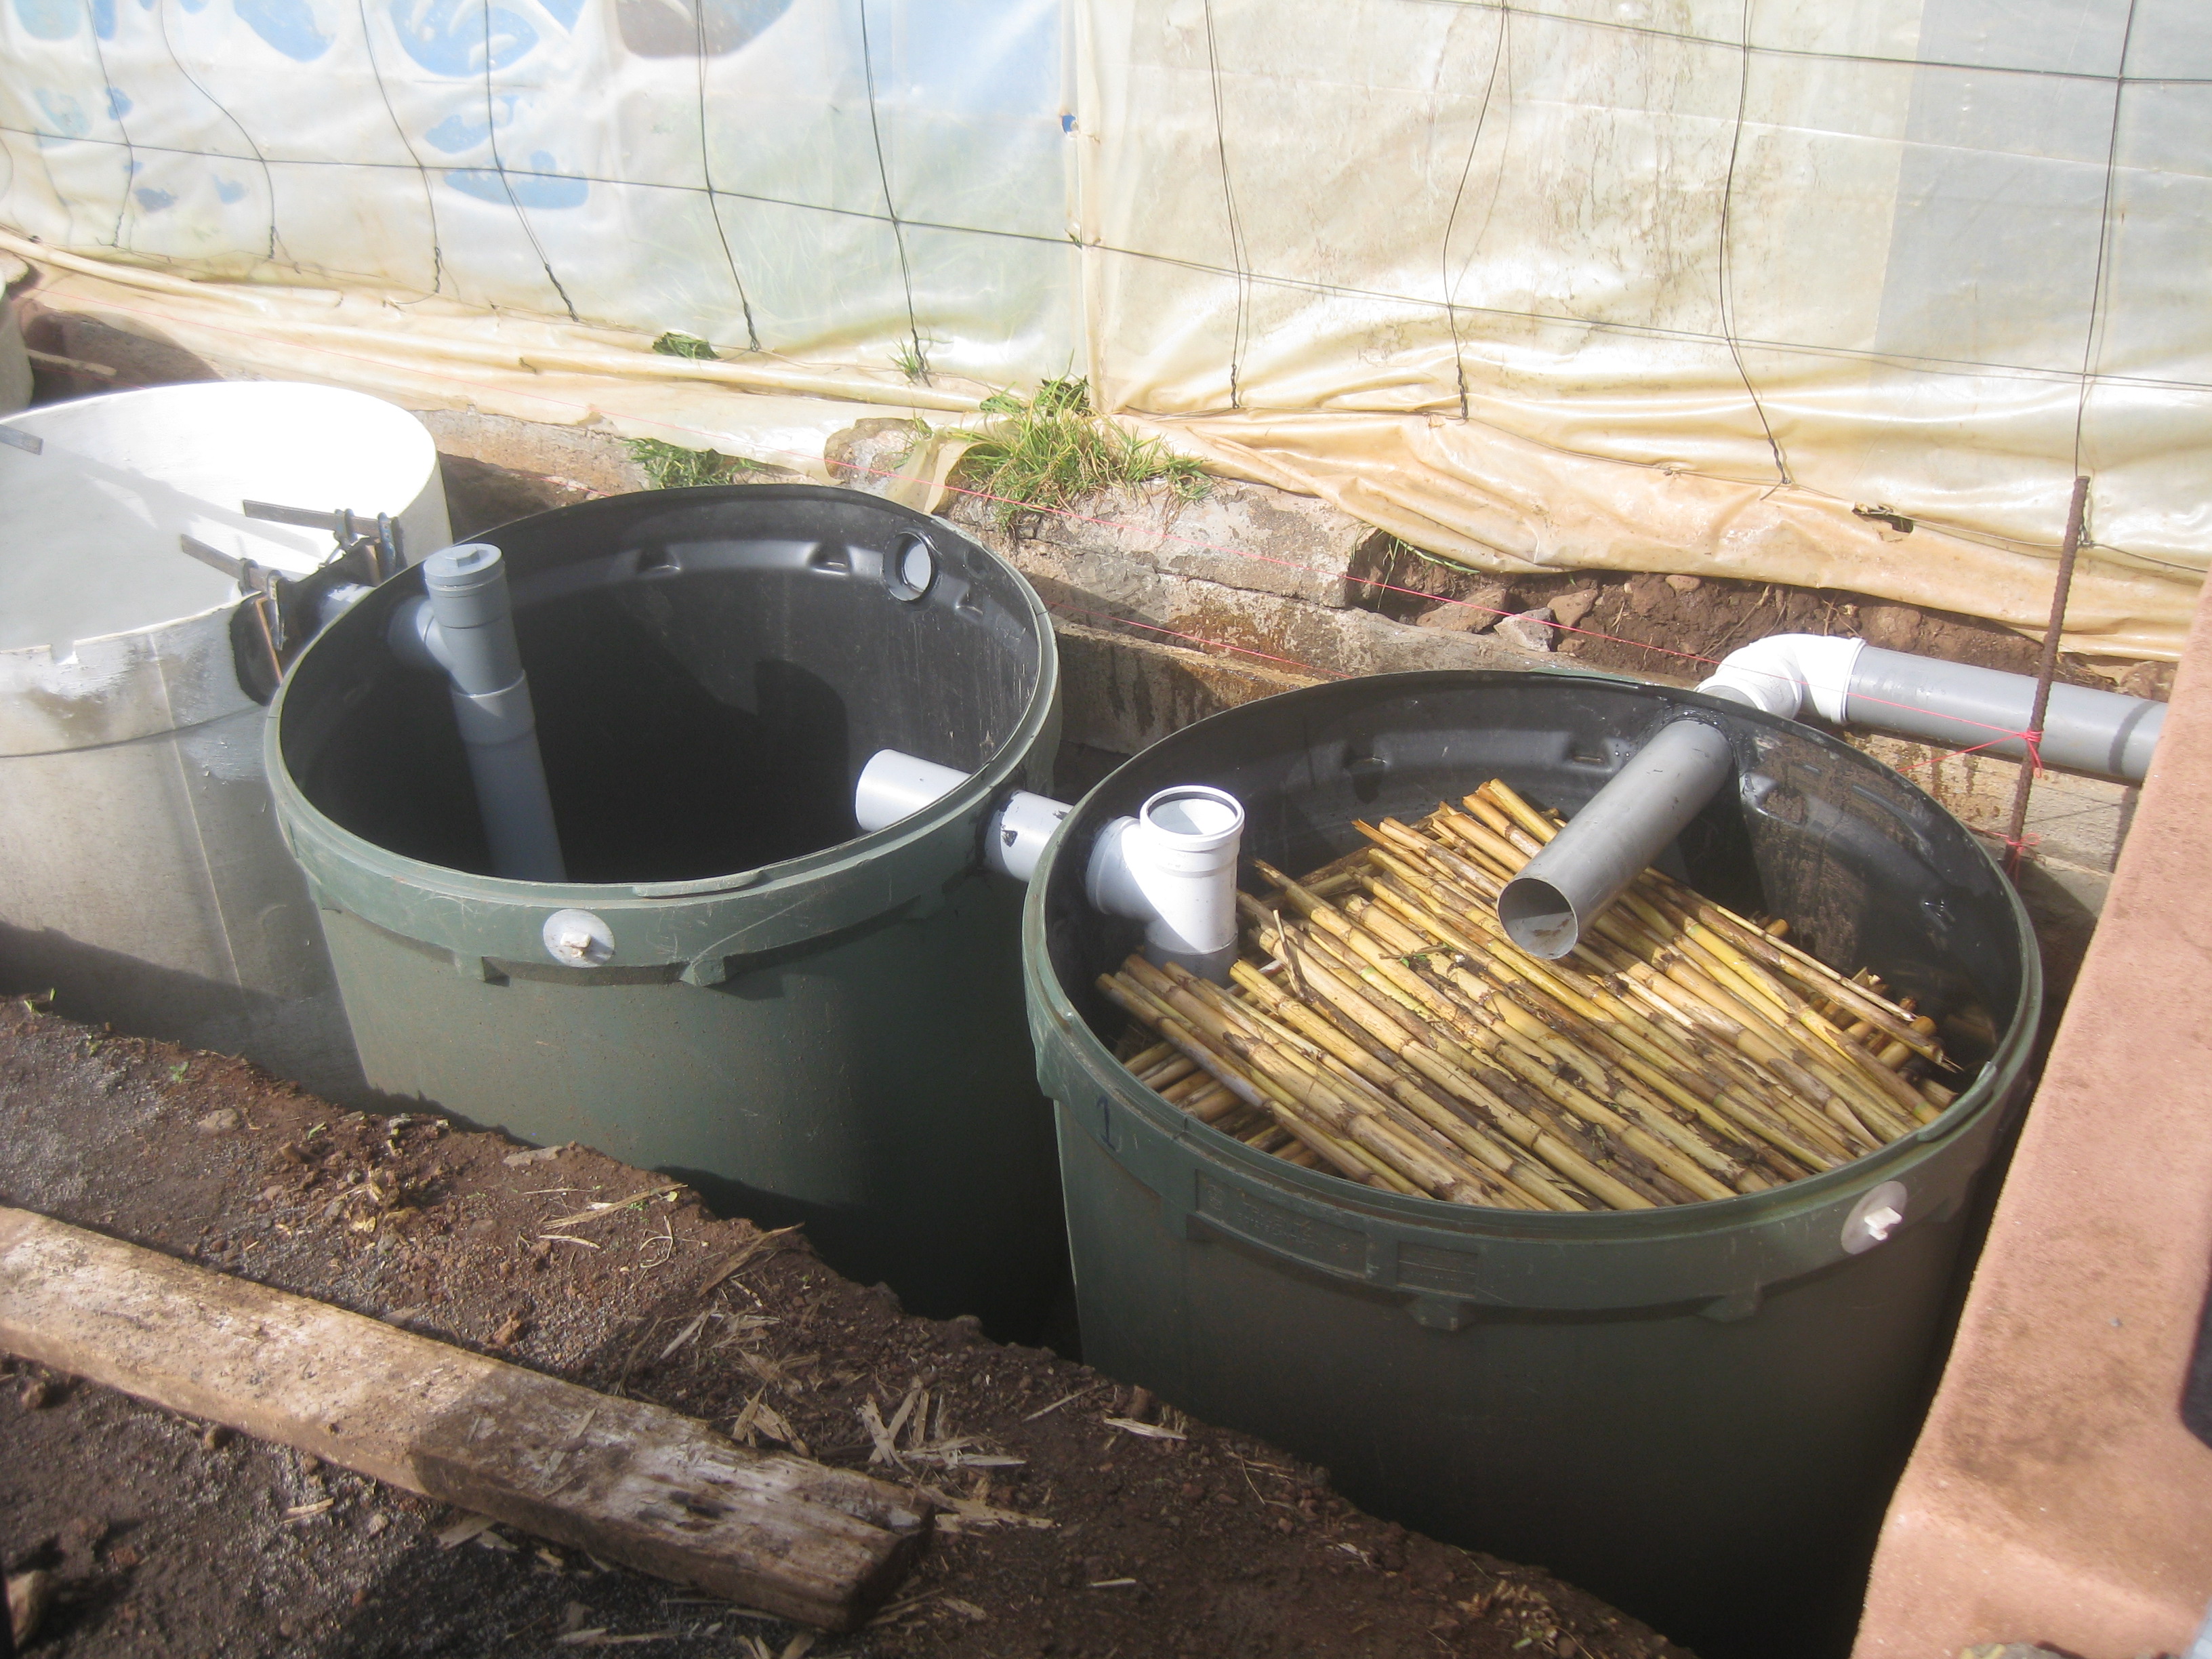
We filled two thirds of its capacity with reed or bamboo and the rest with thatch. It could also be filled only with thatch. The canes have to be cut with a slightly smaller size than the diameter of the vessel so they can be placed horizontally (Figure II.12). At the end of its placing, a weight is added so that they are submerged when the vessel is filled with water. In these vegetable fibers is where the necessary habitat for microorganisms to develop over time in a natural way, microorganisms that will be responsible for purifying fats, organic matter and minerals. If we want to rapidly increase the microbial fauna and thus to advance the process of water purification, it could be possible to inoculate microorganisms with Bokashi (Wikipedia). This first vessel has to be tightly closed with a lid. In this first vessel, the fats are caught and eaten by the microorganisms that thrive in the fibres.
The water leaves the first container due to the siphon effect through a long tube from the middle of the tank at the area closest to the second tank. The upper part of the pipe end is T-shaped so that water enters by gravity action into the second vessel. This last tube arm is closed with a lid so that the water can be extracted to the object for analysis. (Figure II.12).


Figure II.12.- Inner composition of the first vessel and connection with the second vessel
The composition of the three remaining vessels is as follows: a 20 cm layer of fist-sized stones was placed on the bottom to serve as drainage; a geotextile mesh was put on the stones so it acts as barrier for the roots; then a volcanic aggregate, preferably porous, fills the rest of the vessel to favour the growth of as many microorganisms as possible. In case of not having volcanic aggregate, gravel or any similar material can be used. Each vessel is filled with aggregate until the tubes of connection are covered (Figure II.13).
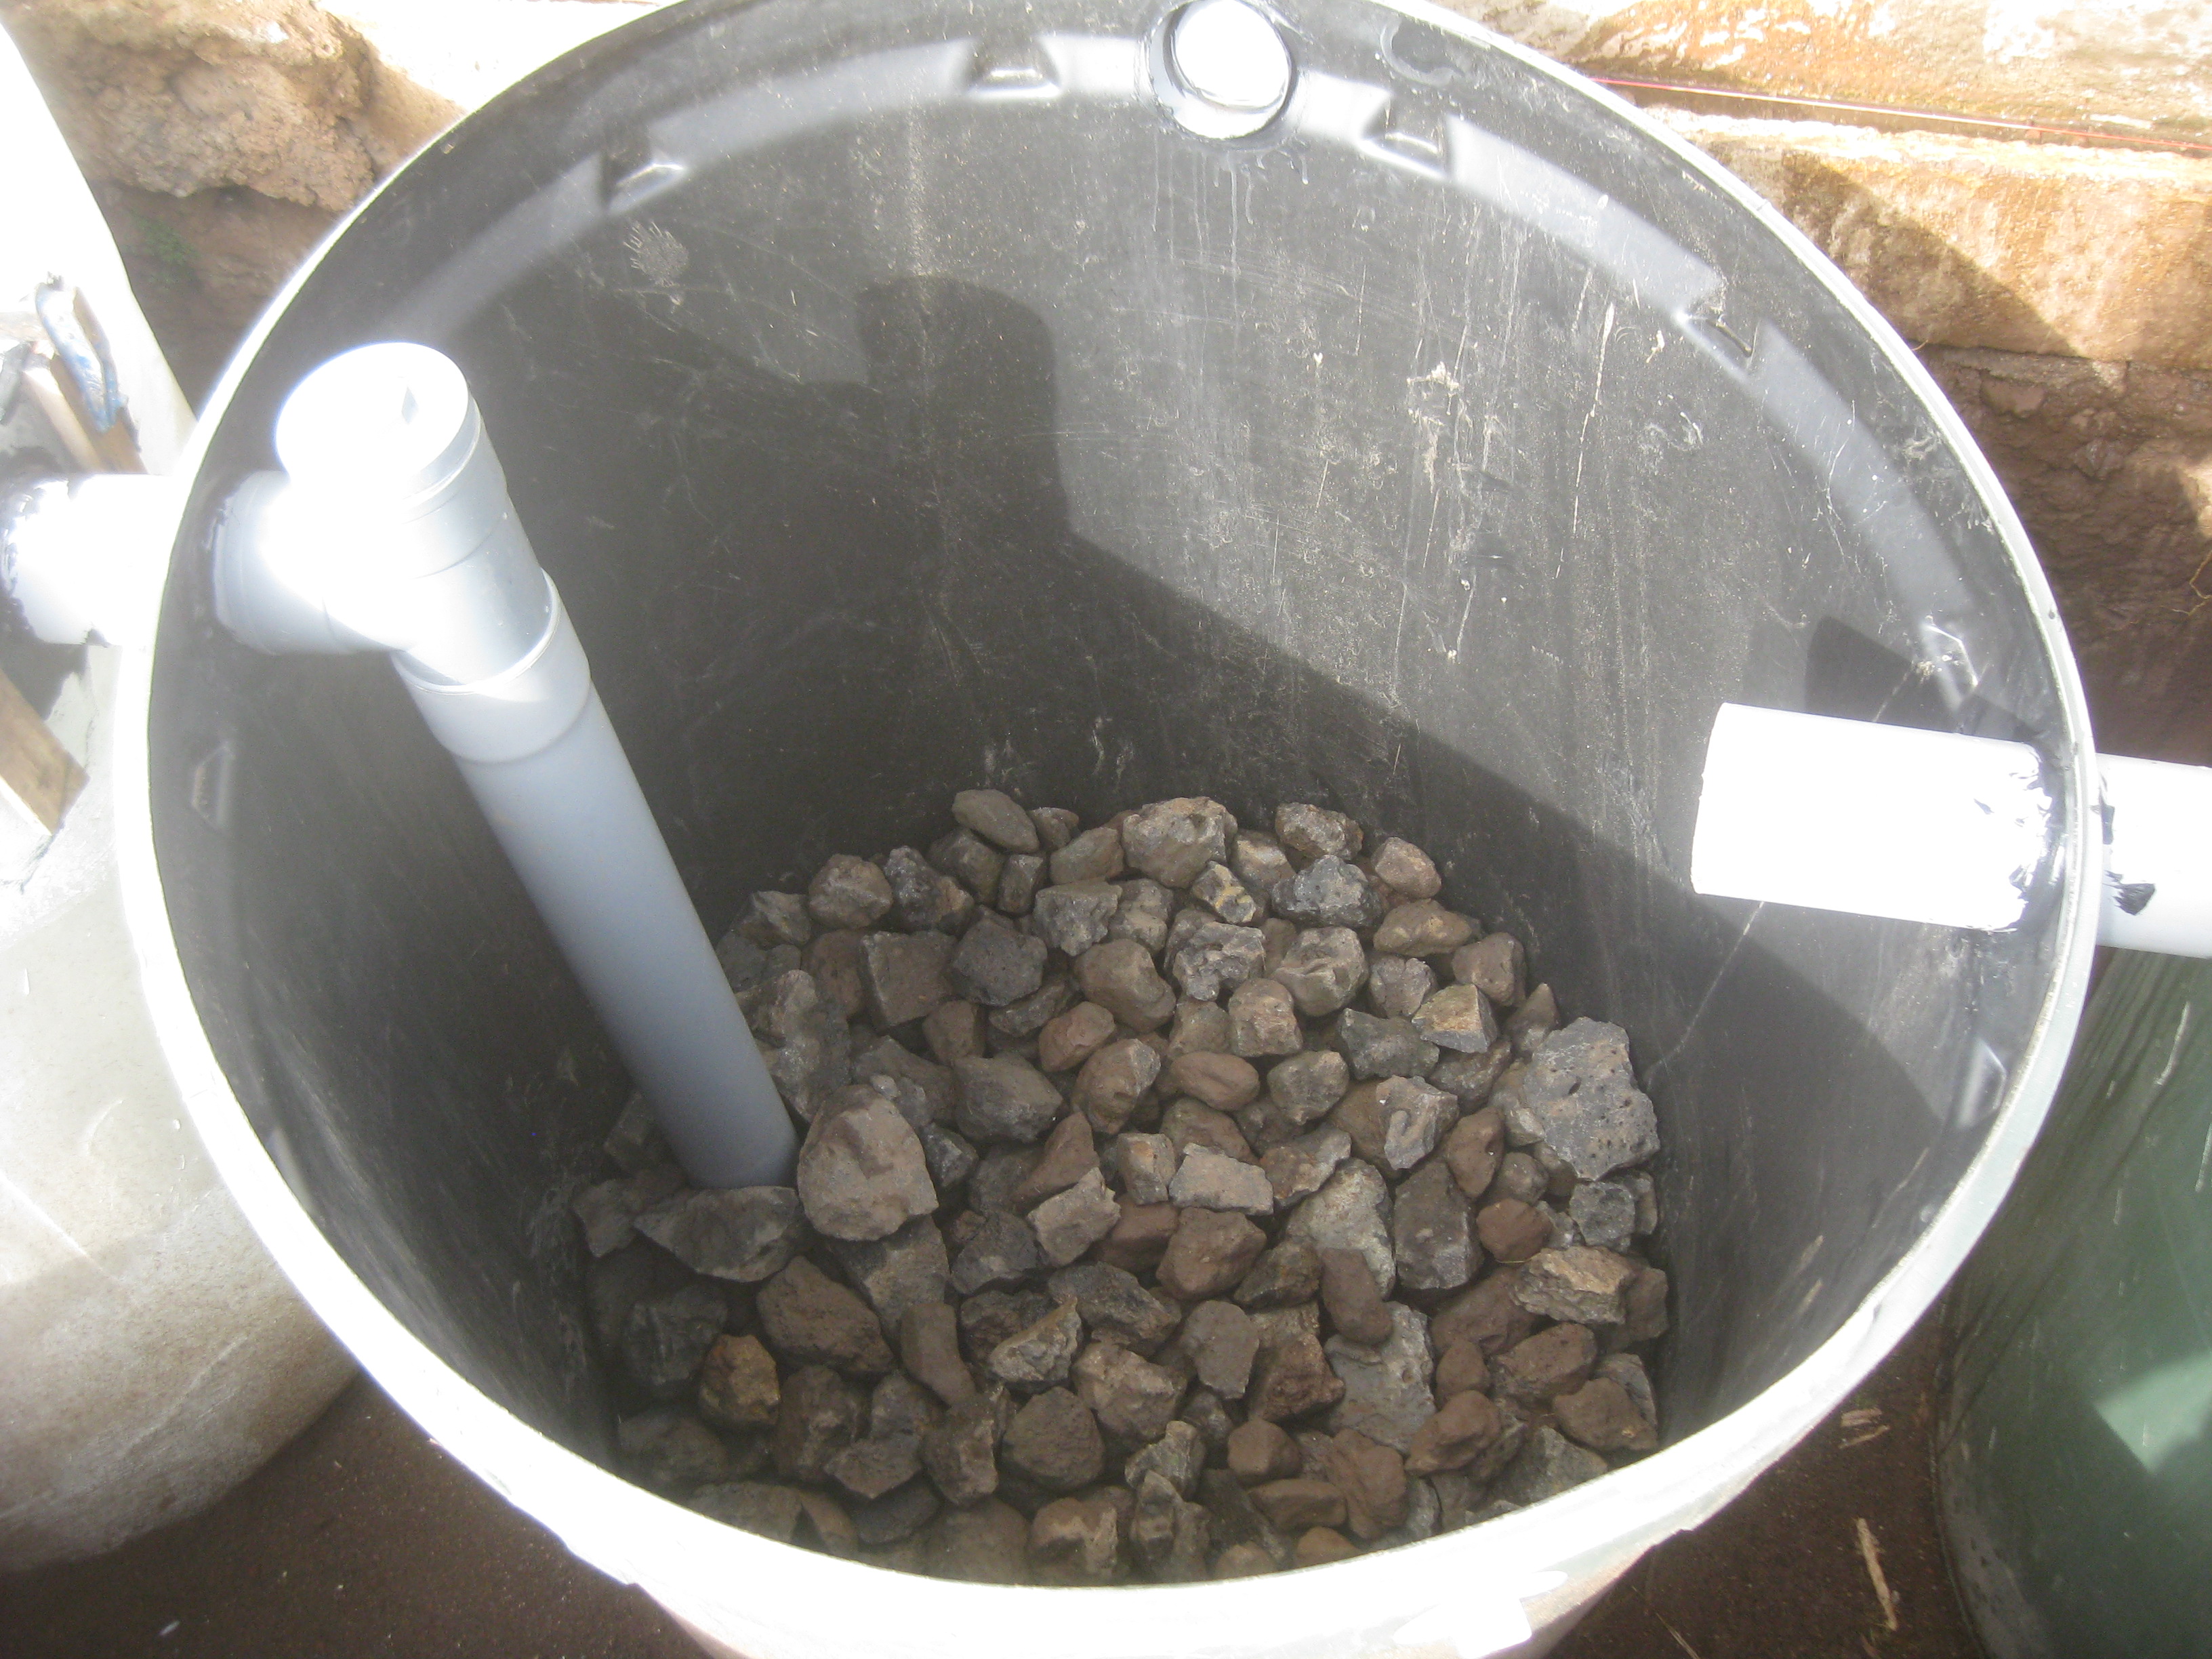
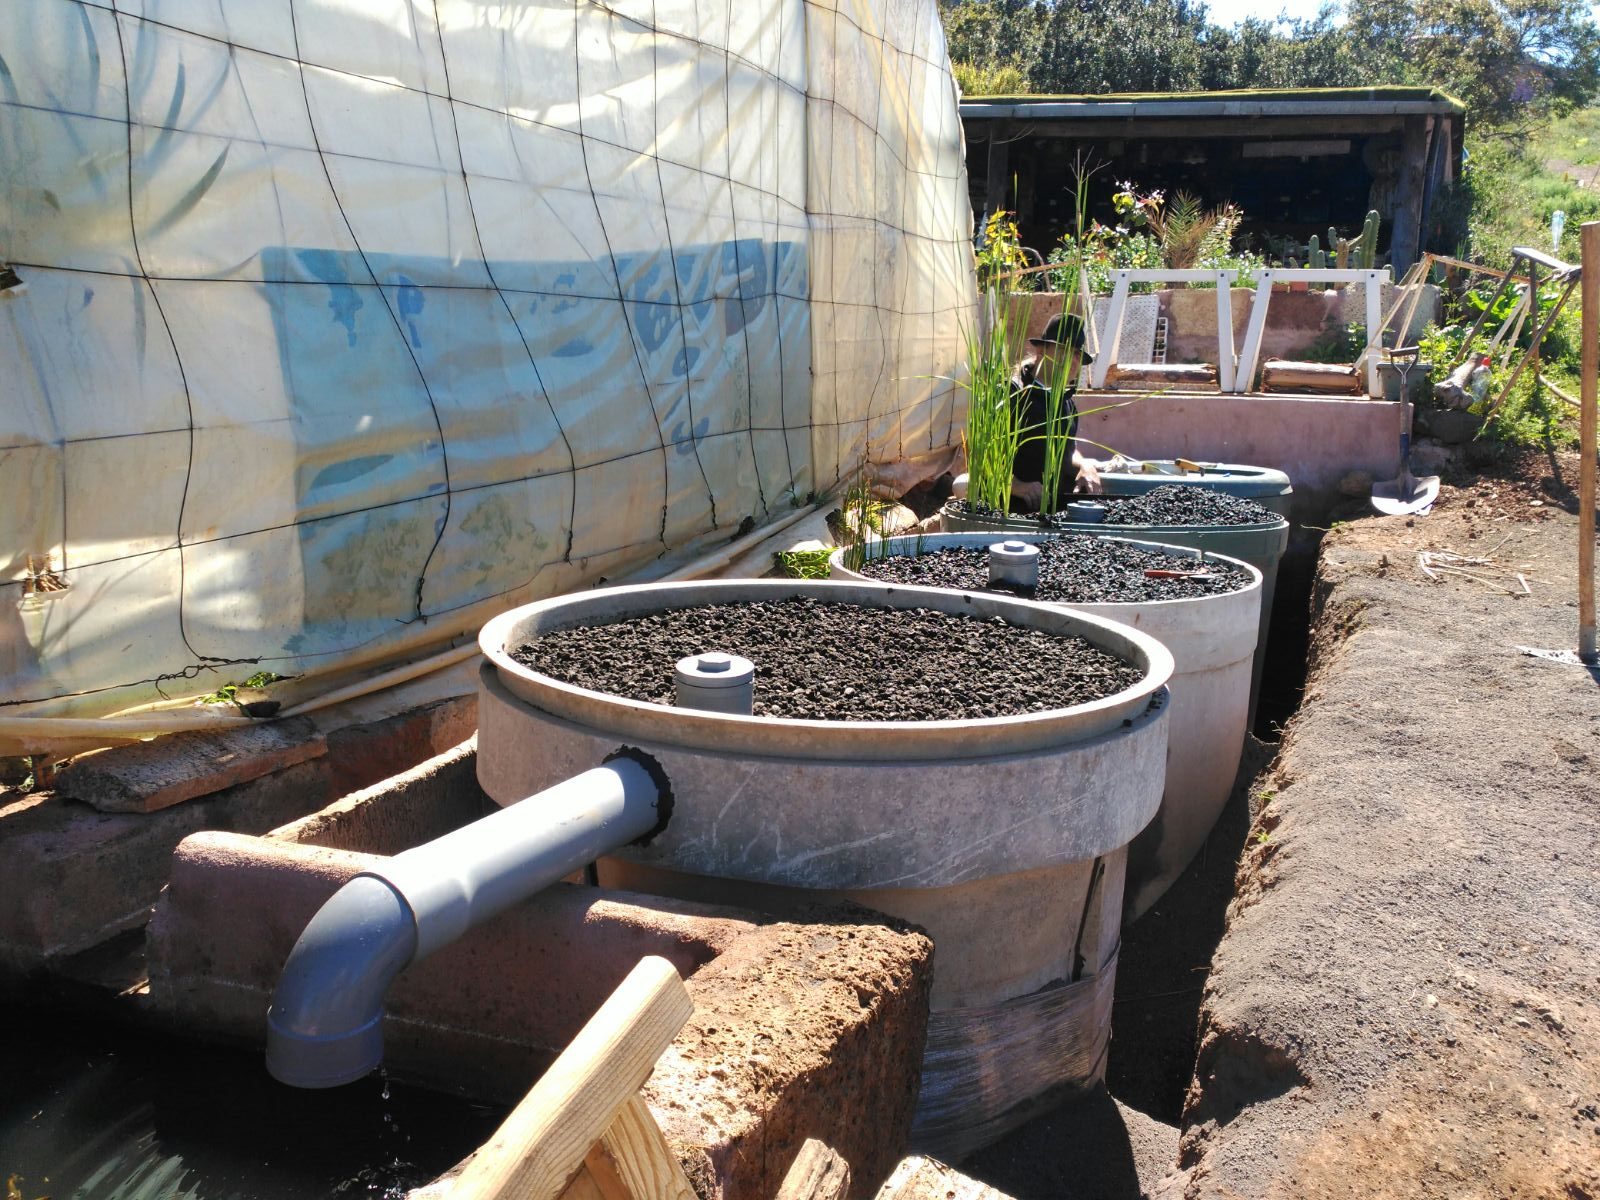
Figure II.13.- Inner composition of the remaining vessels
As explained before, wastewater from the first vessel enters the second one through a tube placed on the upper end. This way water is decanted through the surface of the aggregate towards the drainage. Once there, it siphons through a long tube that goes up from the drainage to the other upper end. This last tube is attached 20 cm above the bottom and is connected with the next vessel.
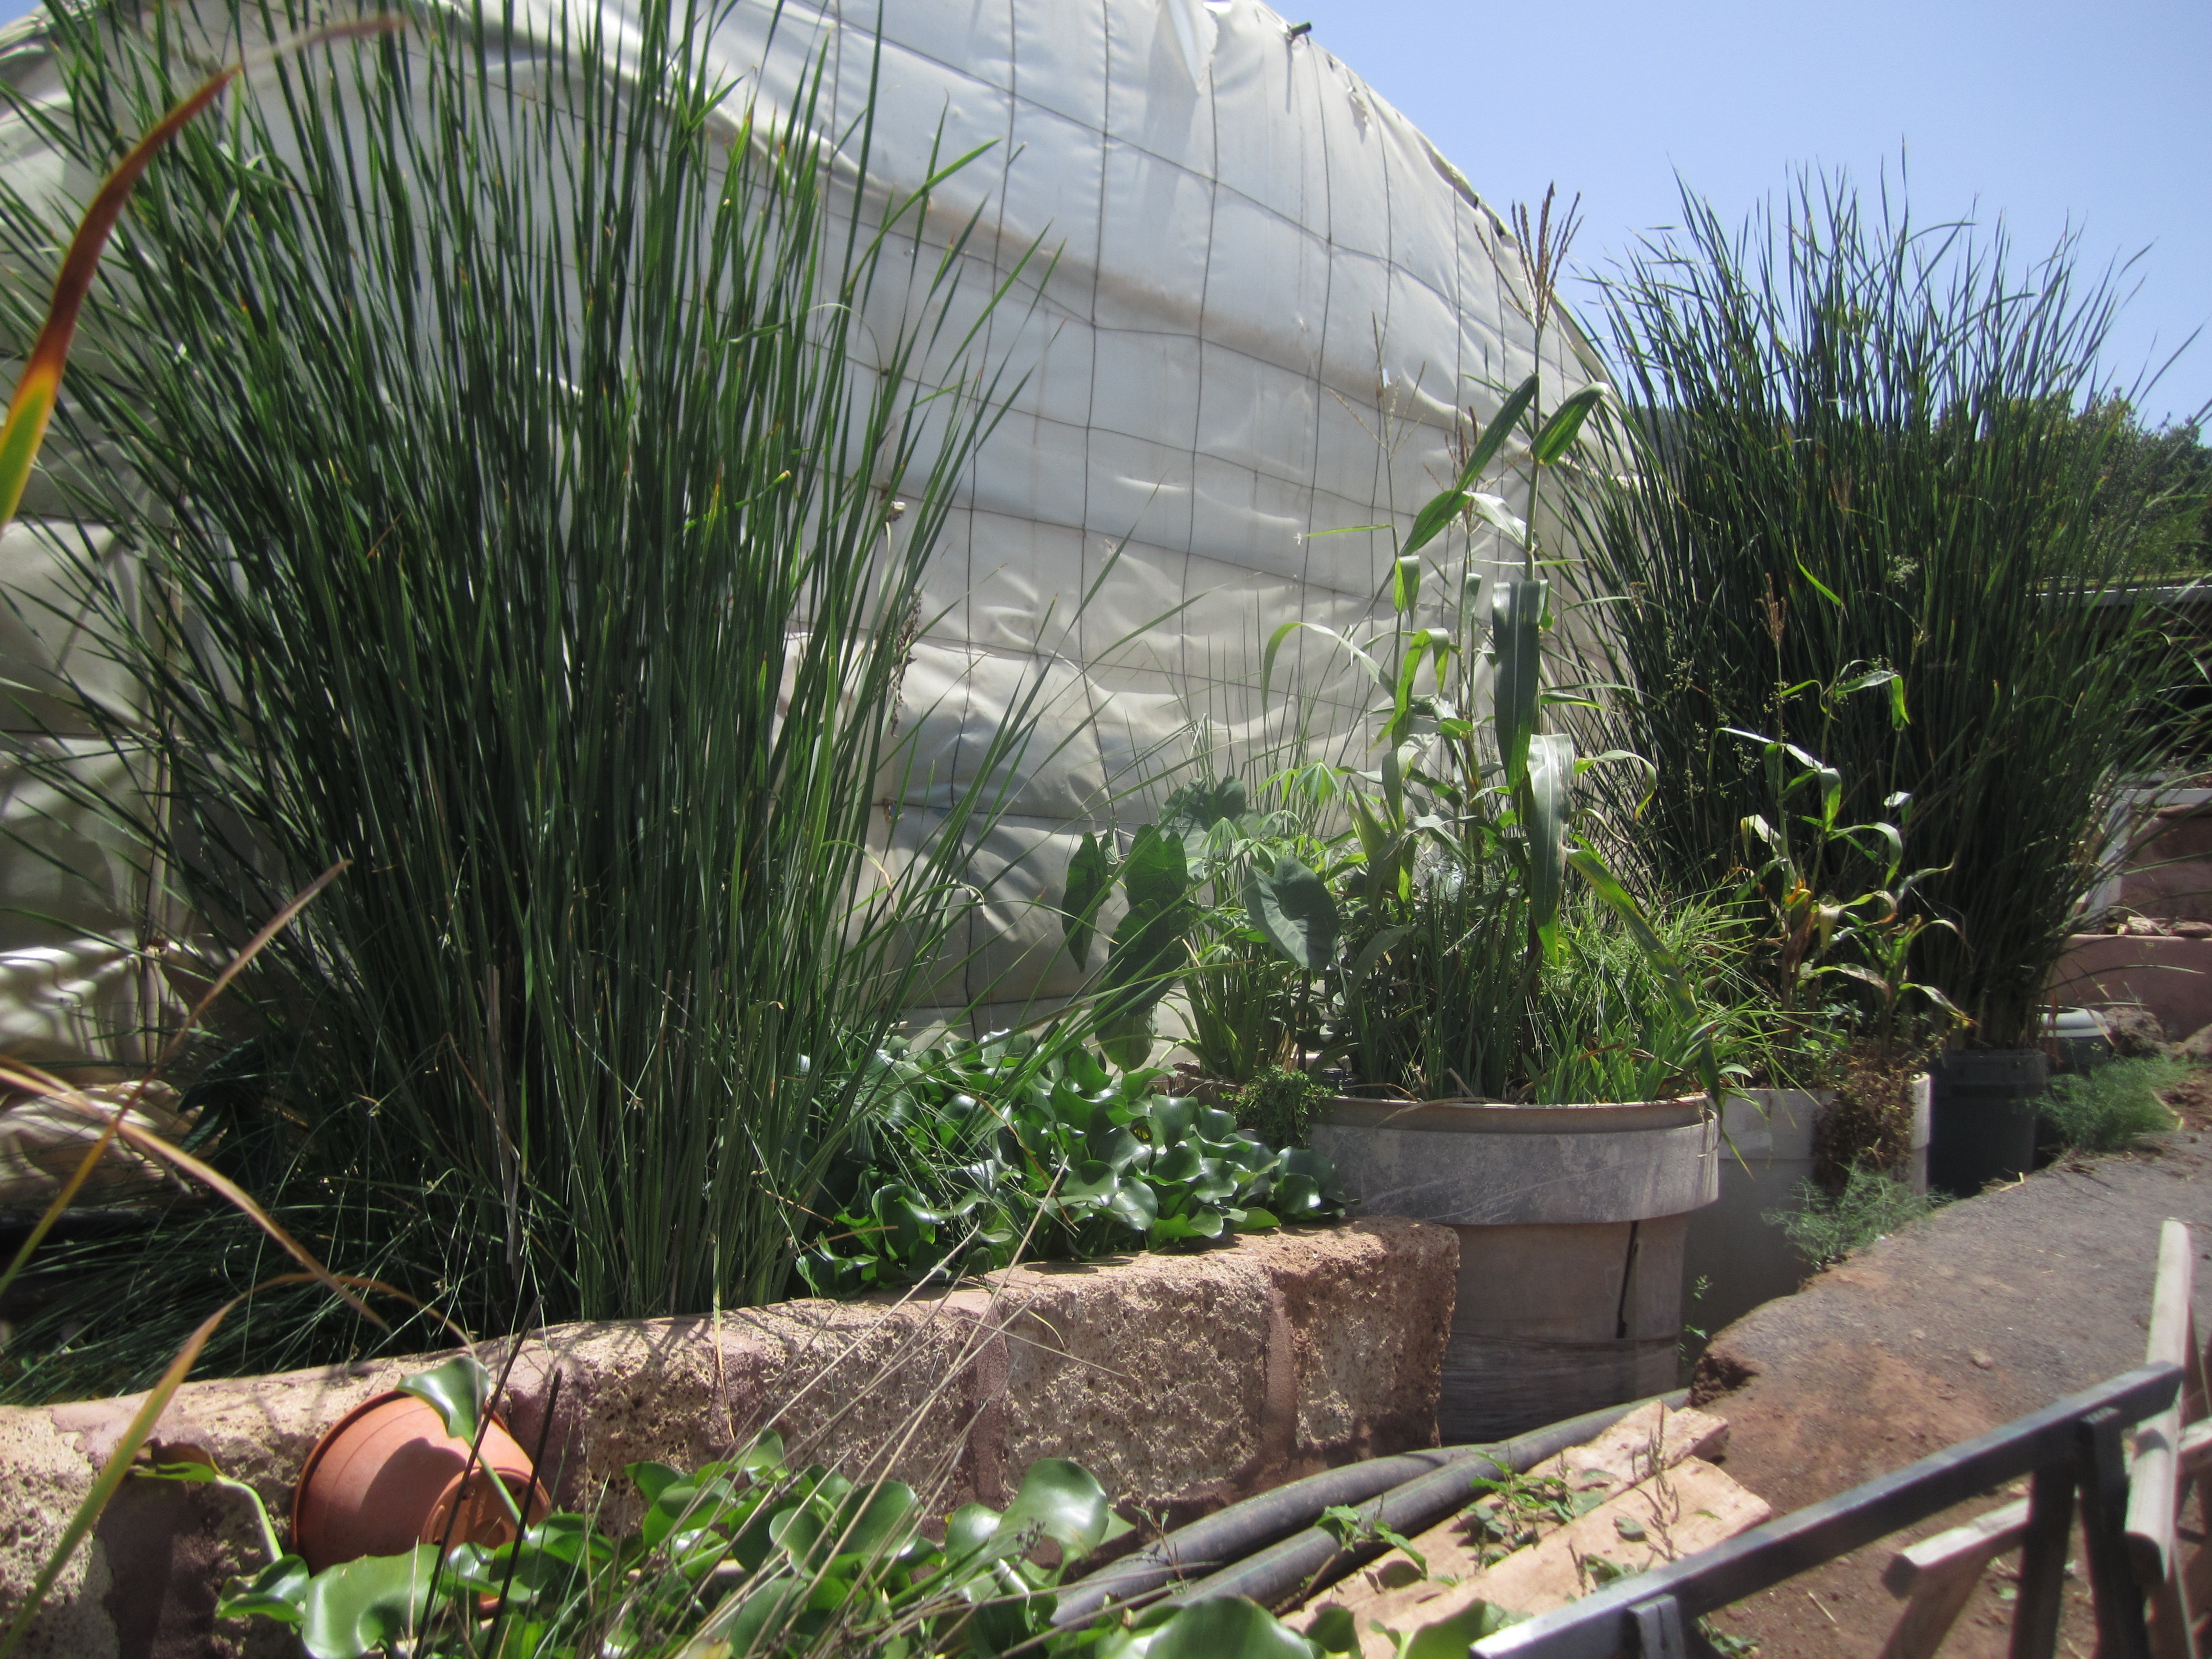
The three vessels once filled and full of water are planted with water plants, preferably native. For the first vessel with aggregate we used typha, reed for the second and the third one was sown with a wide range of plants. Most of them blossom, produce flowers –such as lilies and different iris– and beautify the place as well as attract animals so our users benefit from it (Figure 2.14). In the first test results, one month after the implementation of our plant the treated water was found to be suitable for irrigation.
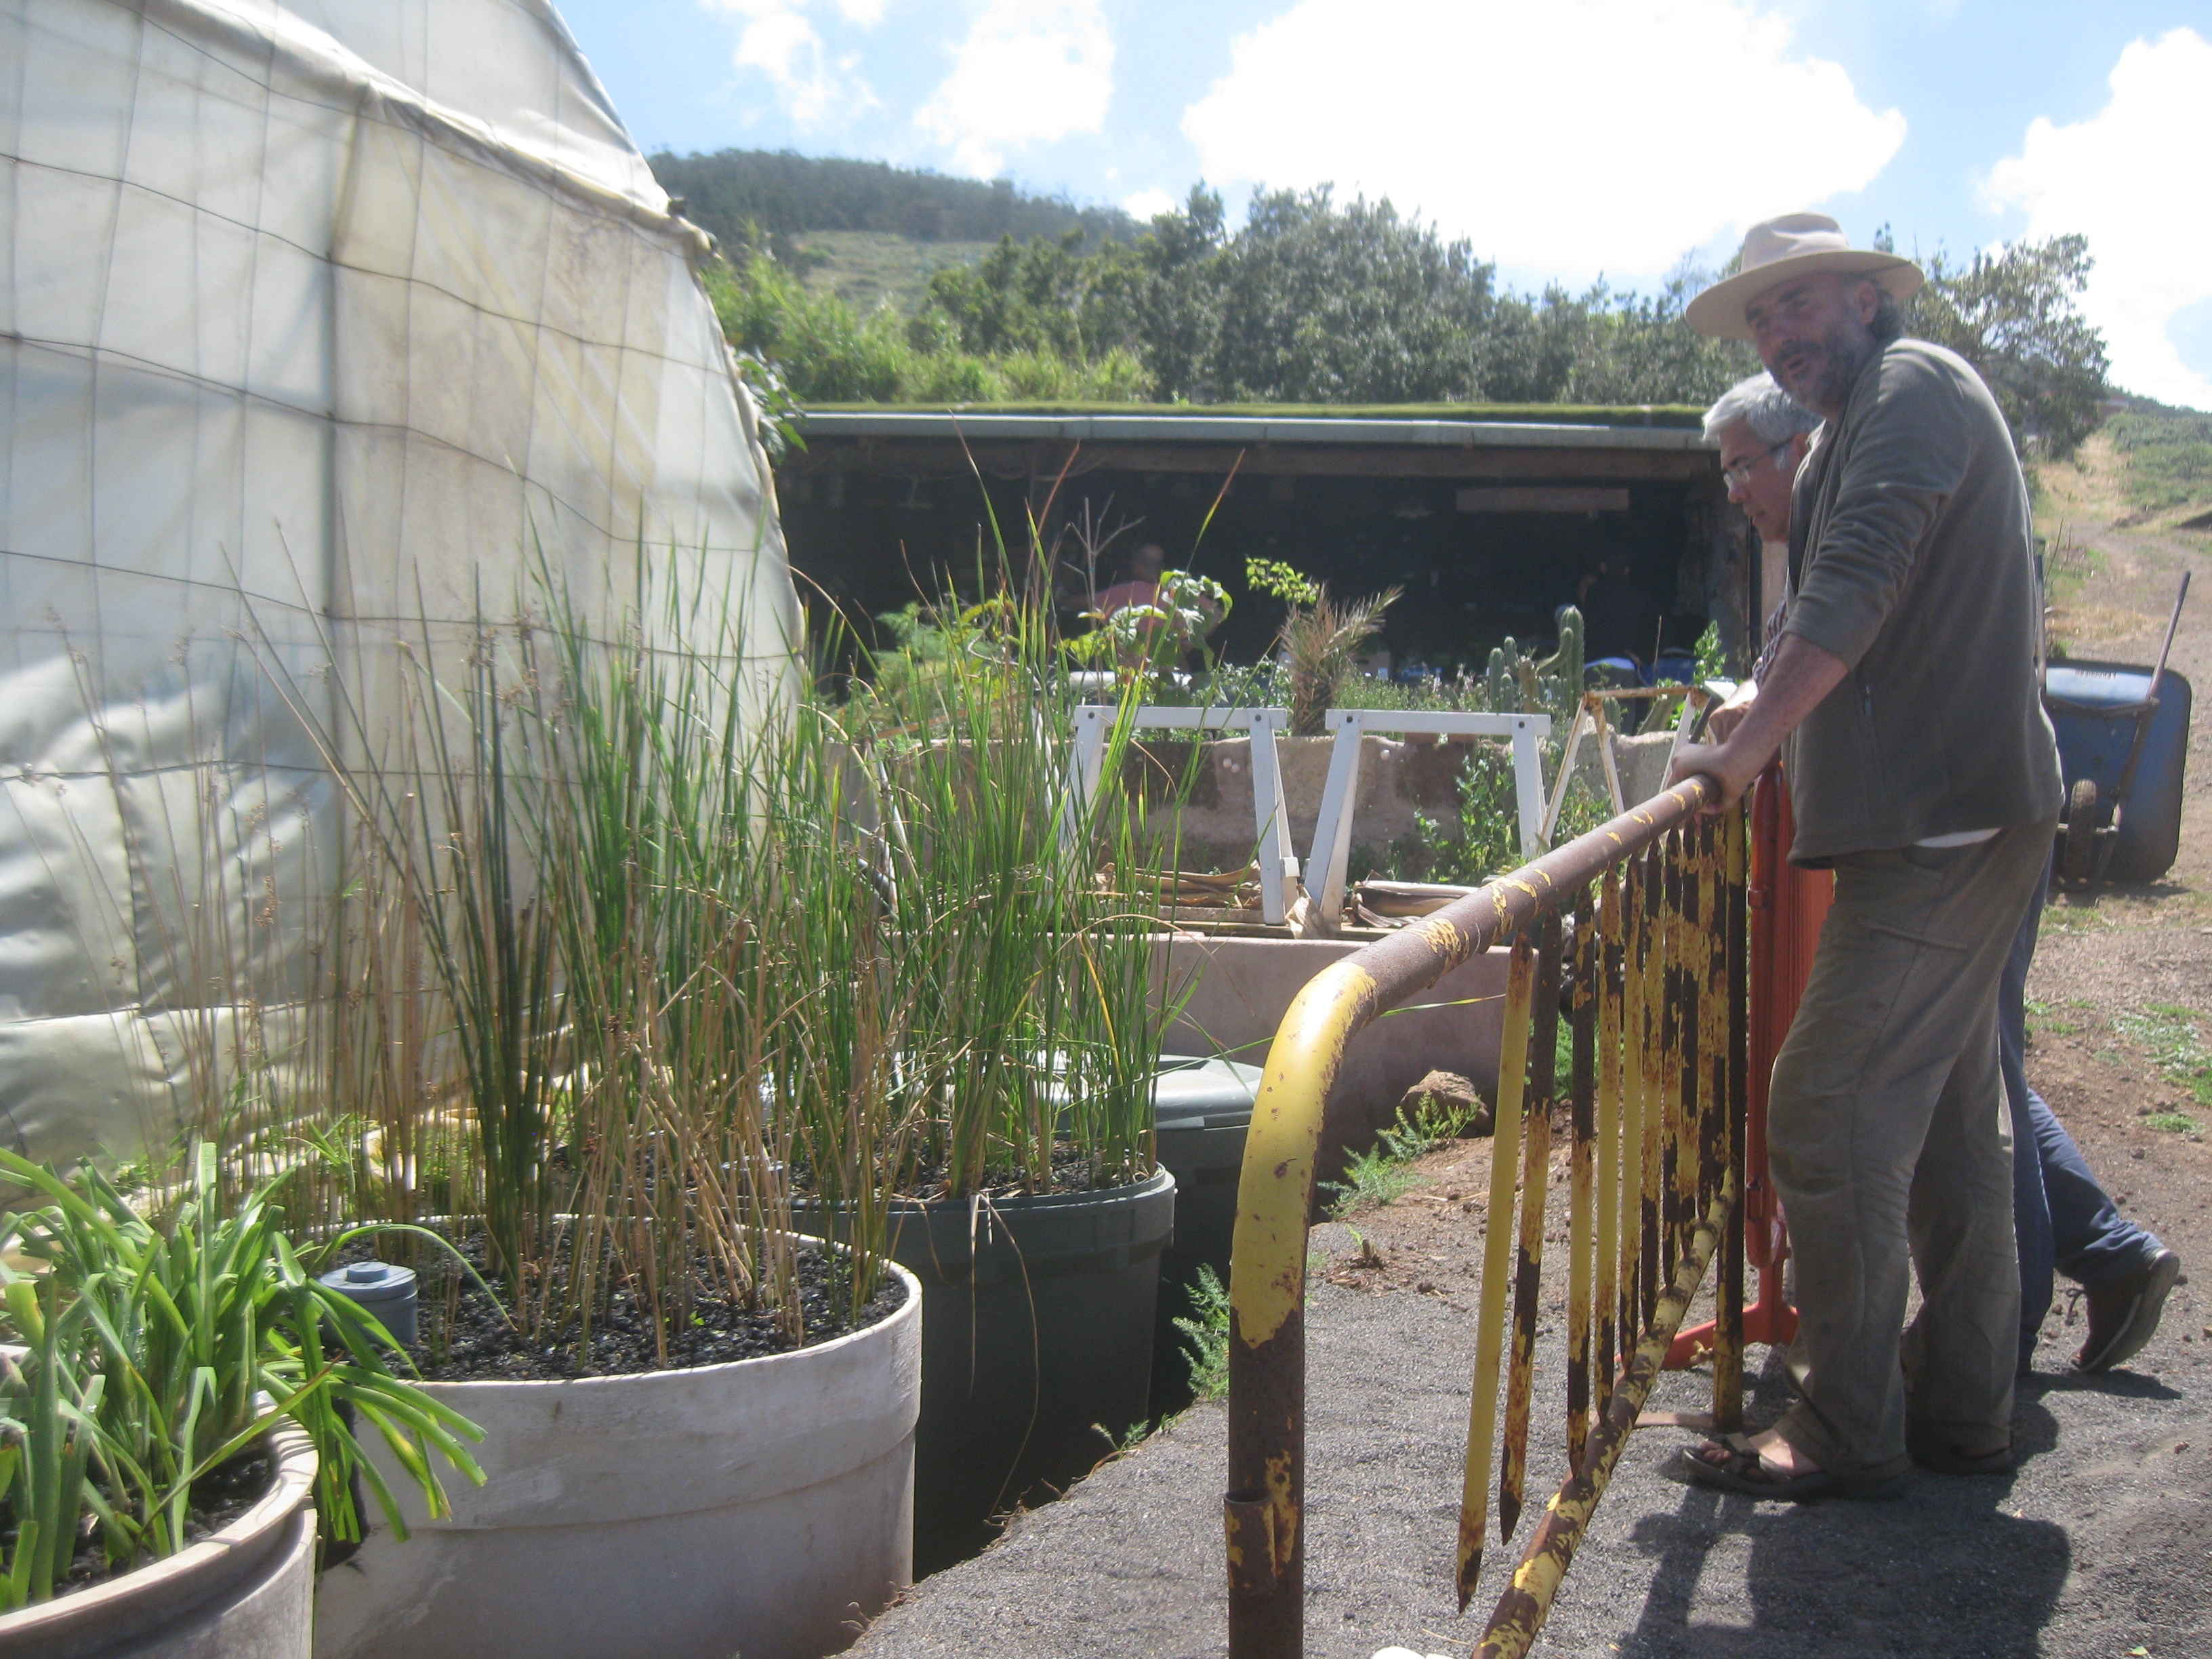
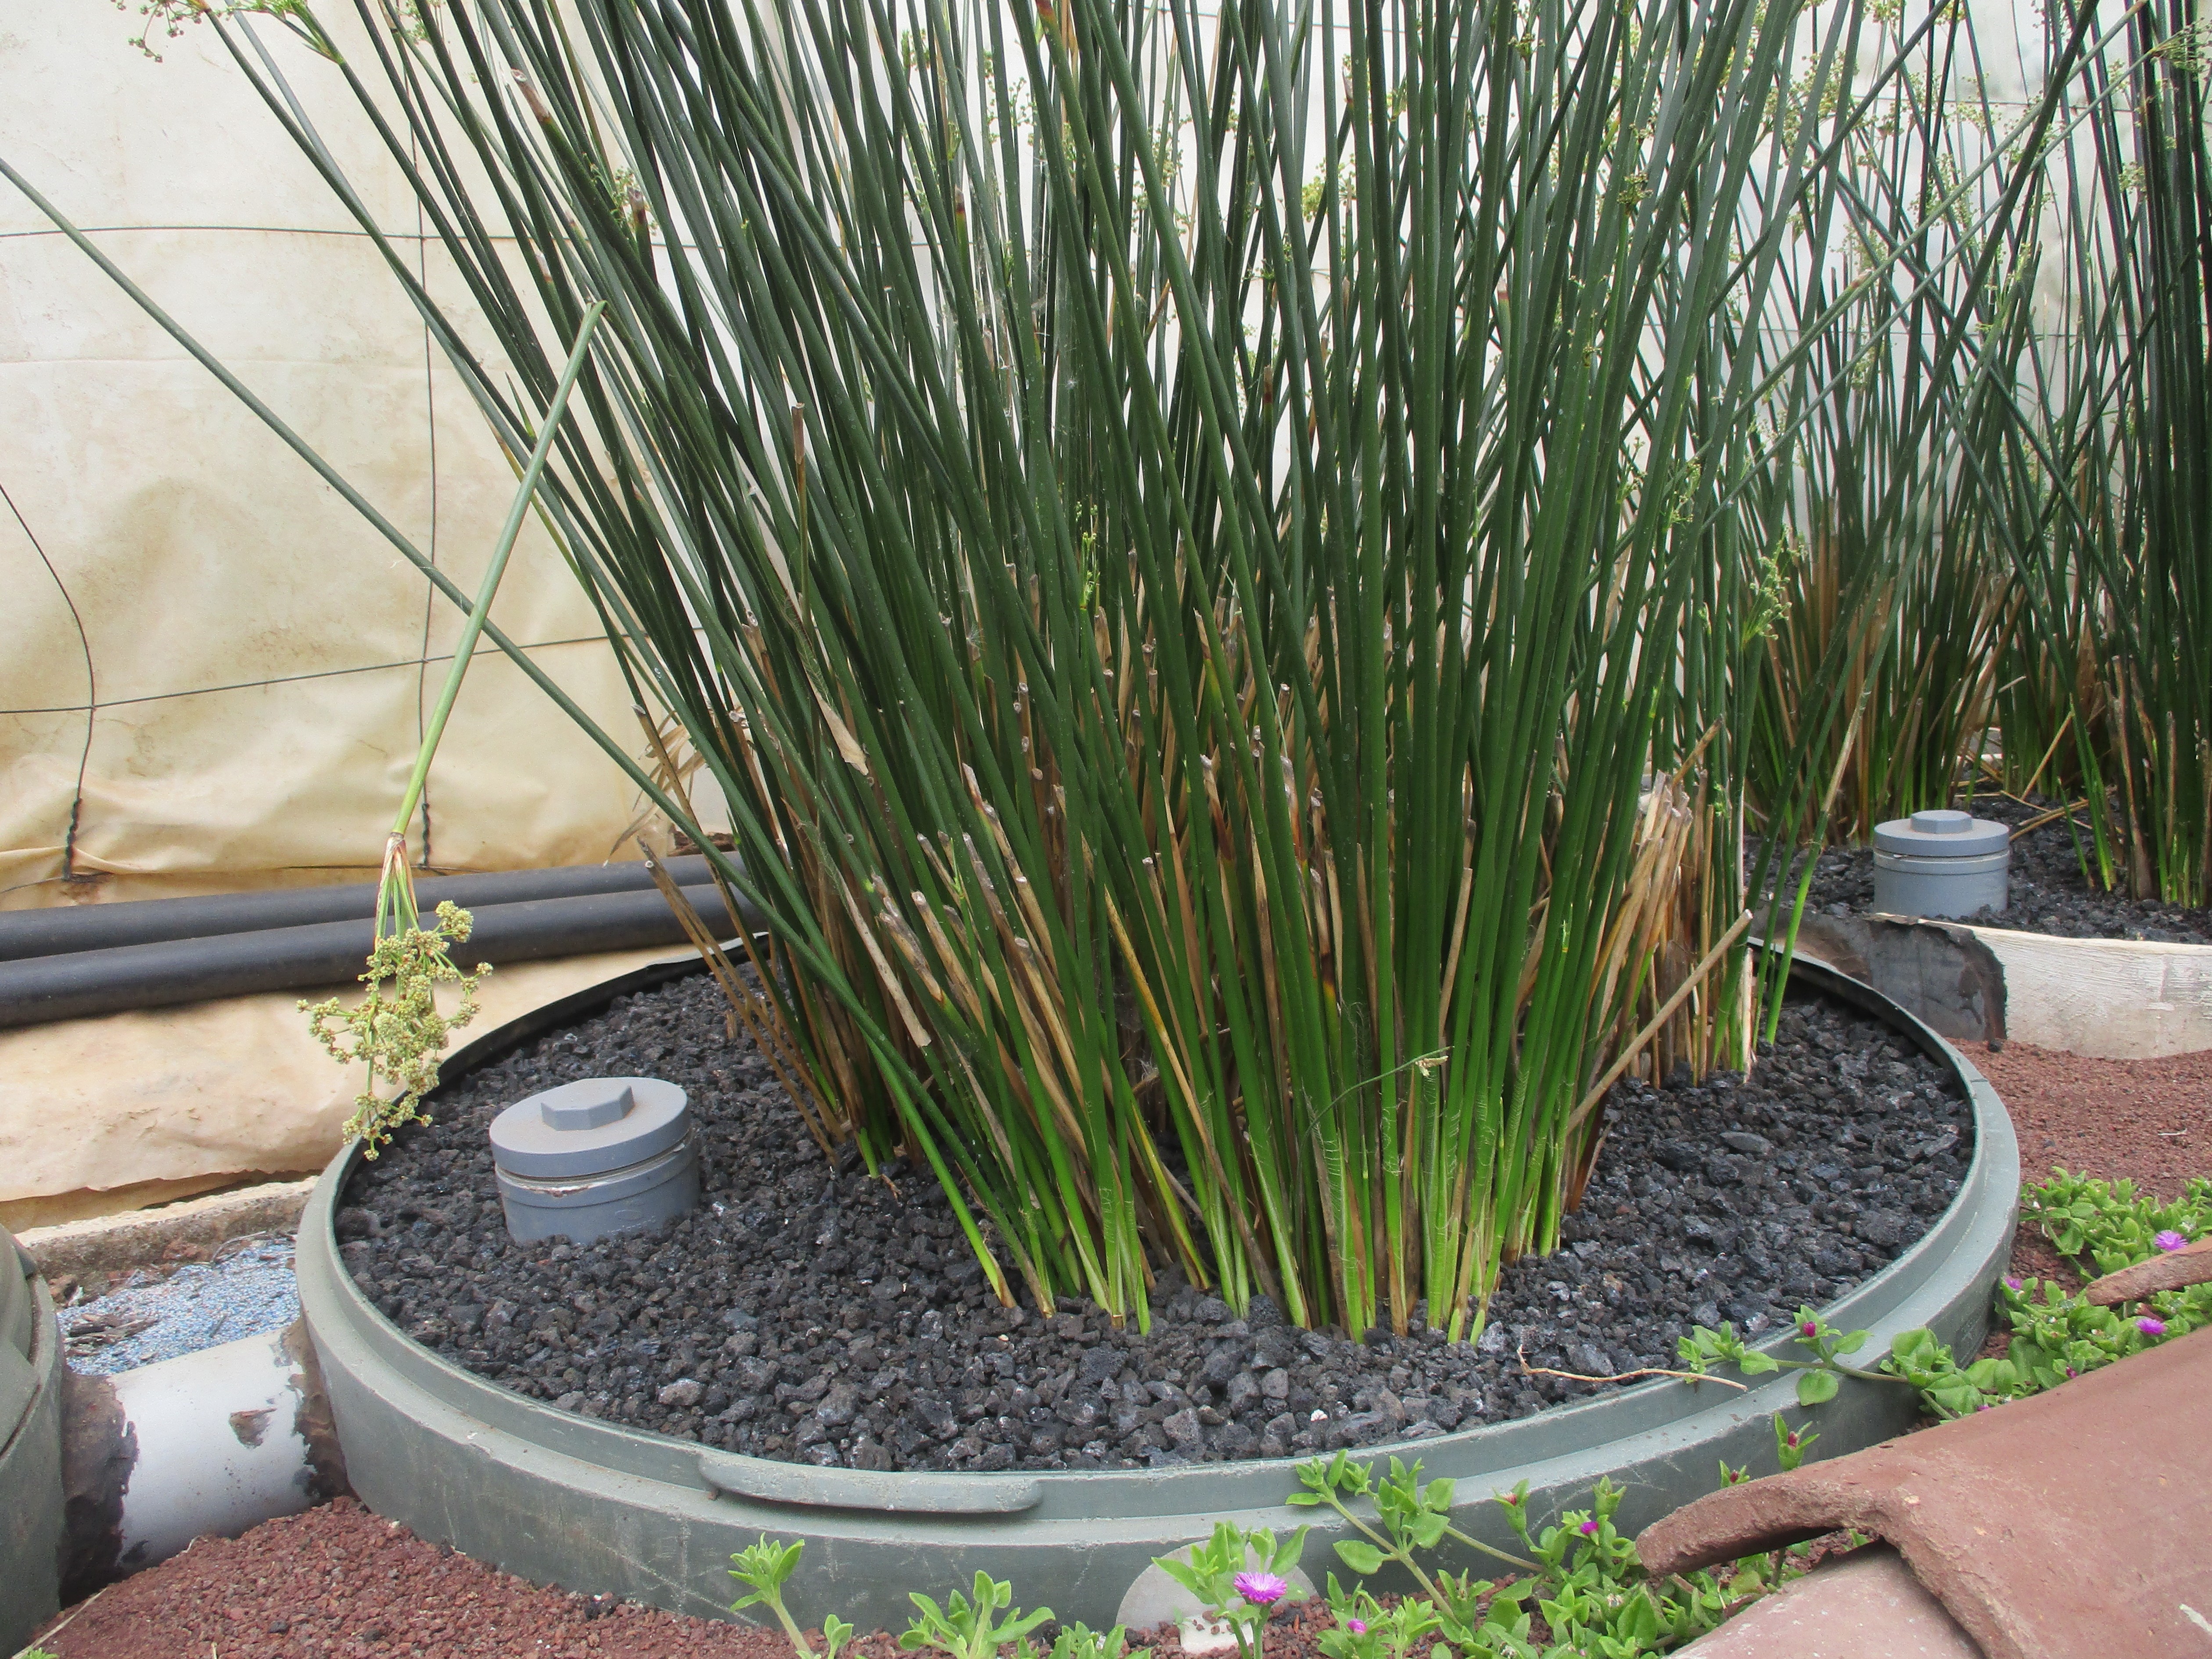
Figure II.14.- Sequence of images of the plant material used in the sewage treatment plant
With these alternative ways of harvesting water we can raise awareness about how essential the resource water is. Our users are also brought the possibility to observe how it flows through the swales during the rainy season, watch and listen it falling into the pond or observe how the affluent of the treatment plant becomes a permanent natural spring during the dry season.
The musicality of these situations becomes a strong therapeutic element.
II.4 Hedges as borders for the ecosystems
One of the most important steps during the observation process is the identification of the wind direction, especially that of the prevailing wind and the strongest and most destructive ones. This information will be useful to place the evergreen grove on the boundaries of the therapy center as hedges.
This hedge row can be composed of trees and evergreen bushes, preferably fruity and native since they are more resistant due to their acclimatization (Figure II.15). The hedges serve as barriers that will soften temperature and humidity, slow down wind, attract biodiversity and protect our permacultural structure.
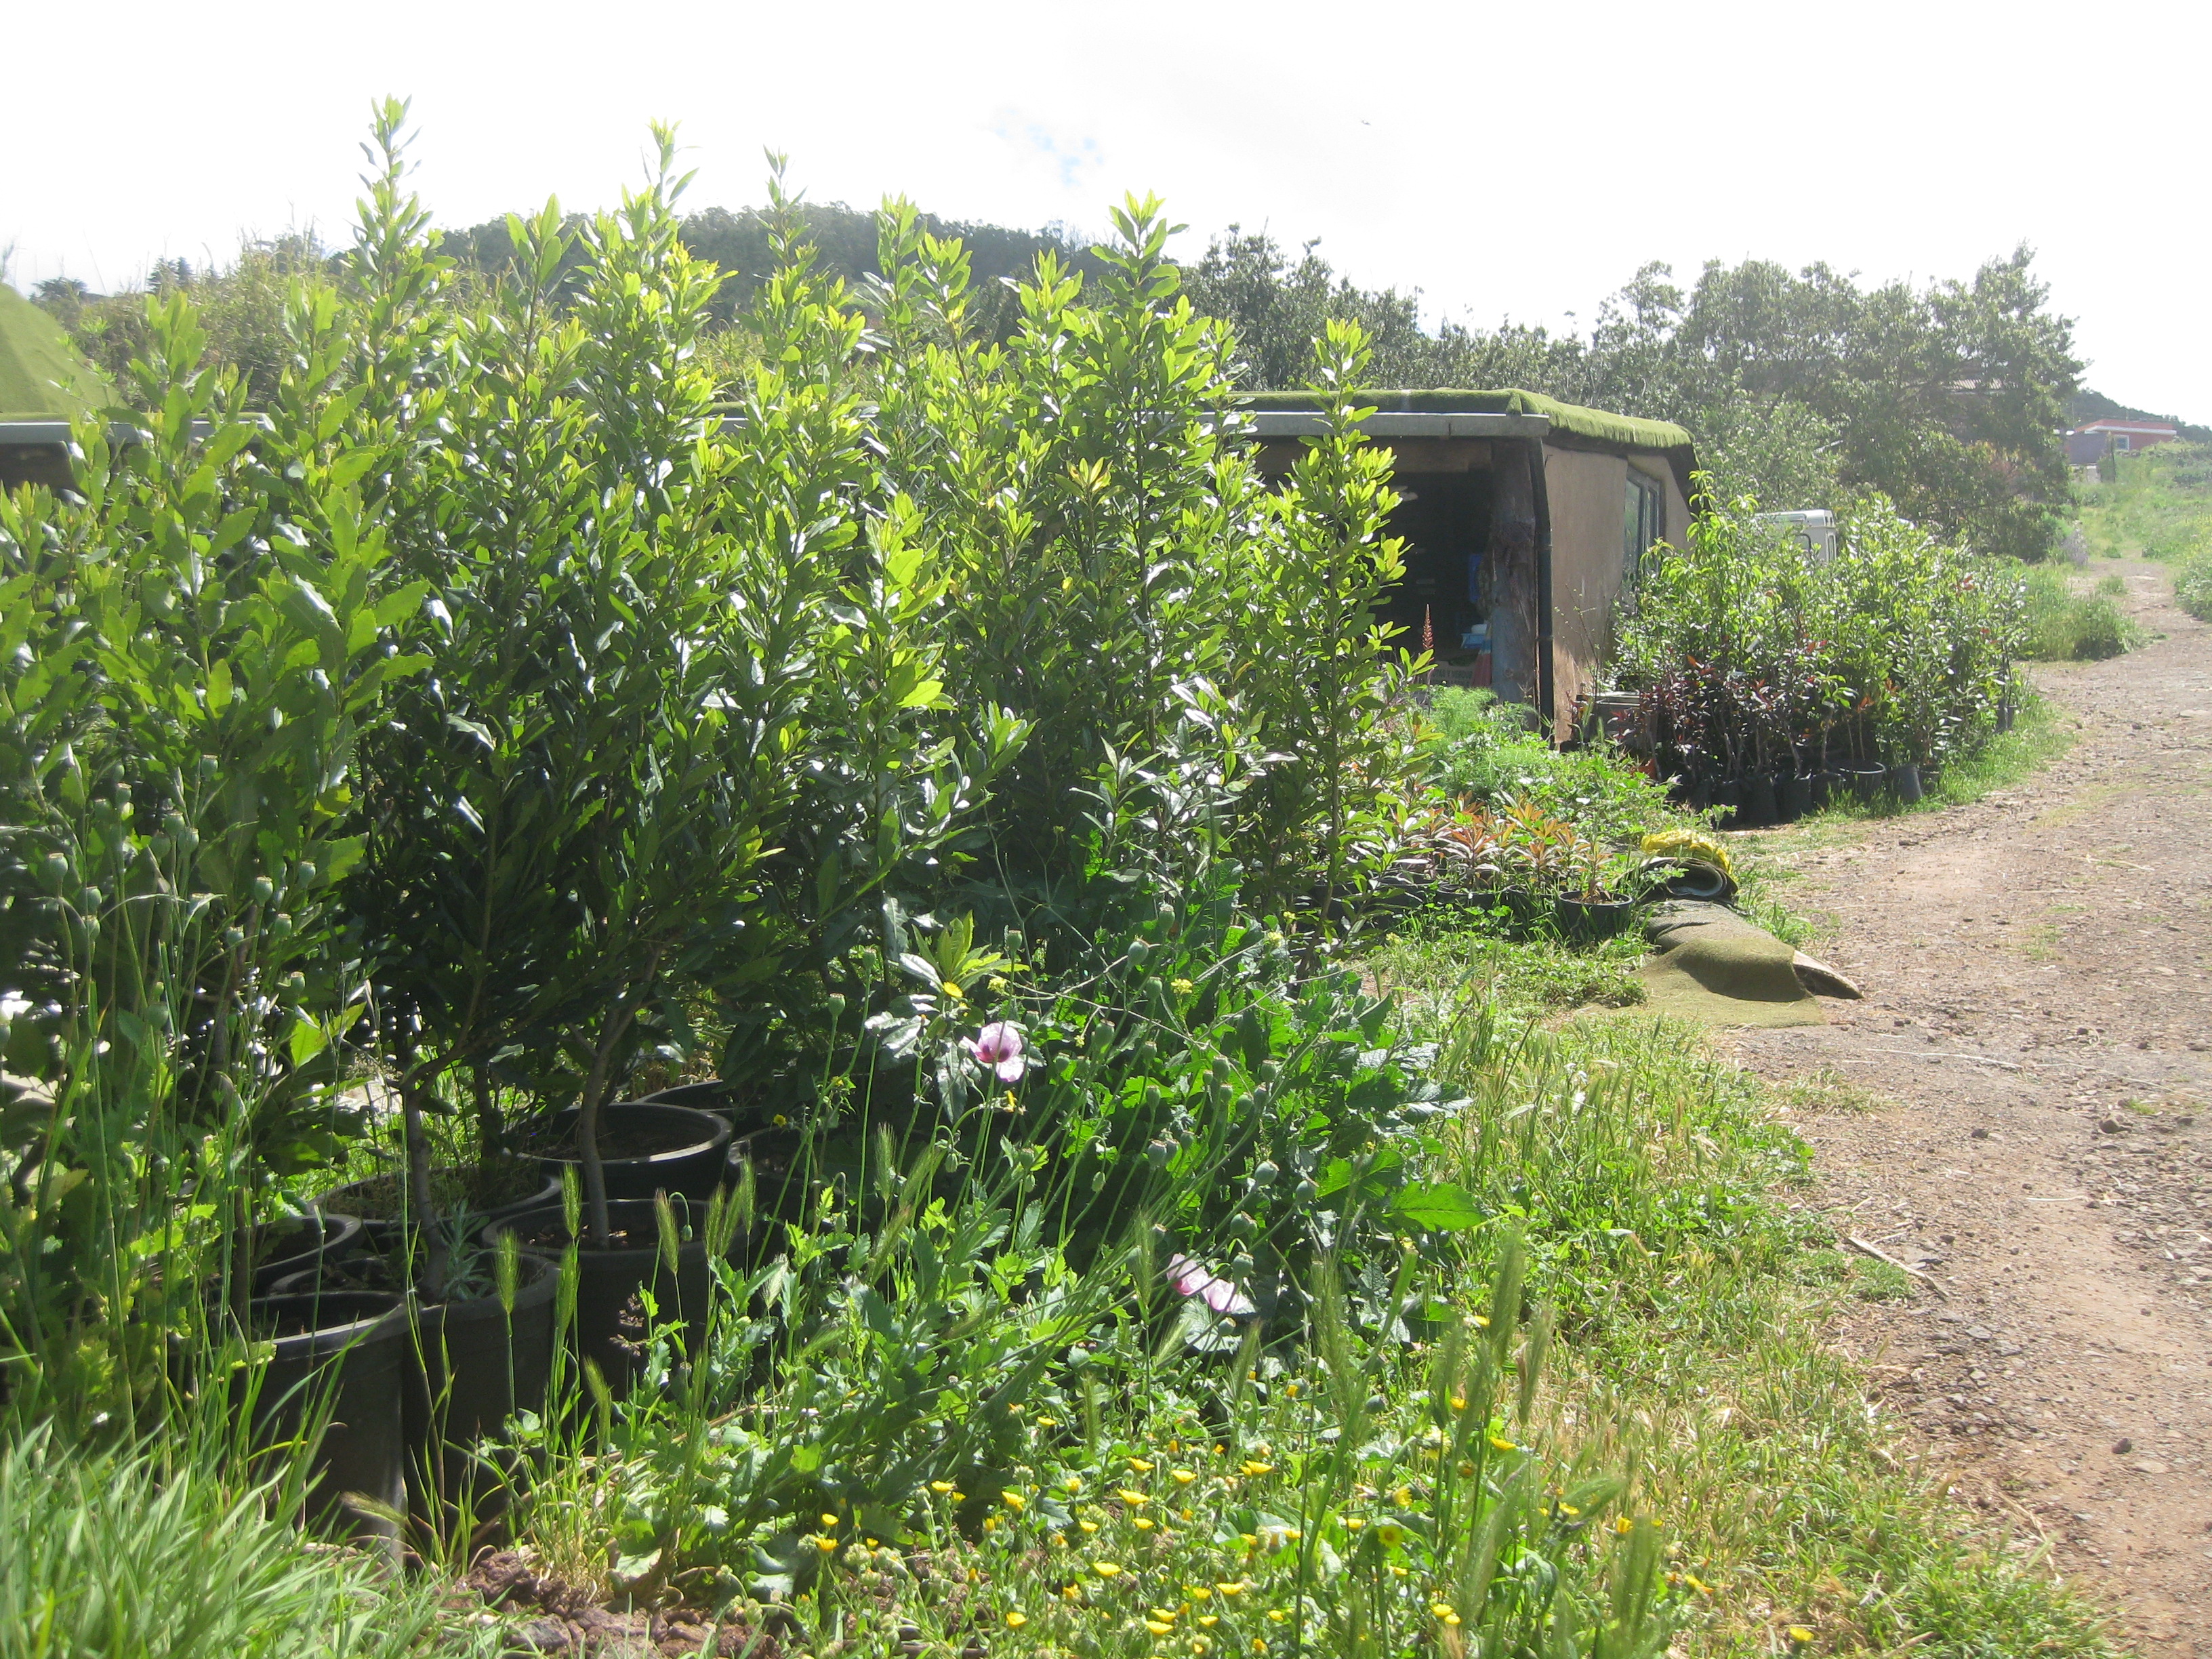
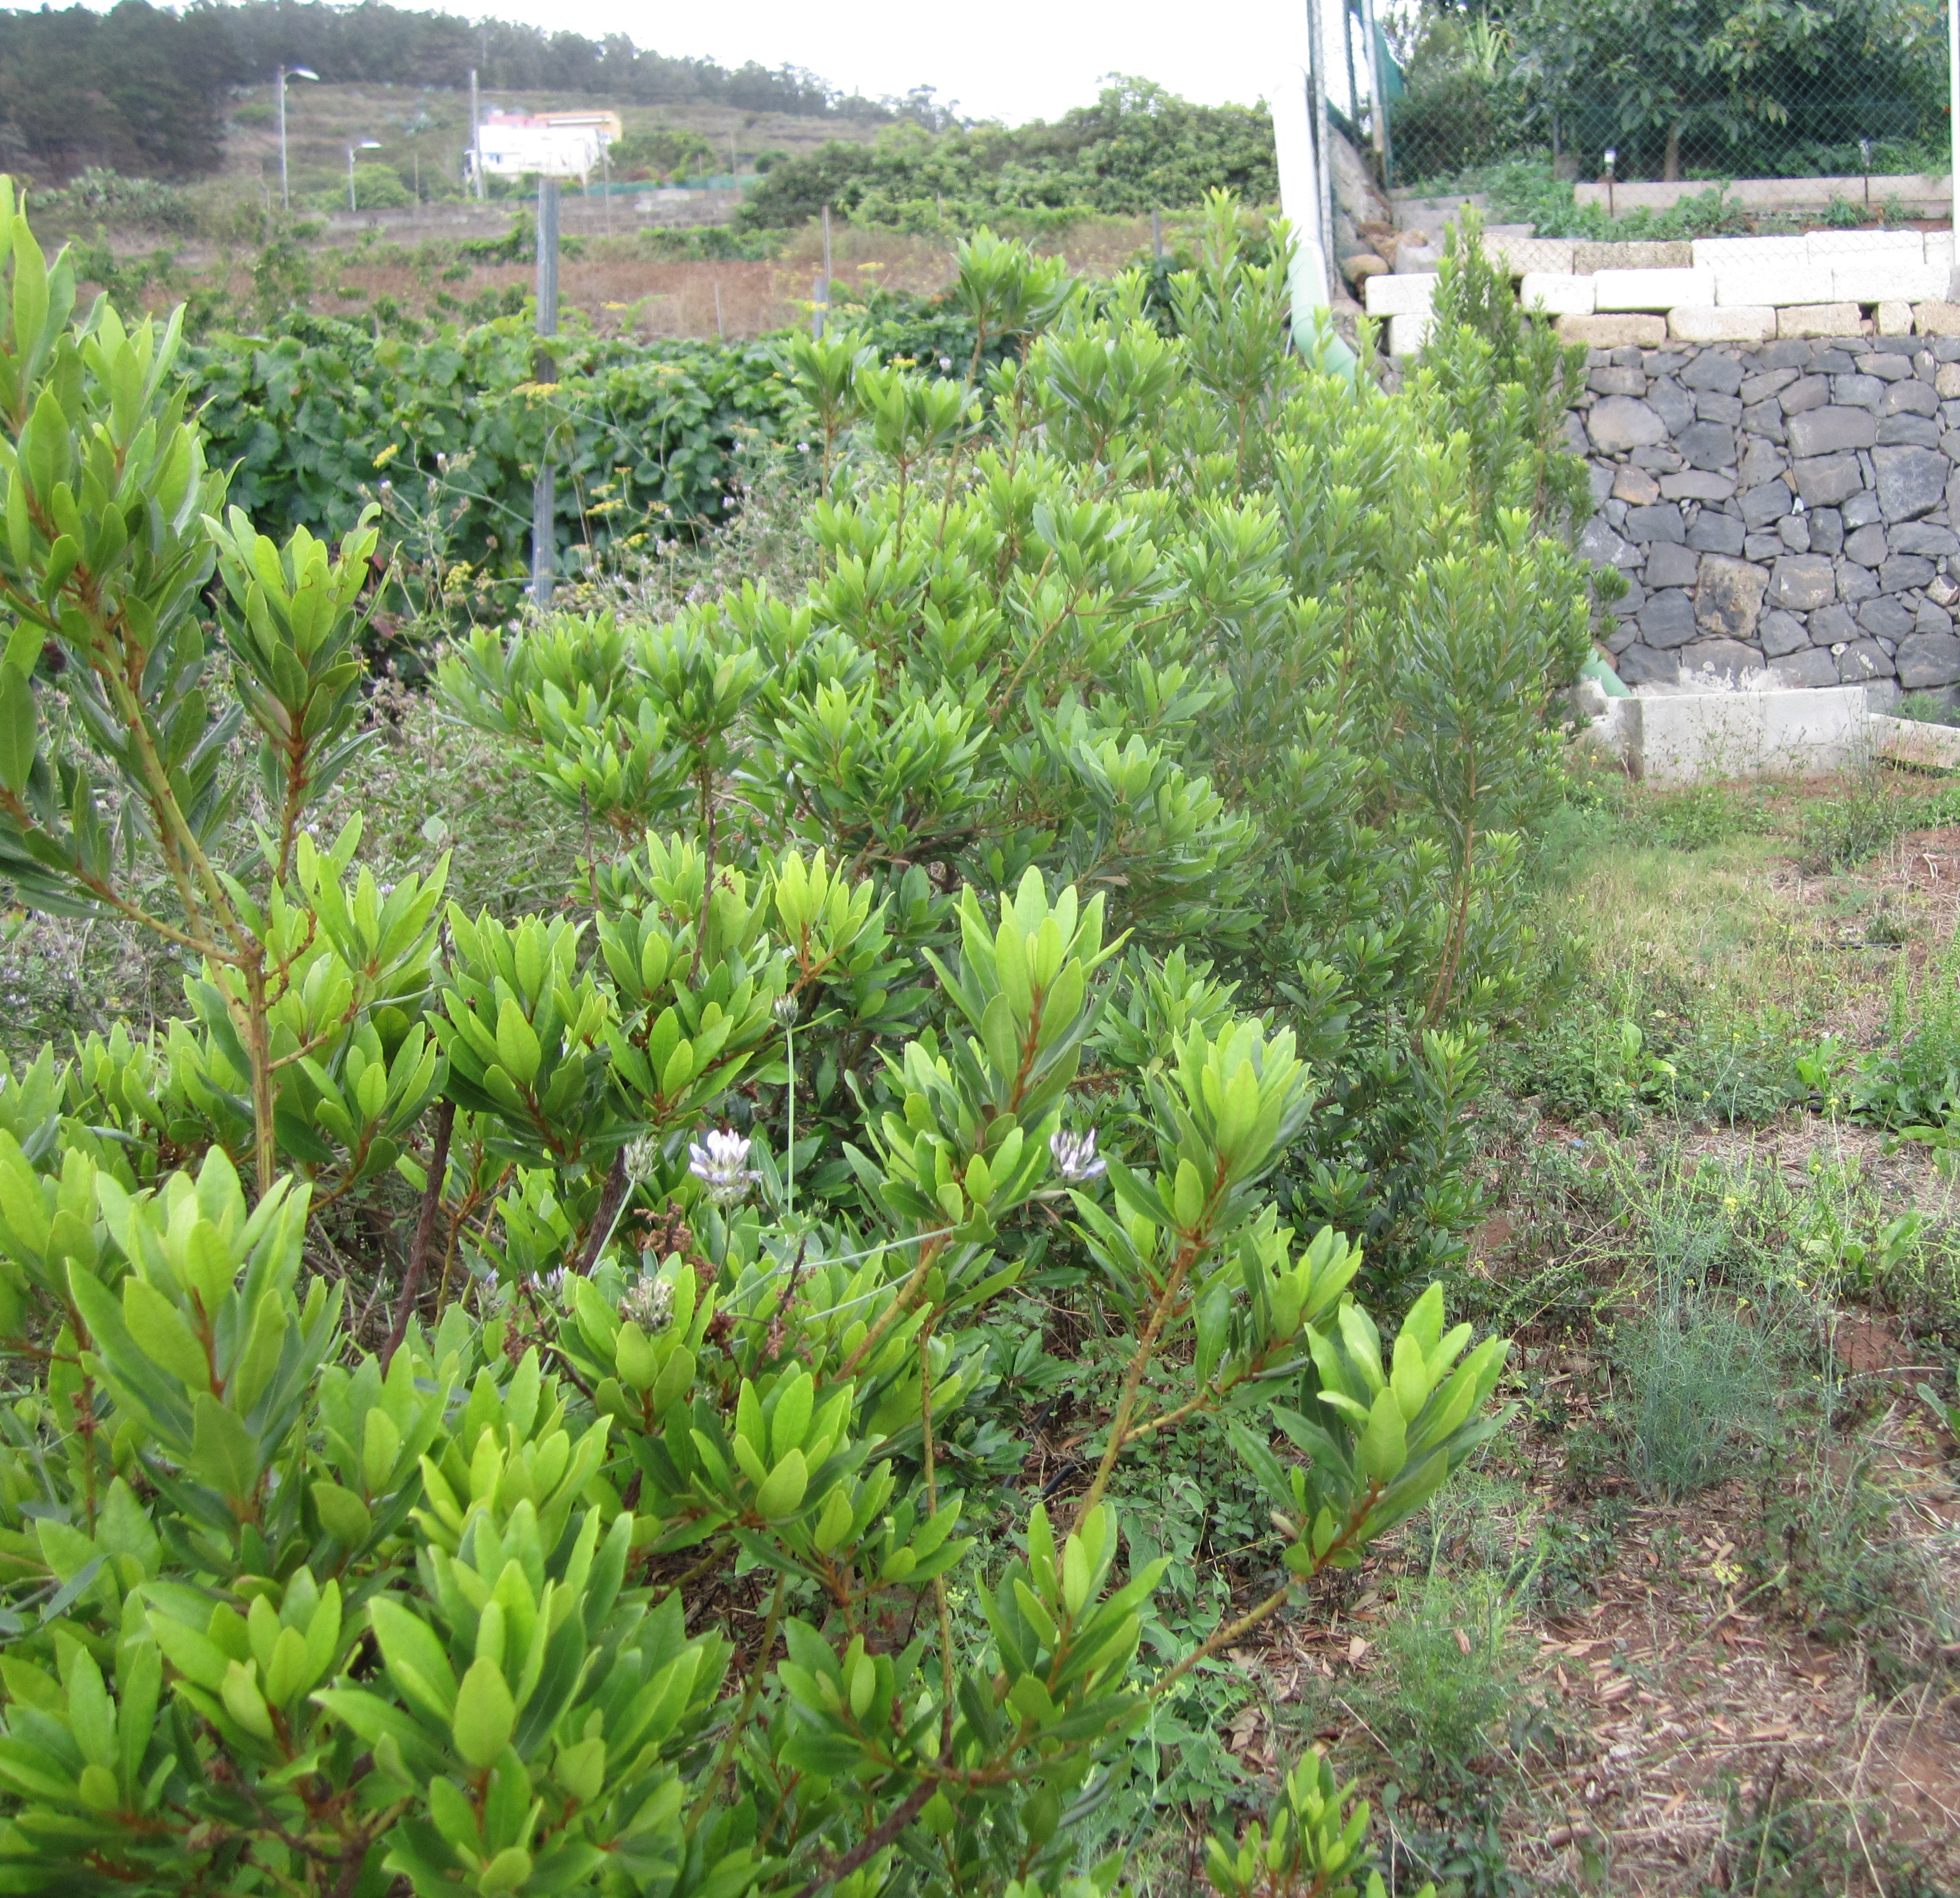
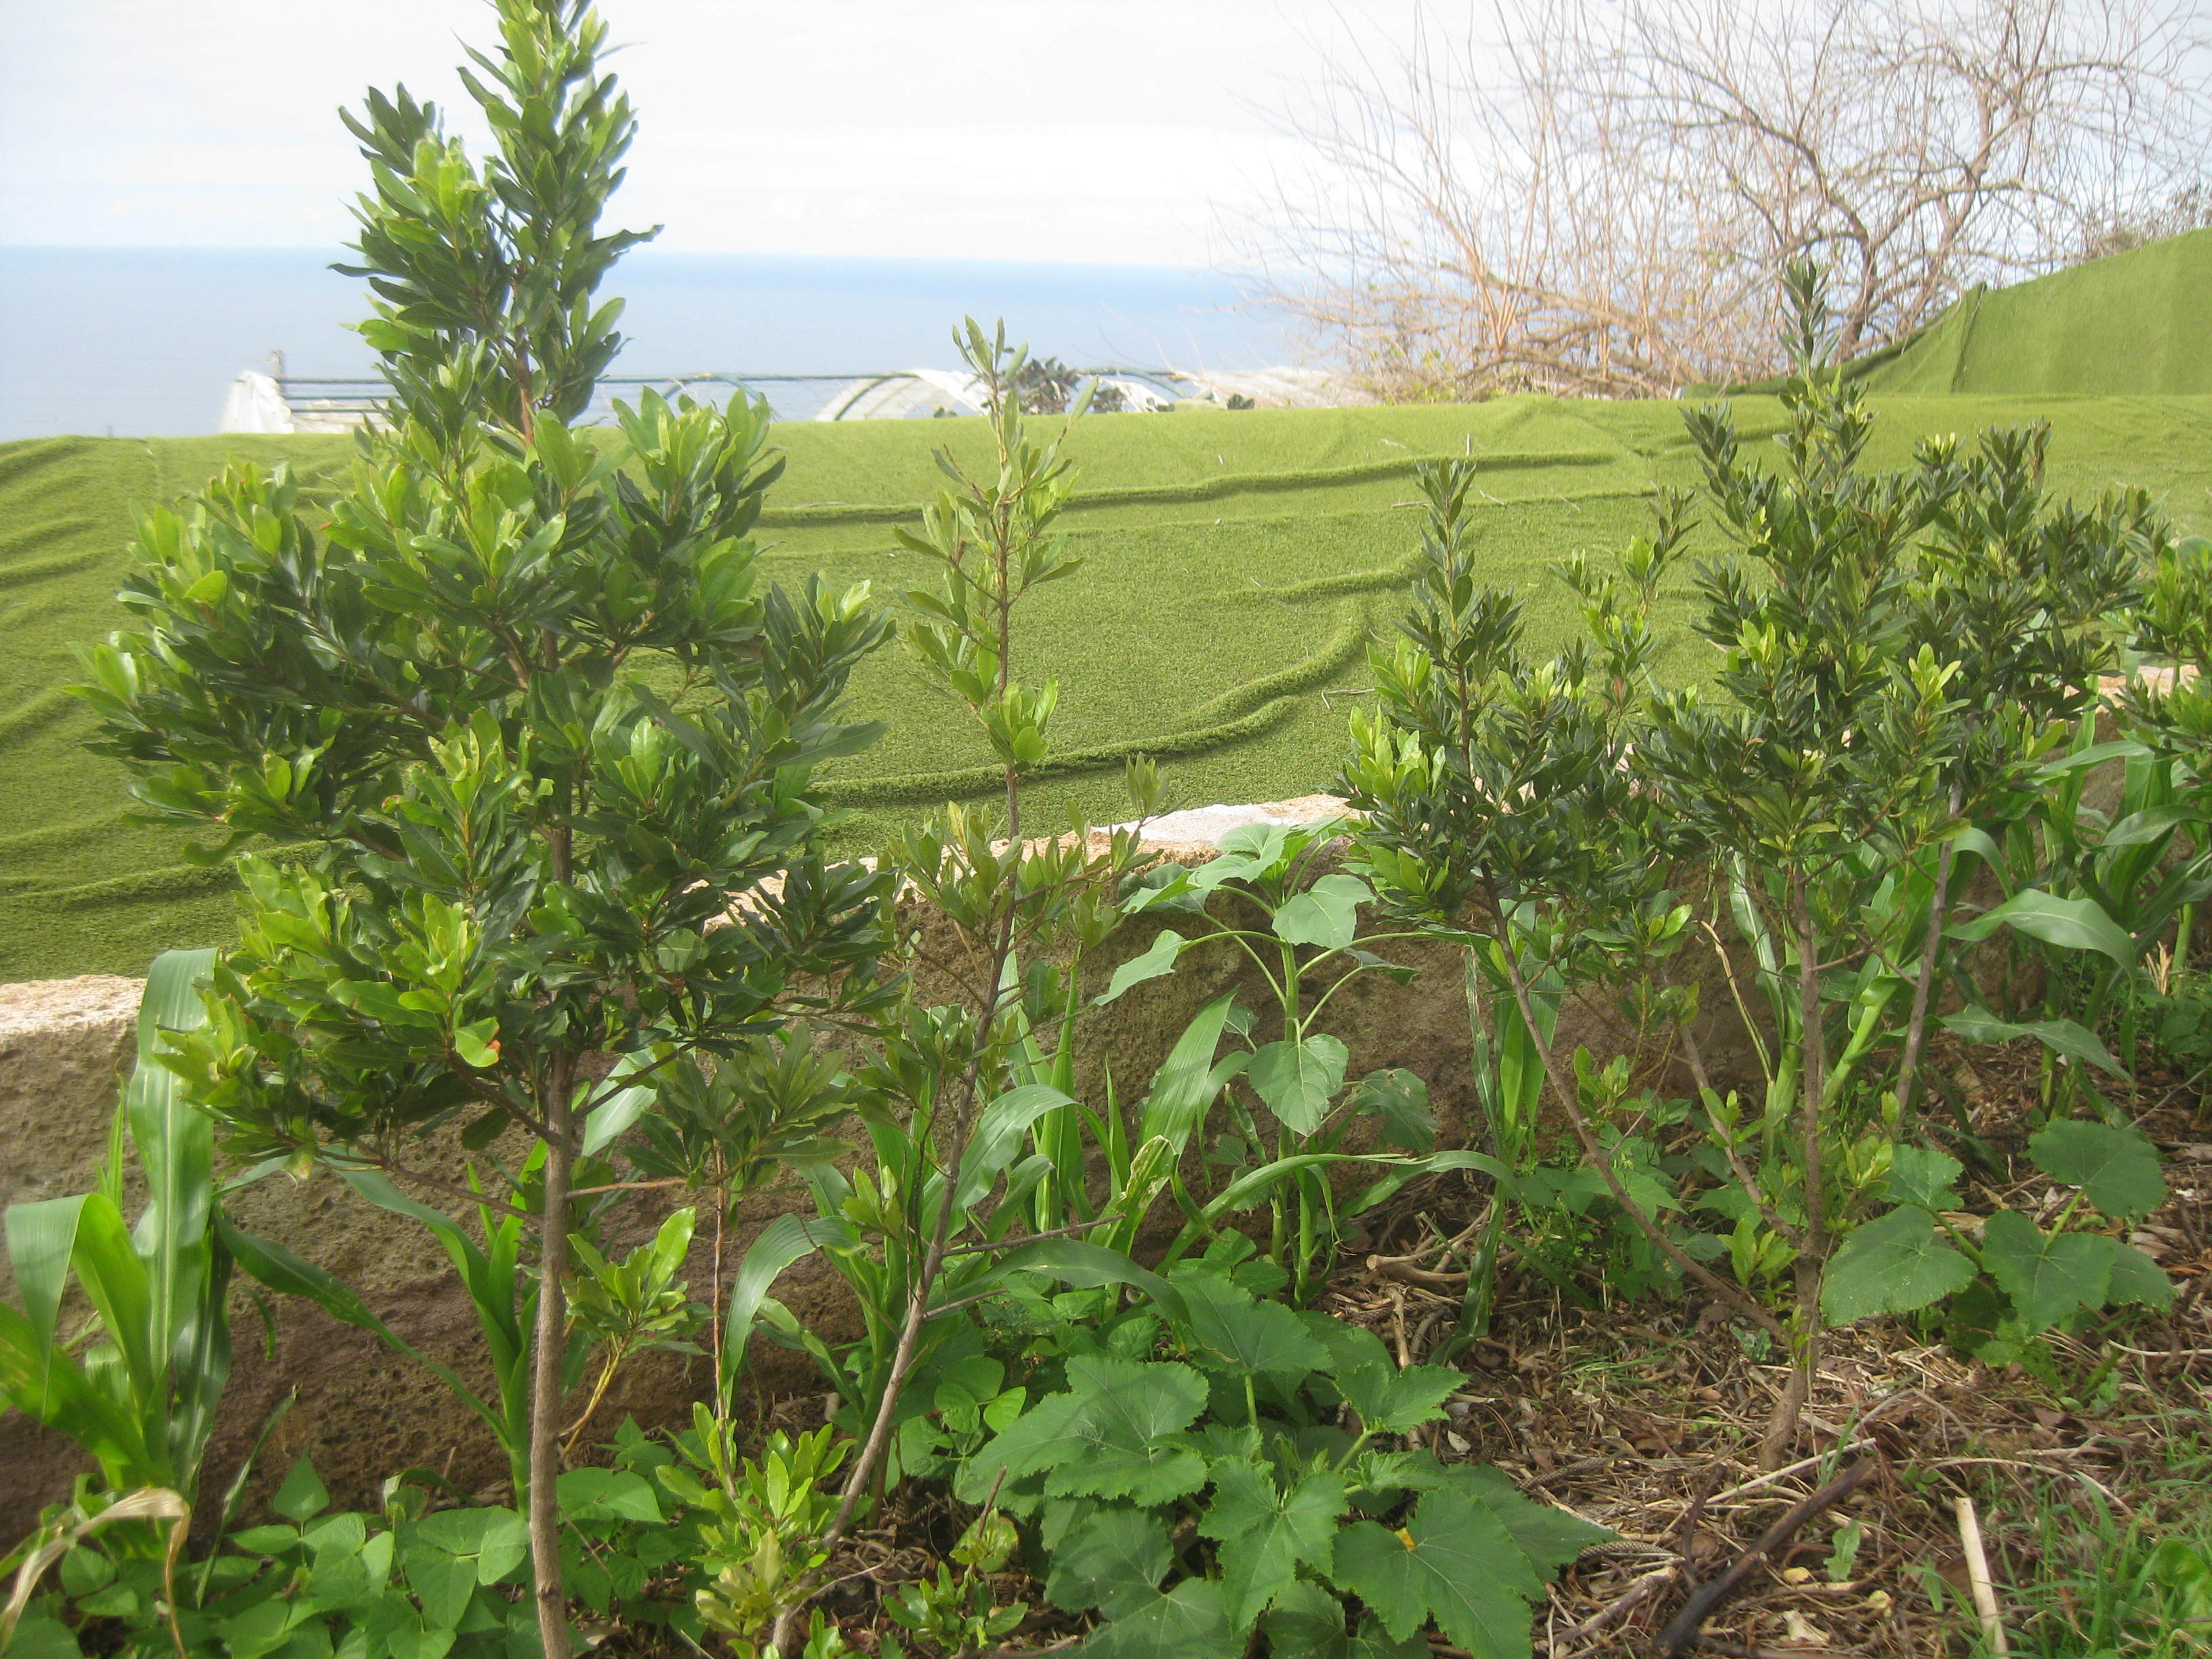
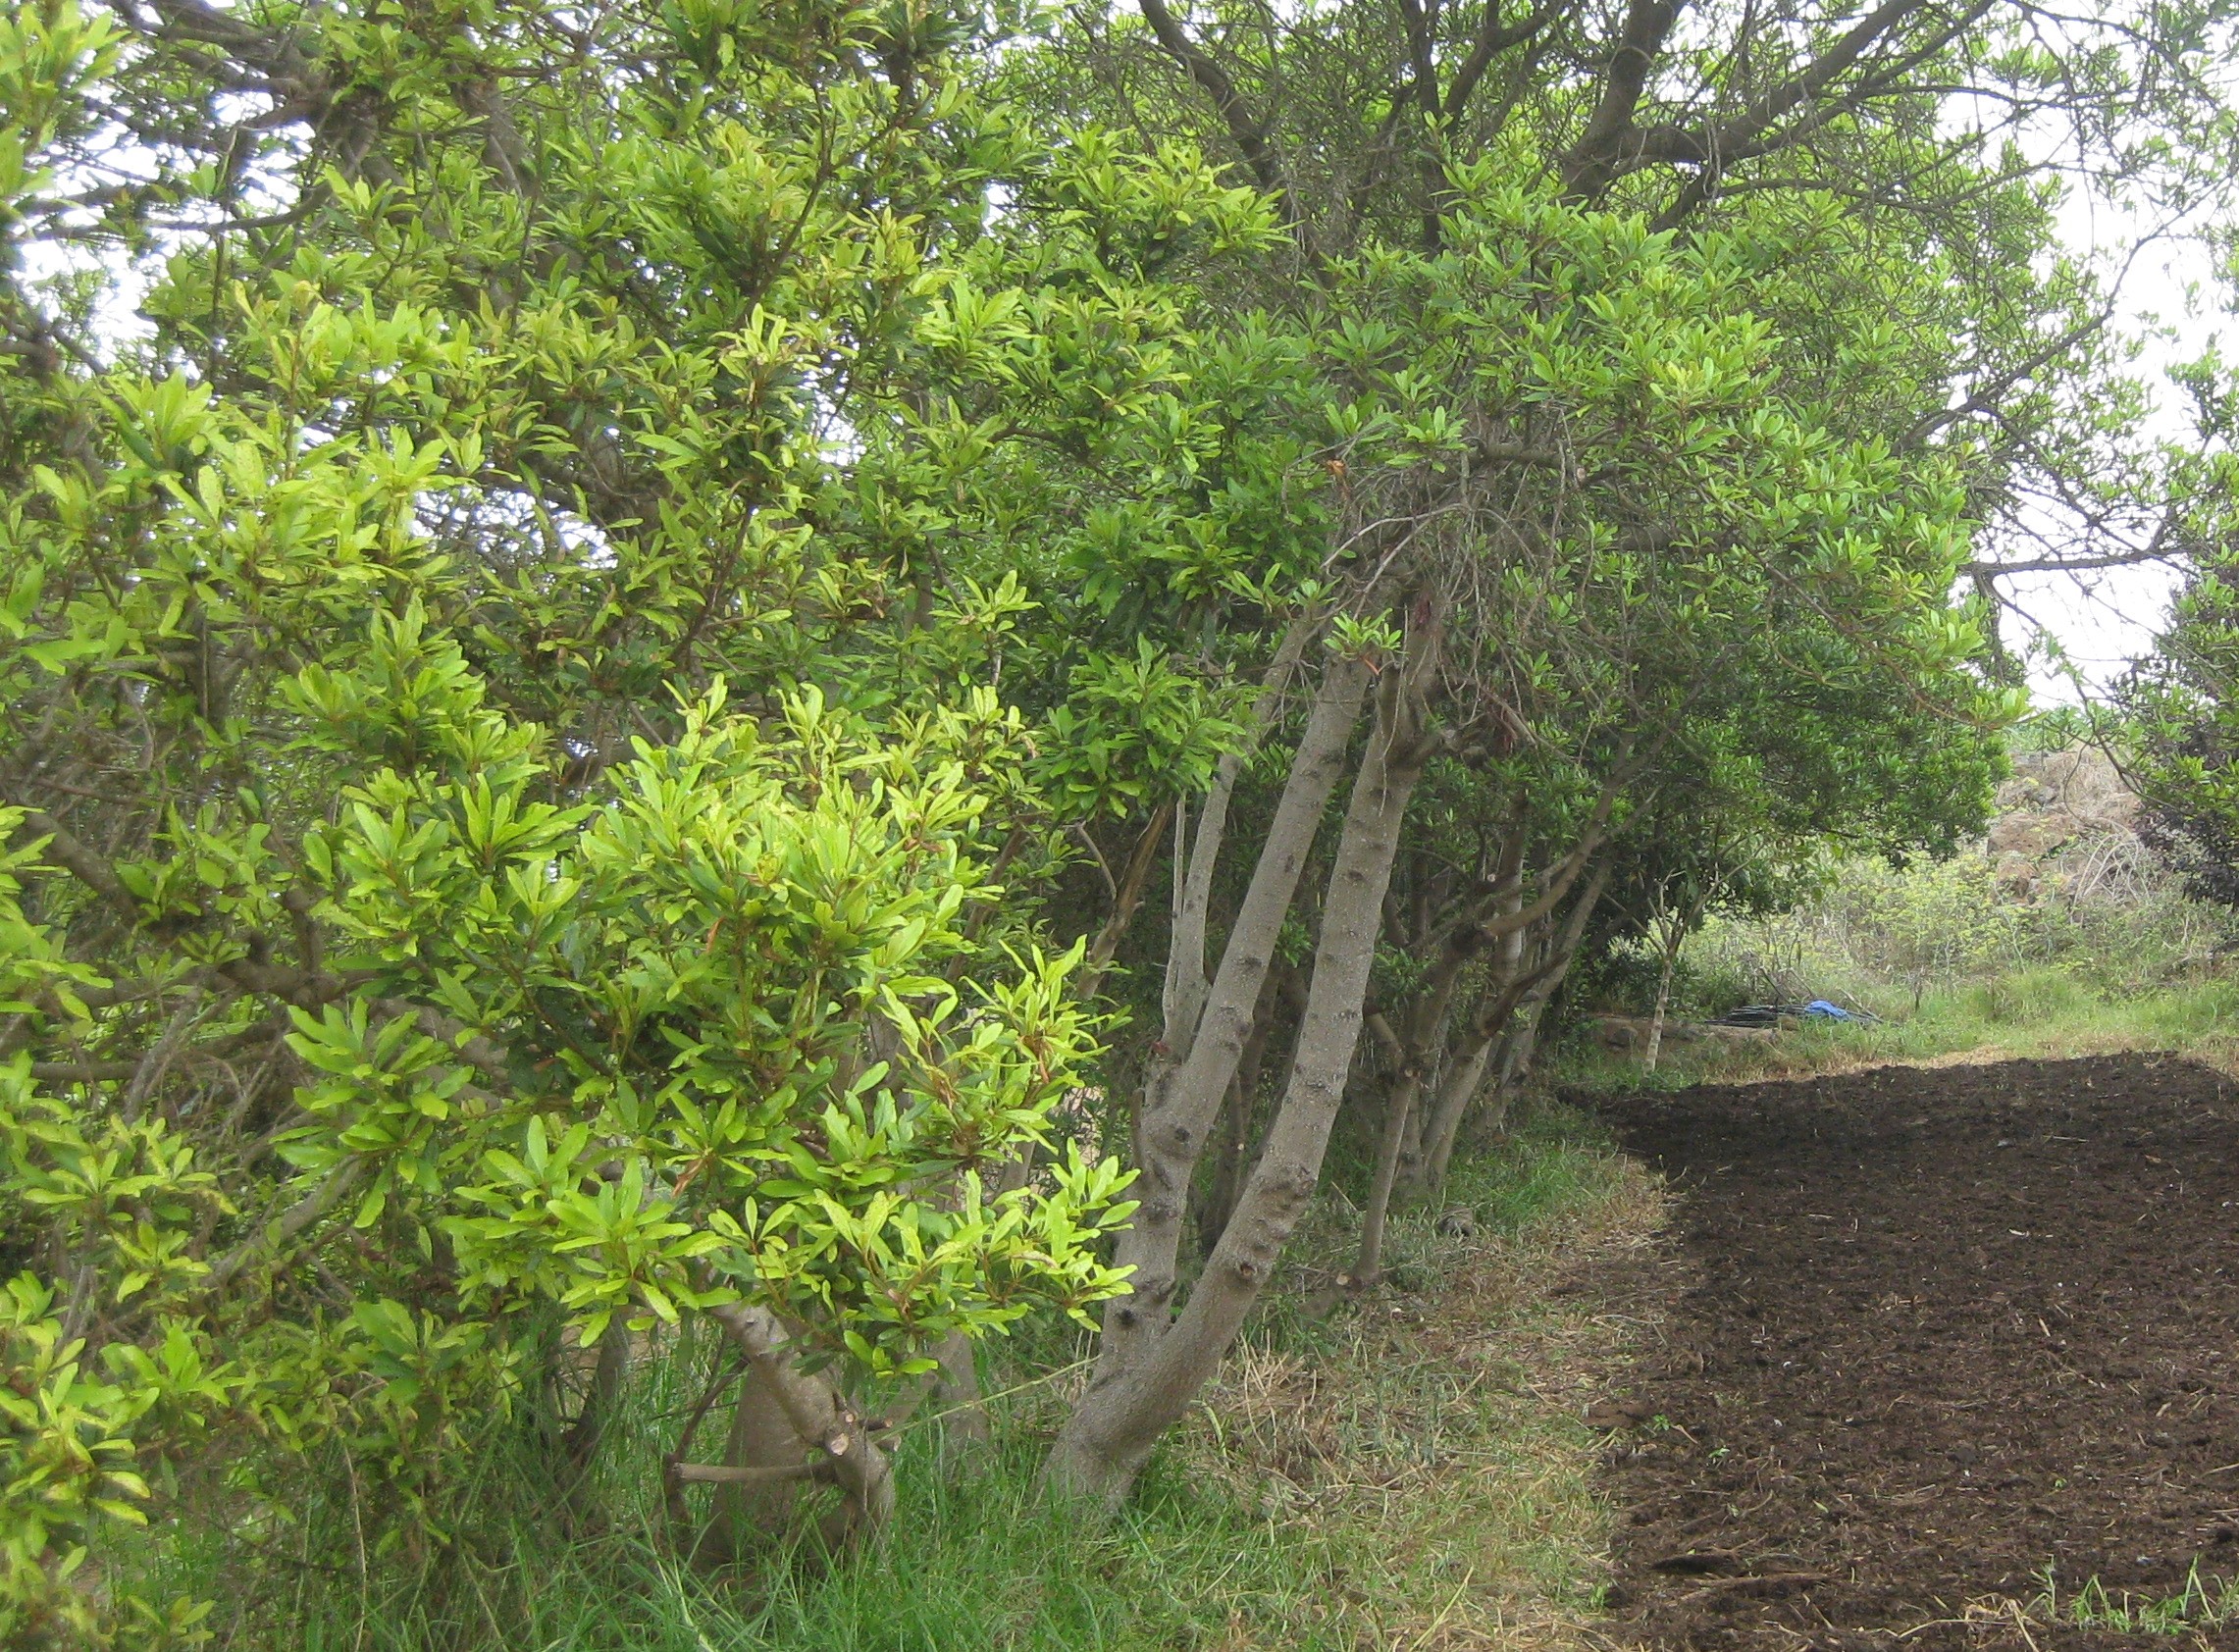
Figure II.15.- The Myrica Faya from the Laurel forest (Canary Islands) as part of the hedge provides fruit, wood, biomass, fodder, fixes atmospheric nitrogen and serves as haven for the nesting birds.

The bushes should be planted in a row to meet the function of wind breaking and protection. They should be planted 1-1.5 meters from each other to accomplish an efficient thickness (Figure II.16).
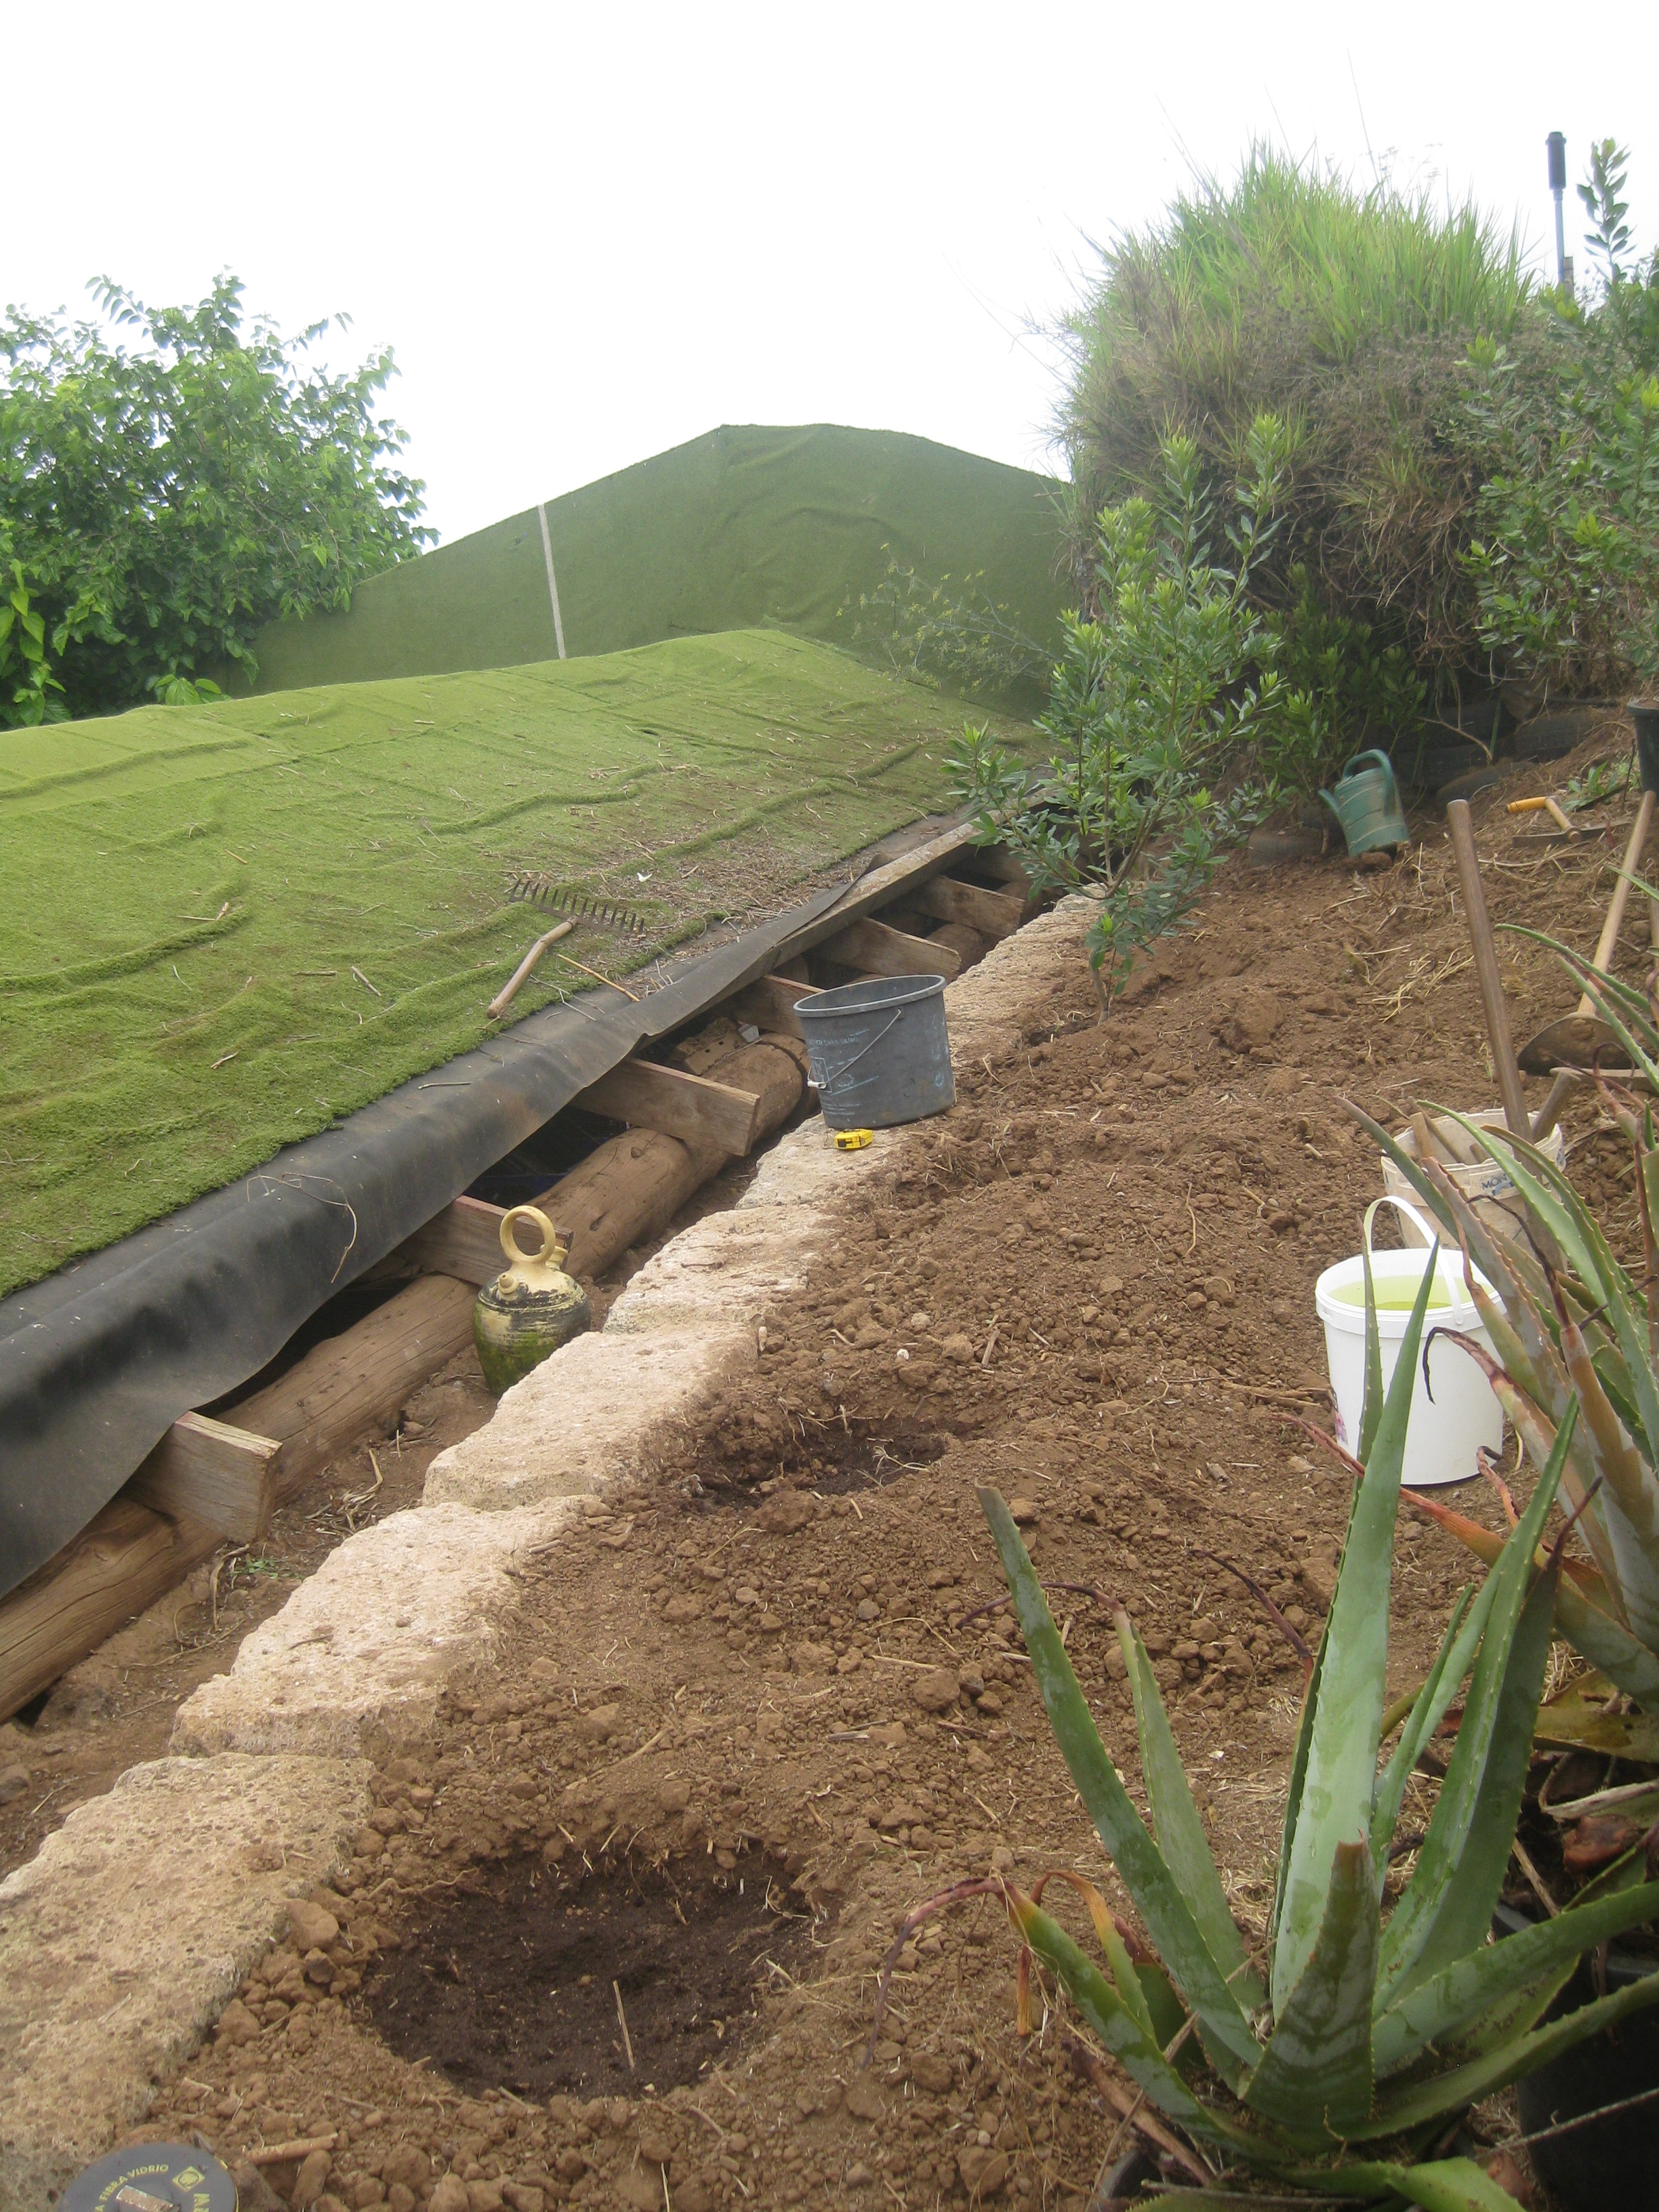
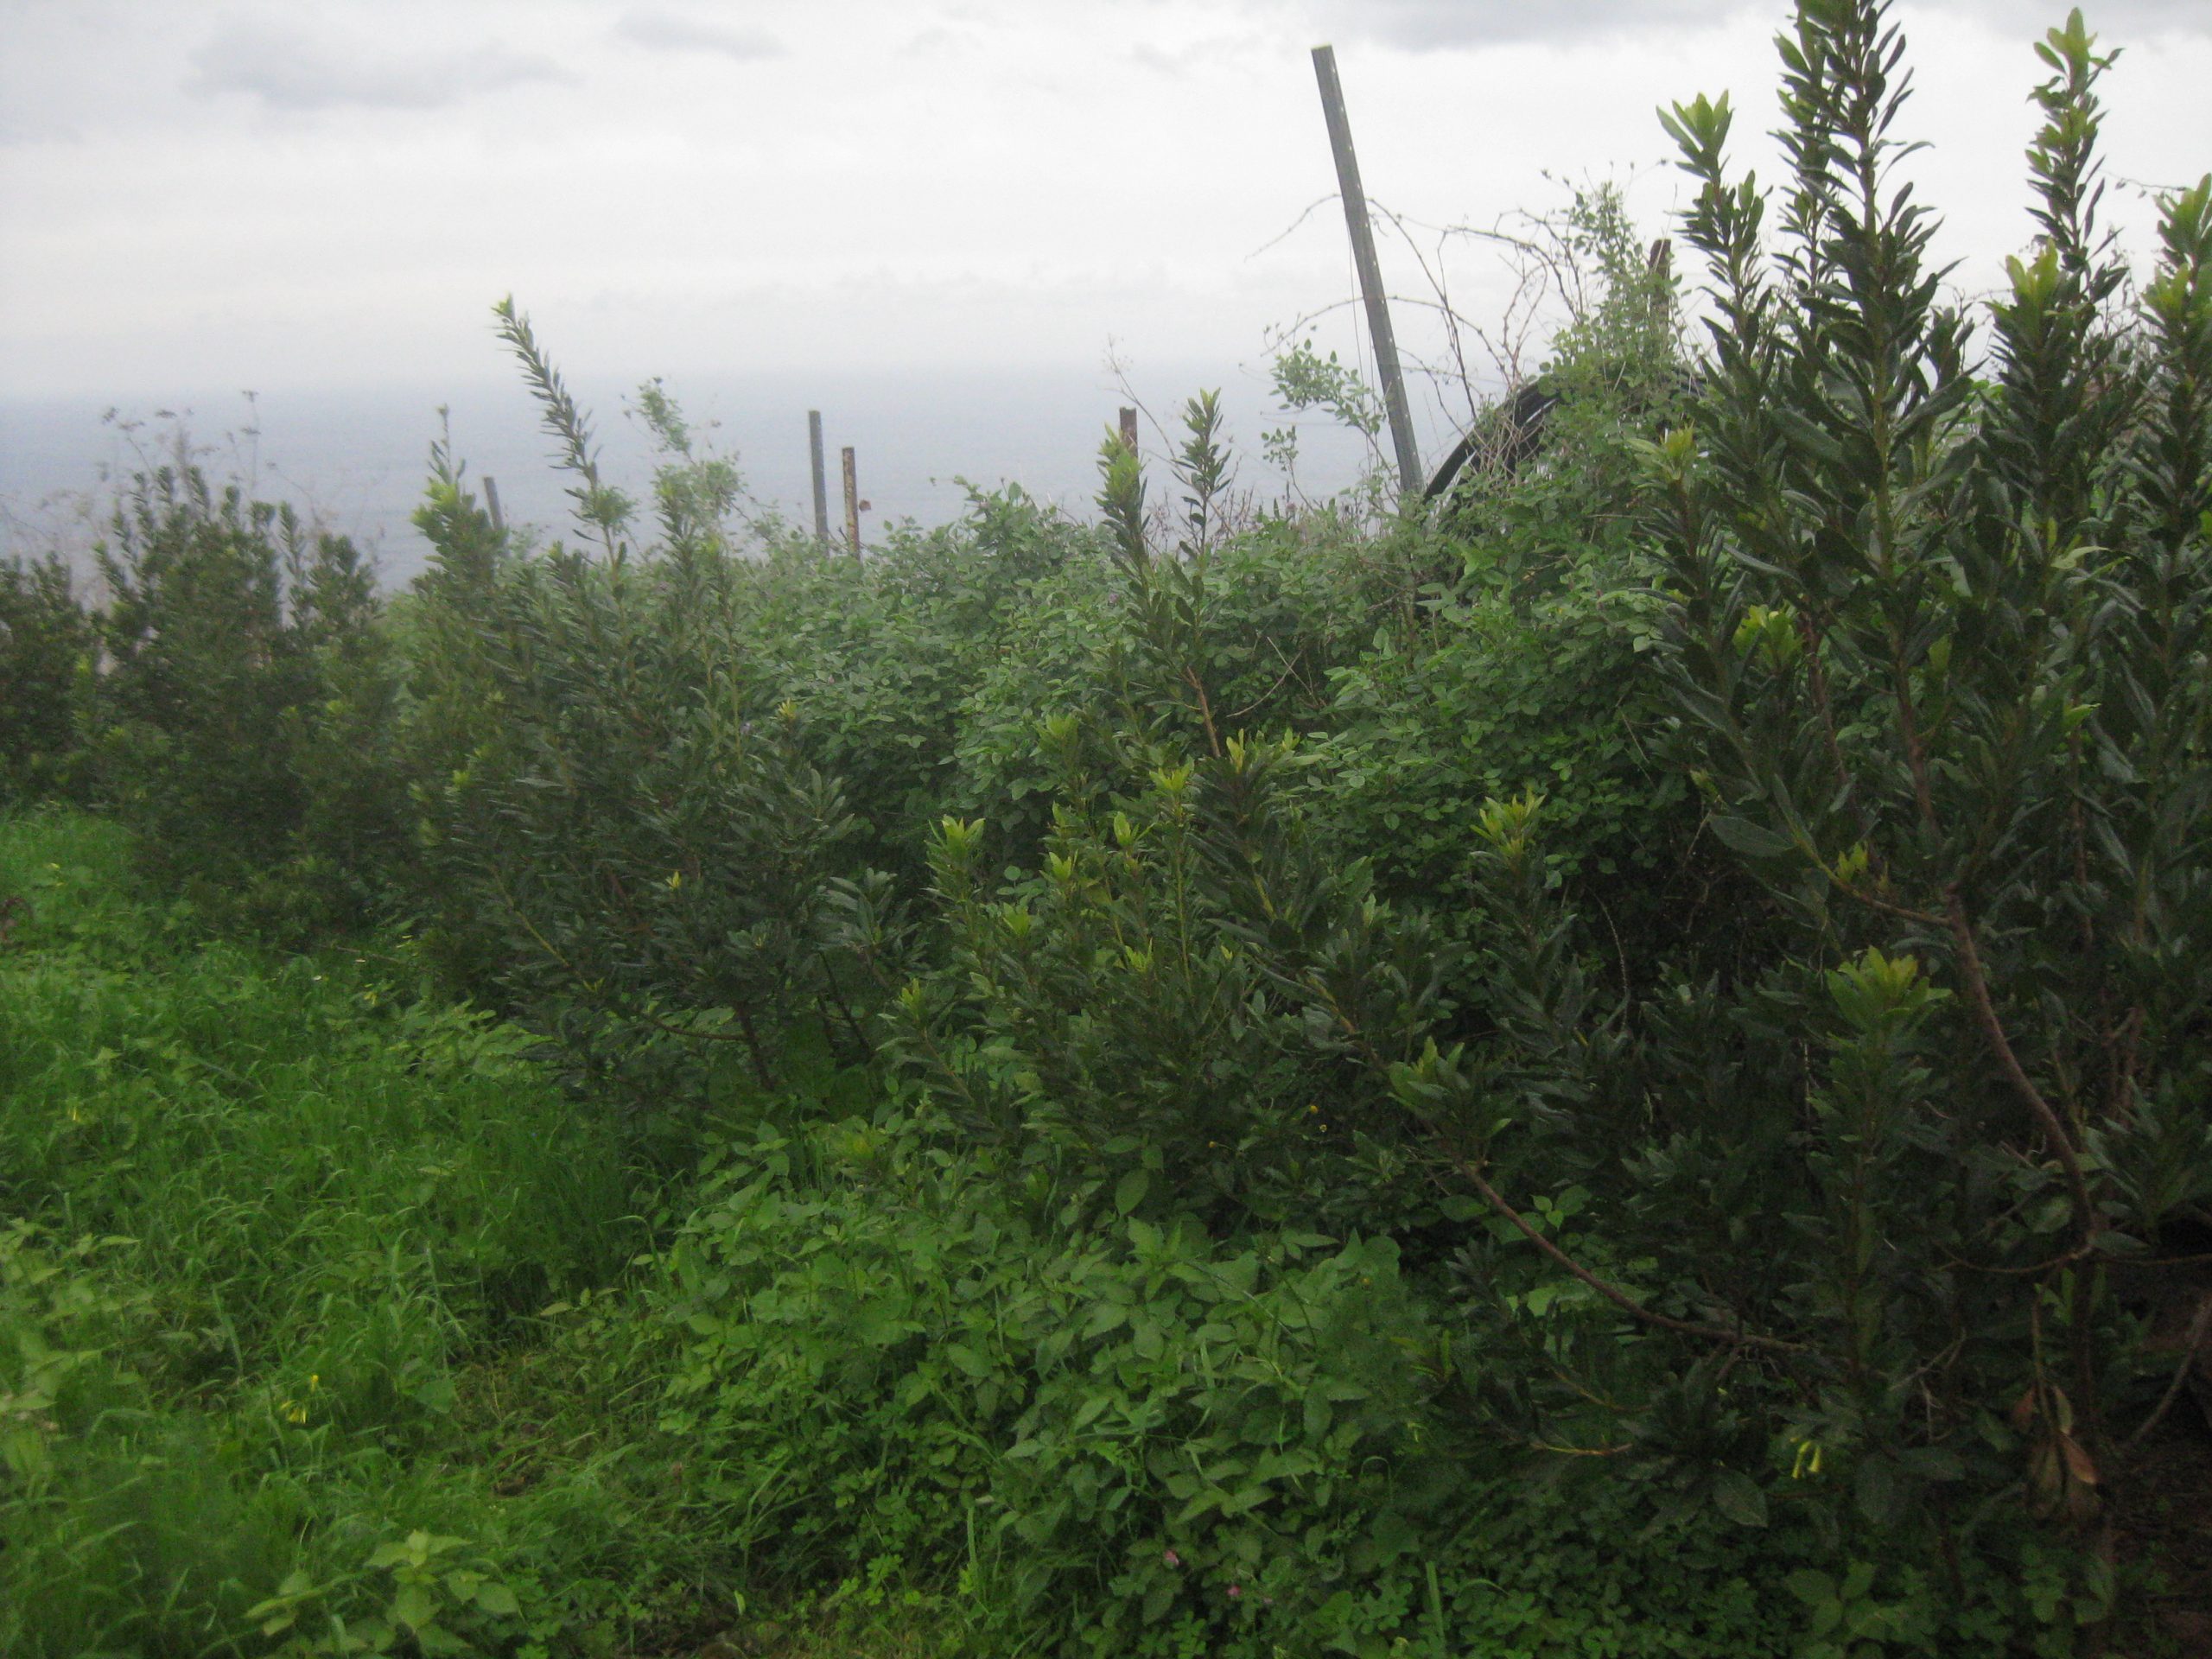
Figure II.16.- Planting and evolution of the hedges
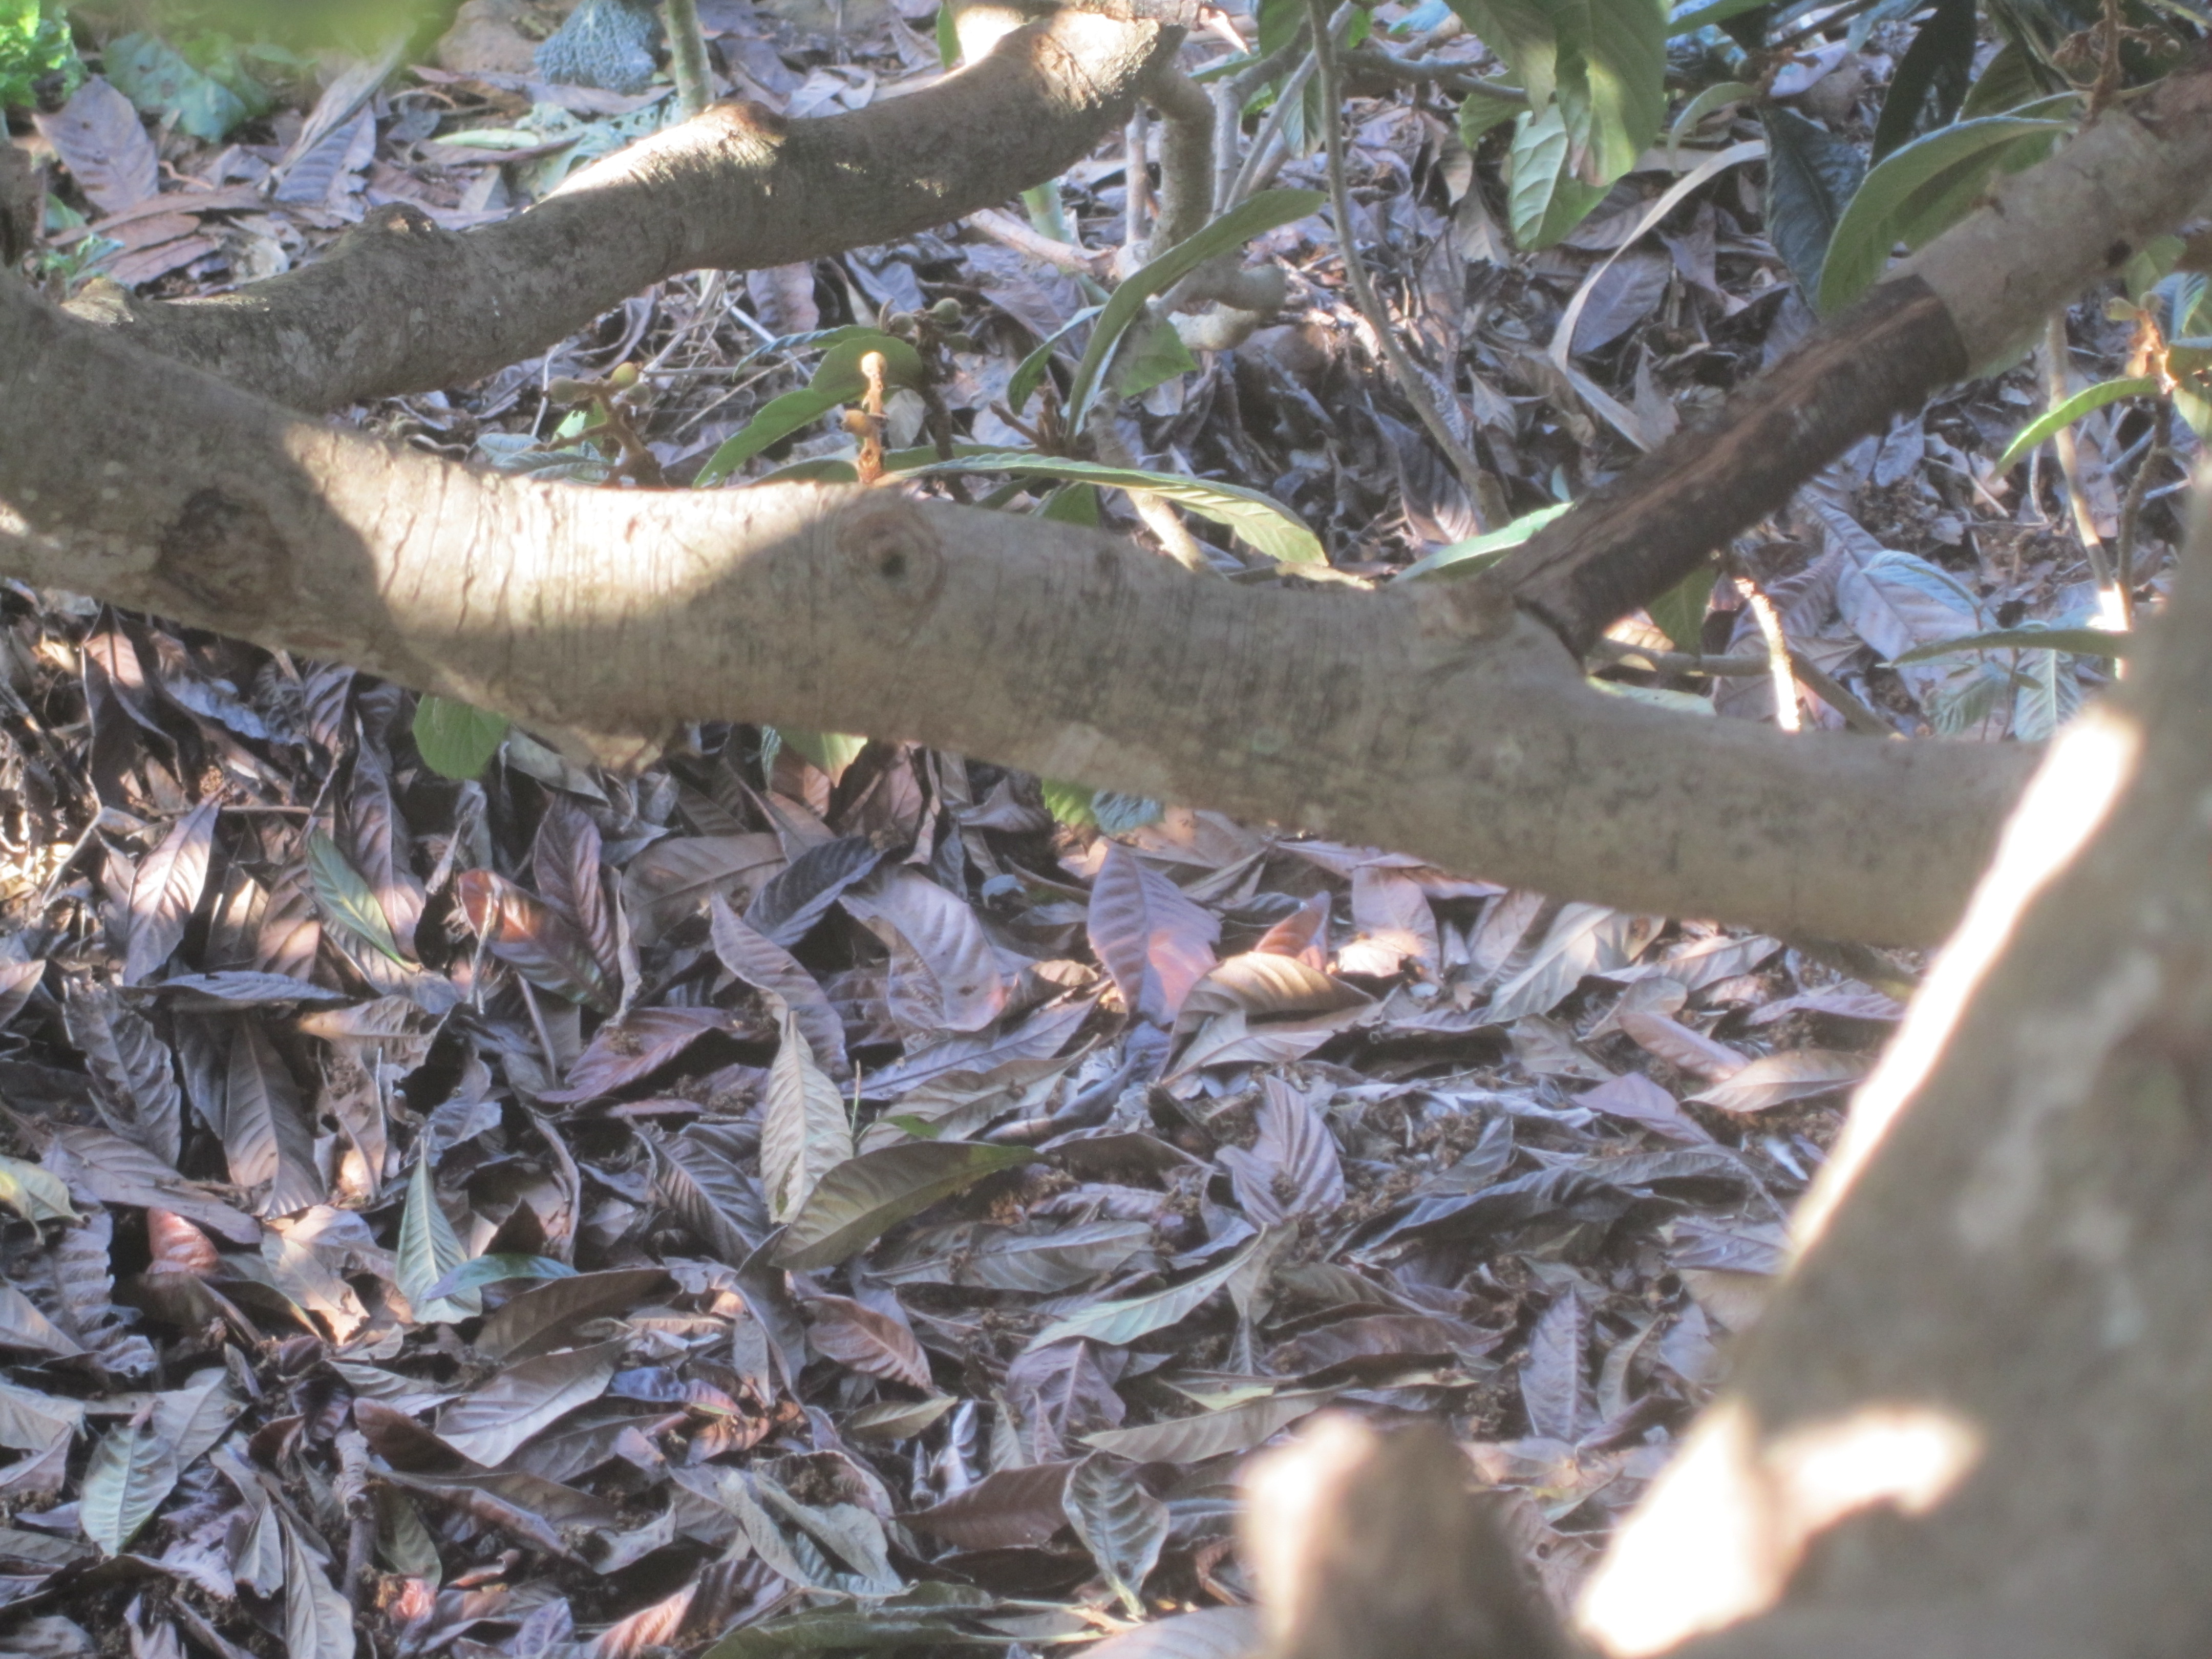
Hedges will also provide biomass for the soil cover of our edible garden, wood, fruit and pasture (Figure II.17), as we will be able to see in the following didactic units.
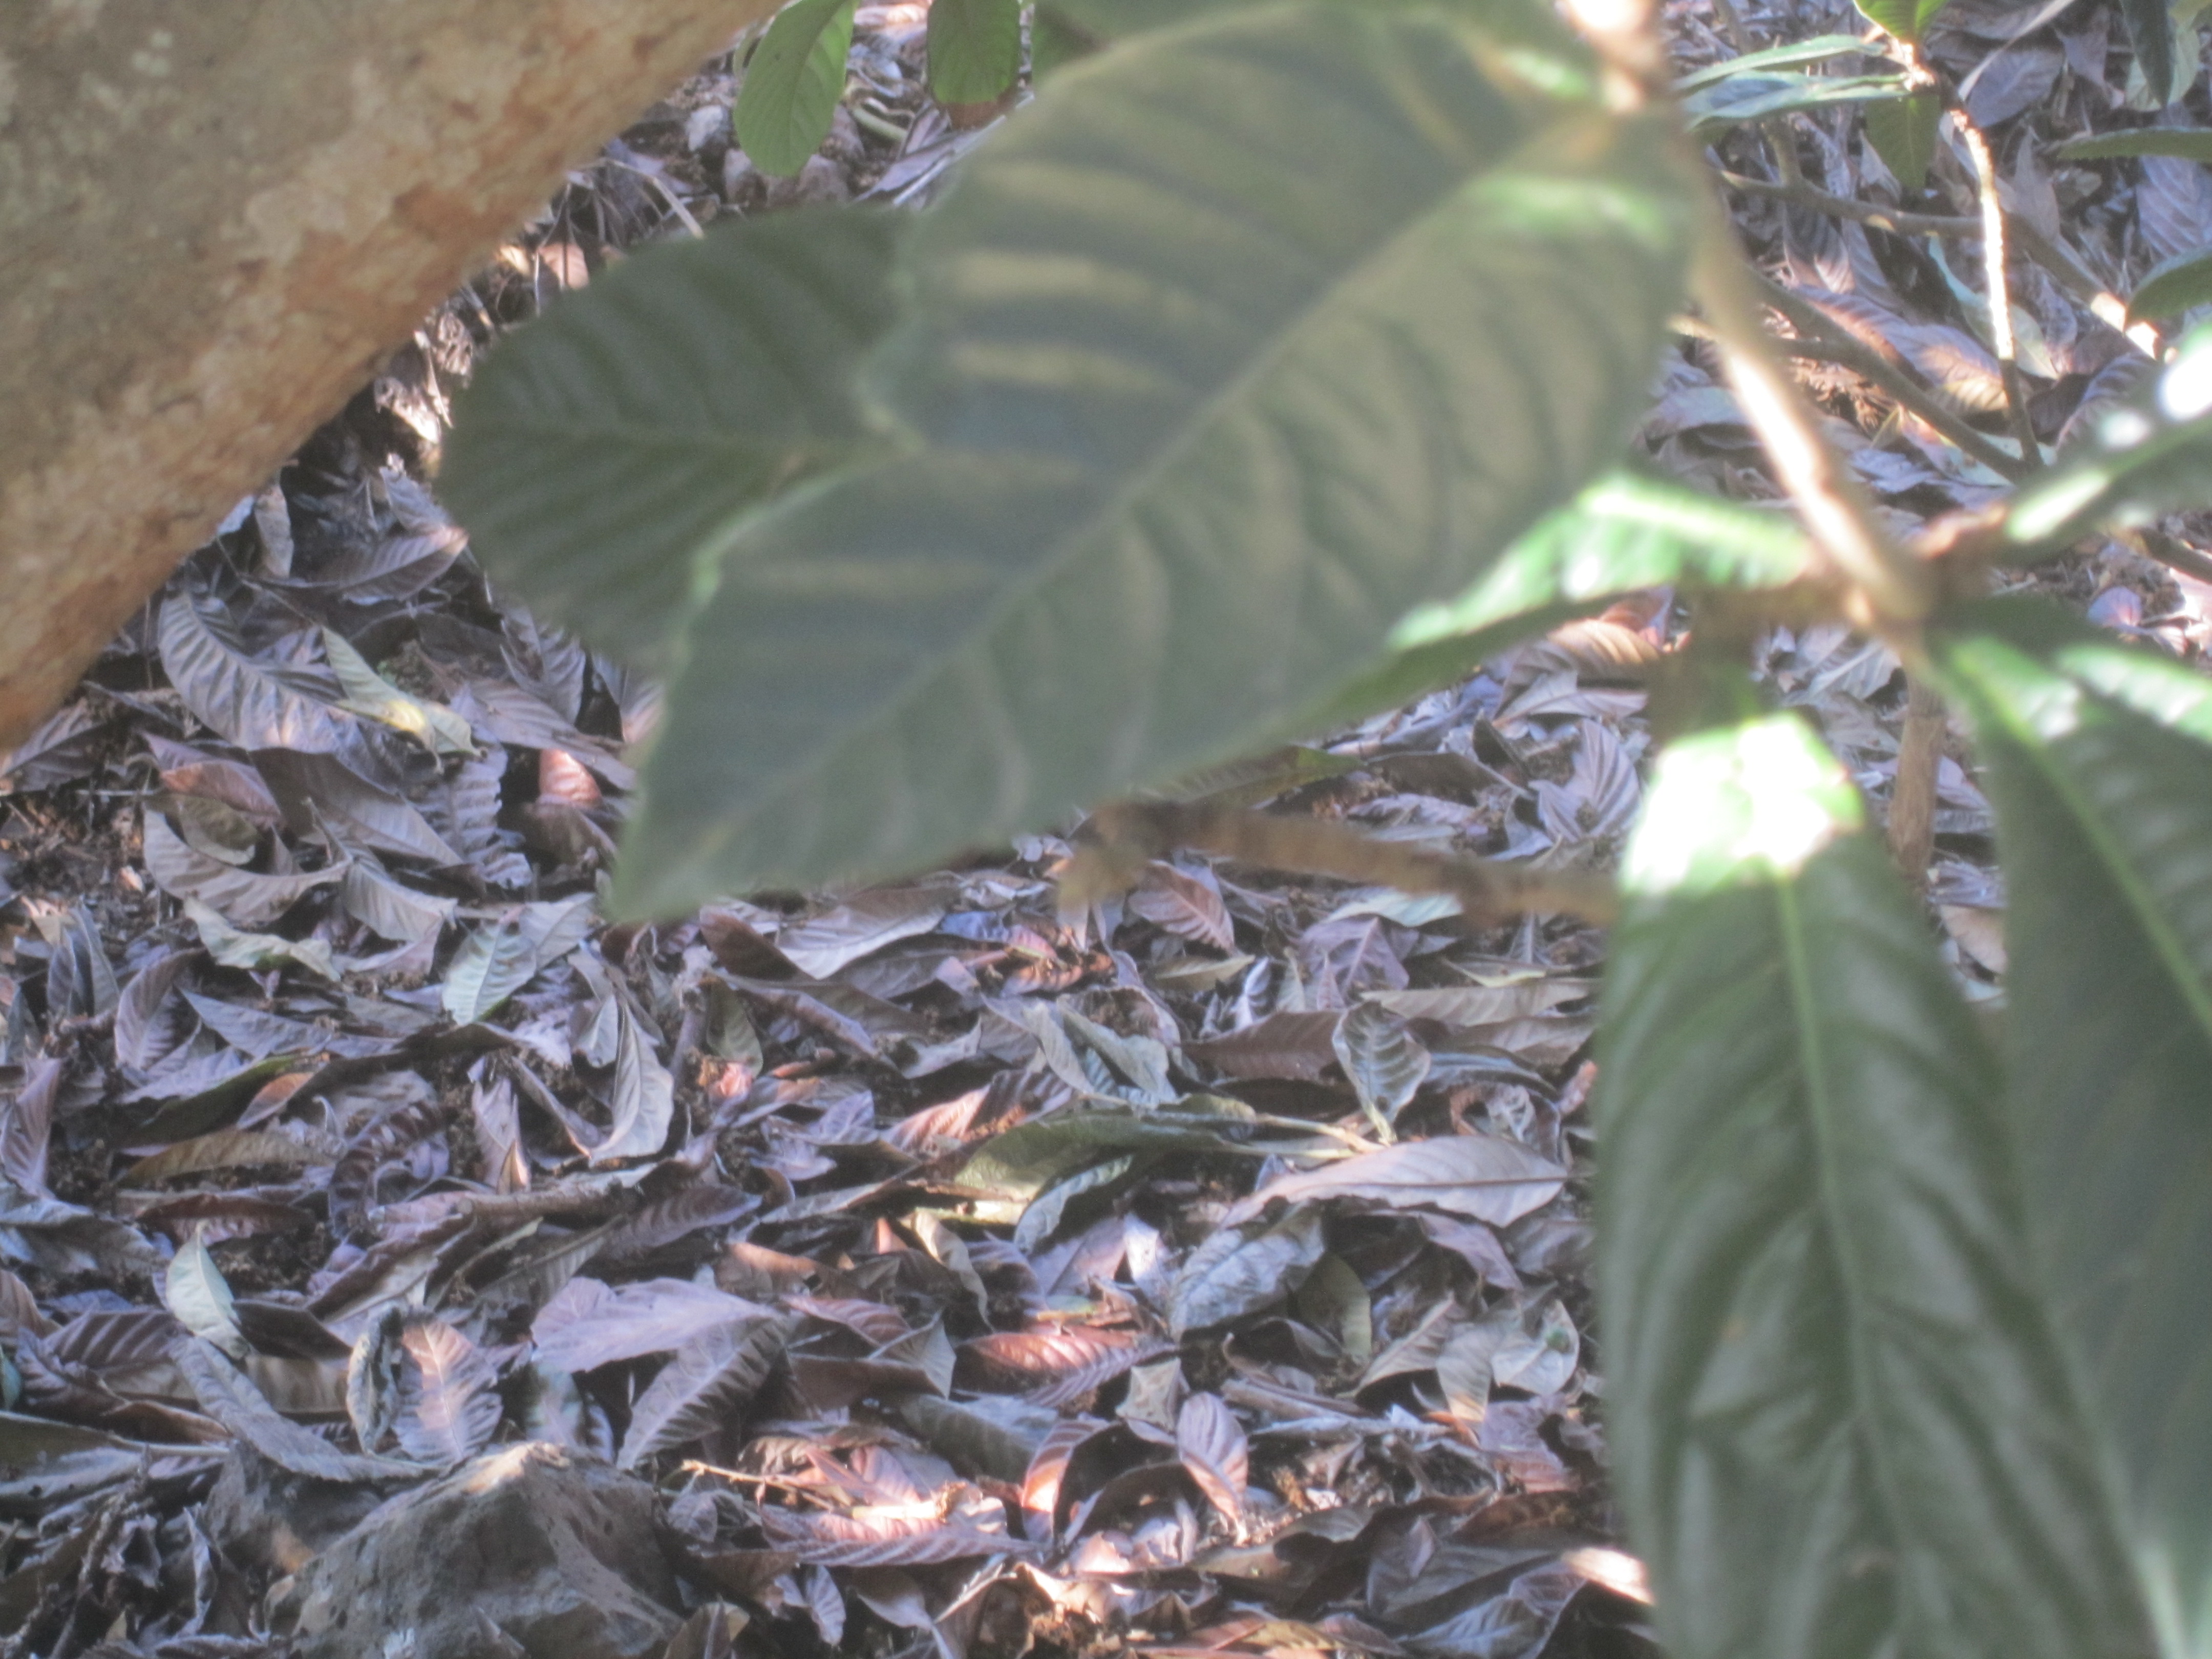
Figure II.17.- Fallen medlar leaves, used as hedges, acting as biomass for the soil
They will also help attracting native animals since they provide the right conditions for the birds to nest (Figure II.18). Therefore this contributes to the biodiversity and the equilibrium of the environment.
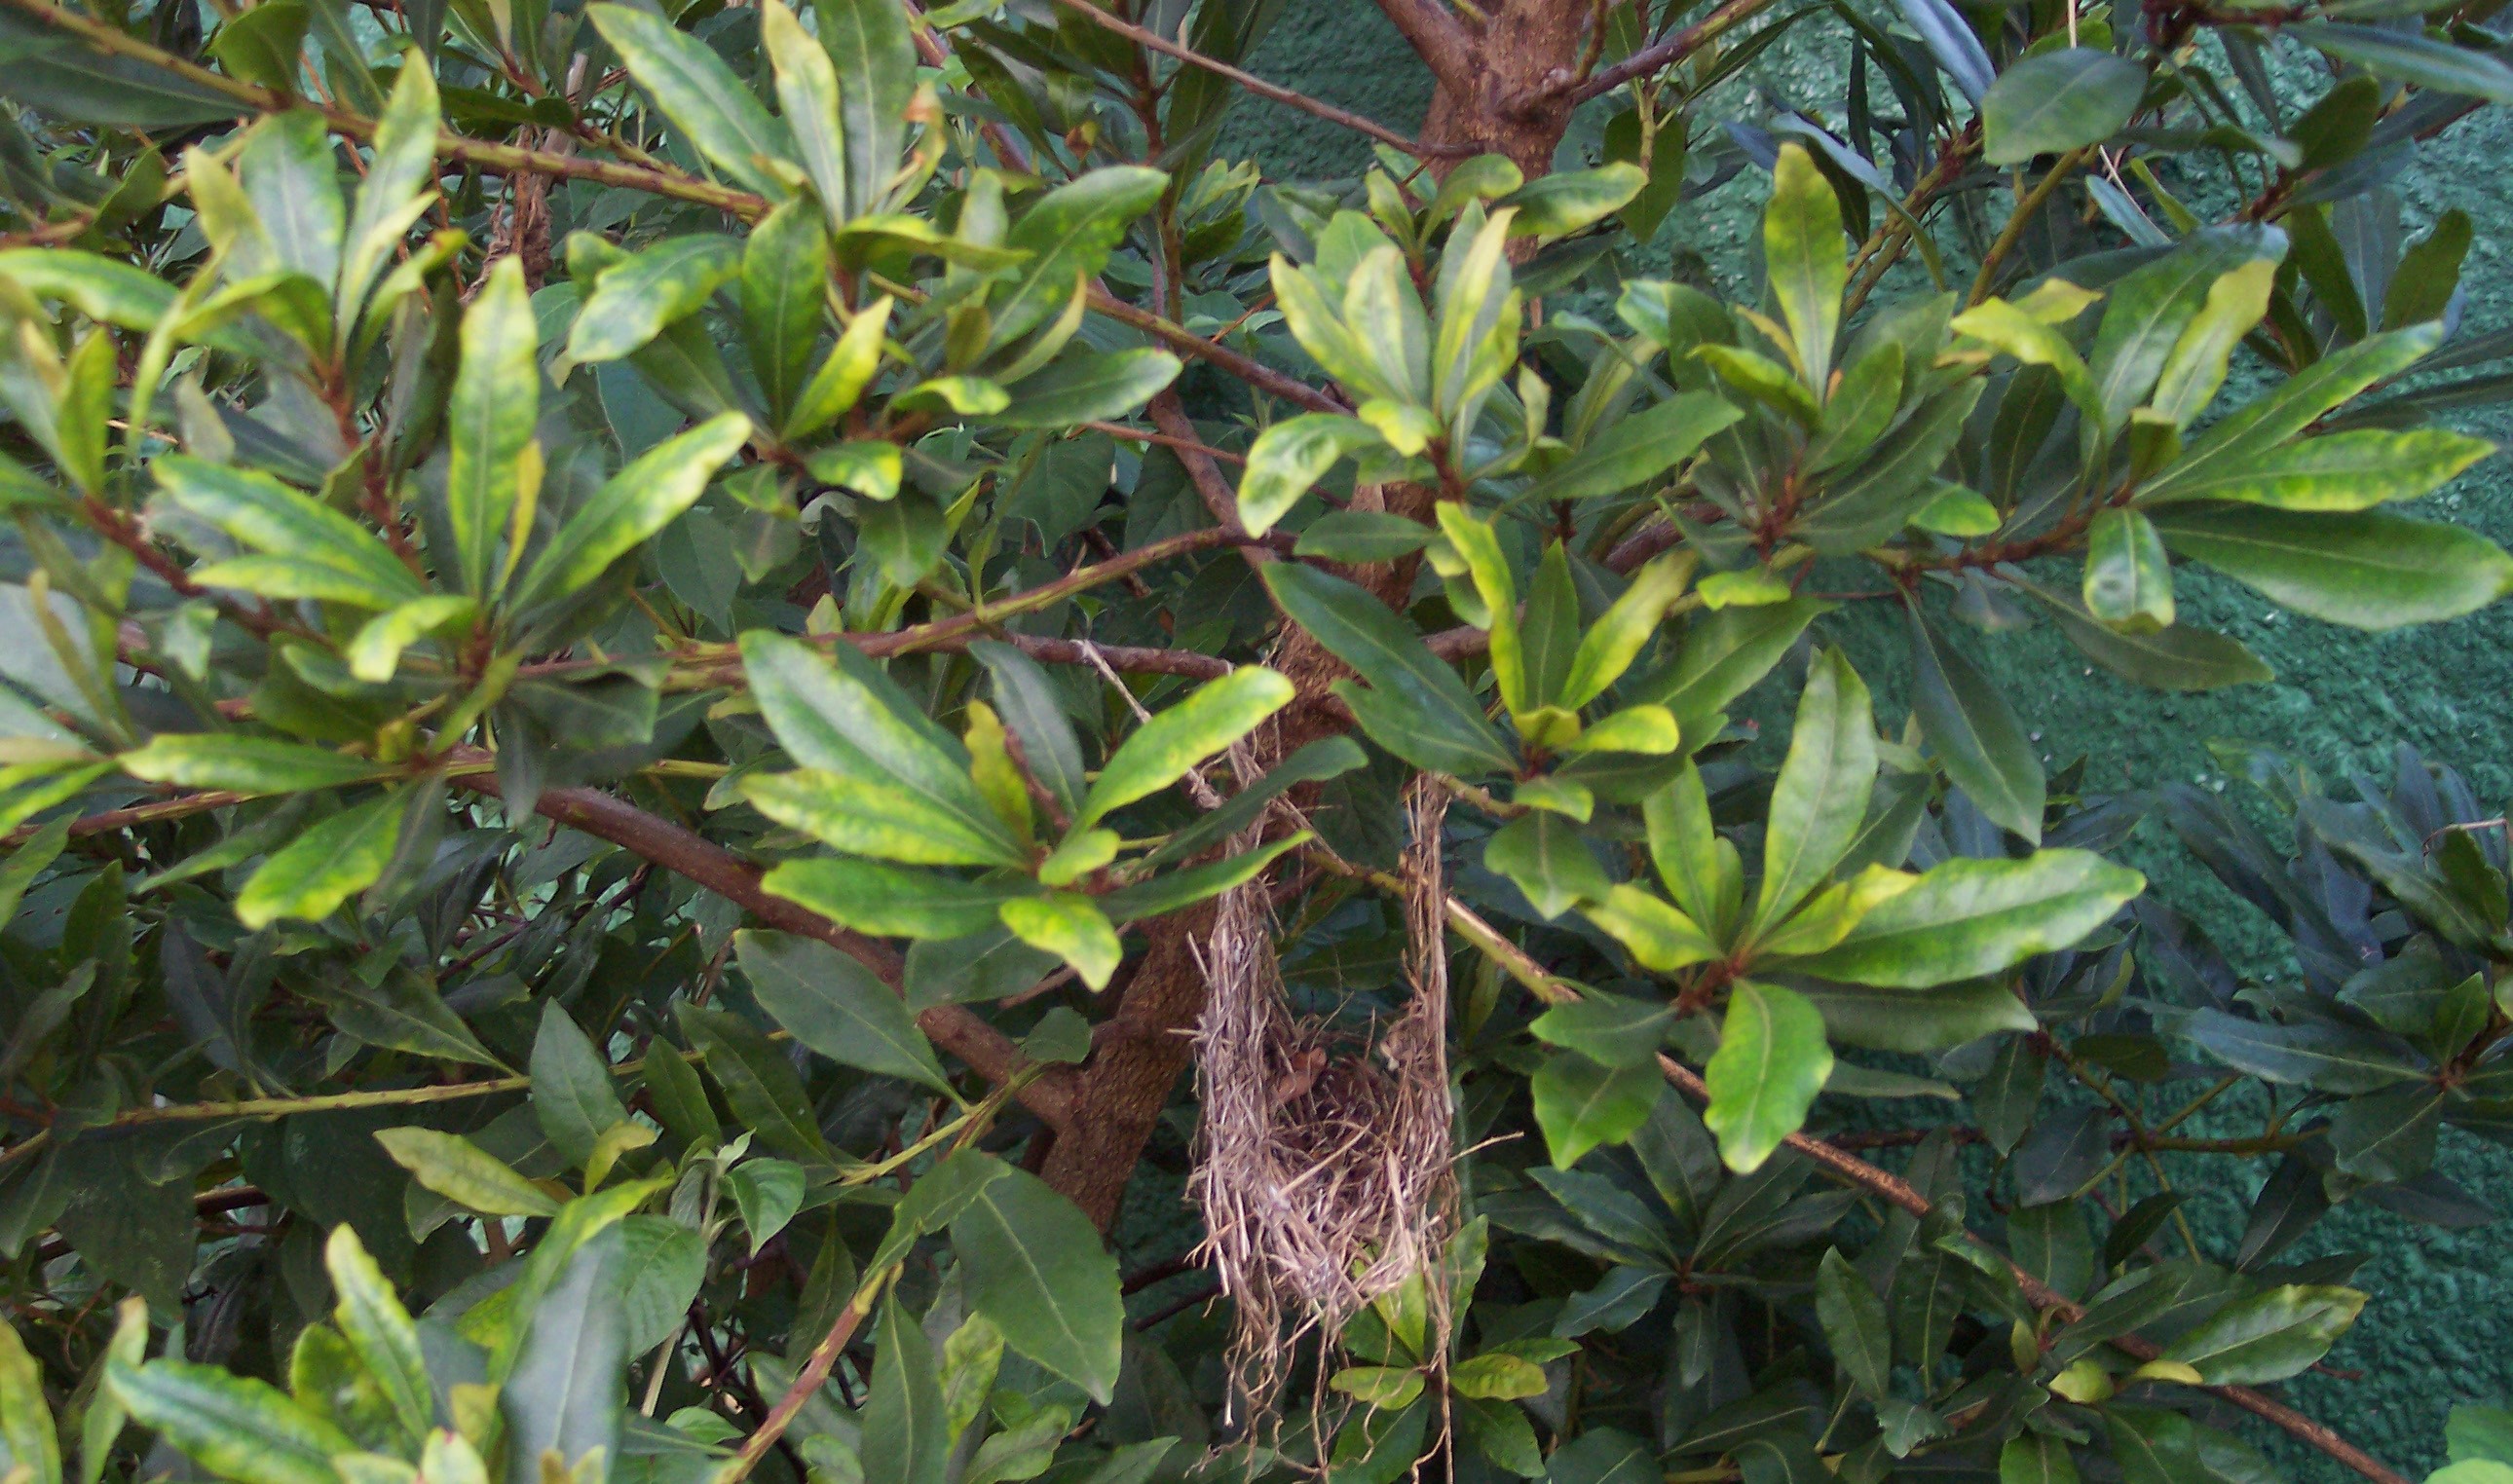
Figure II.18.- Images of a nest under construction and another already made
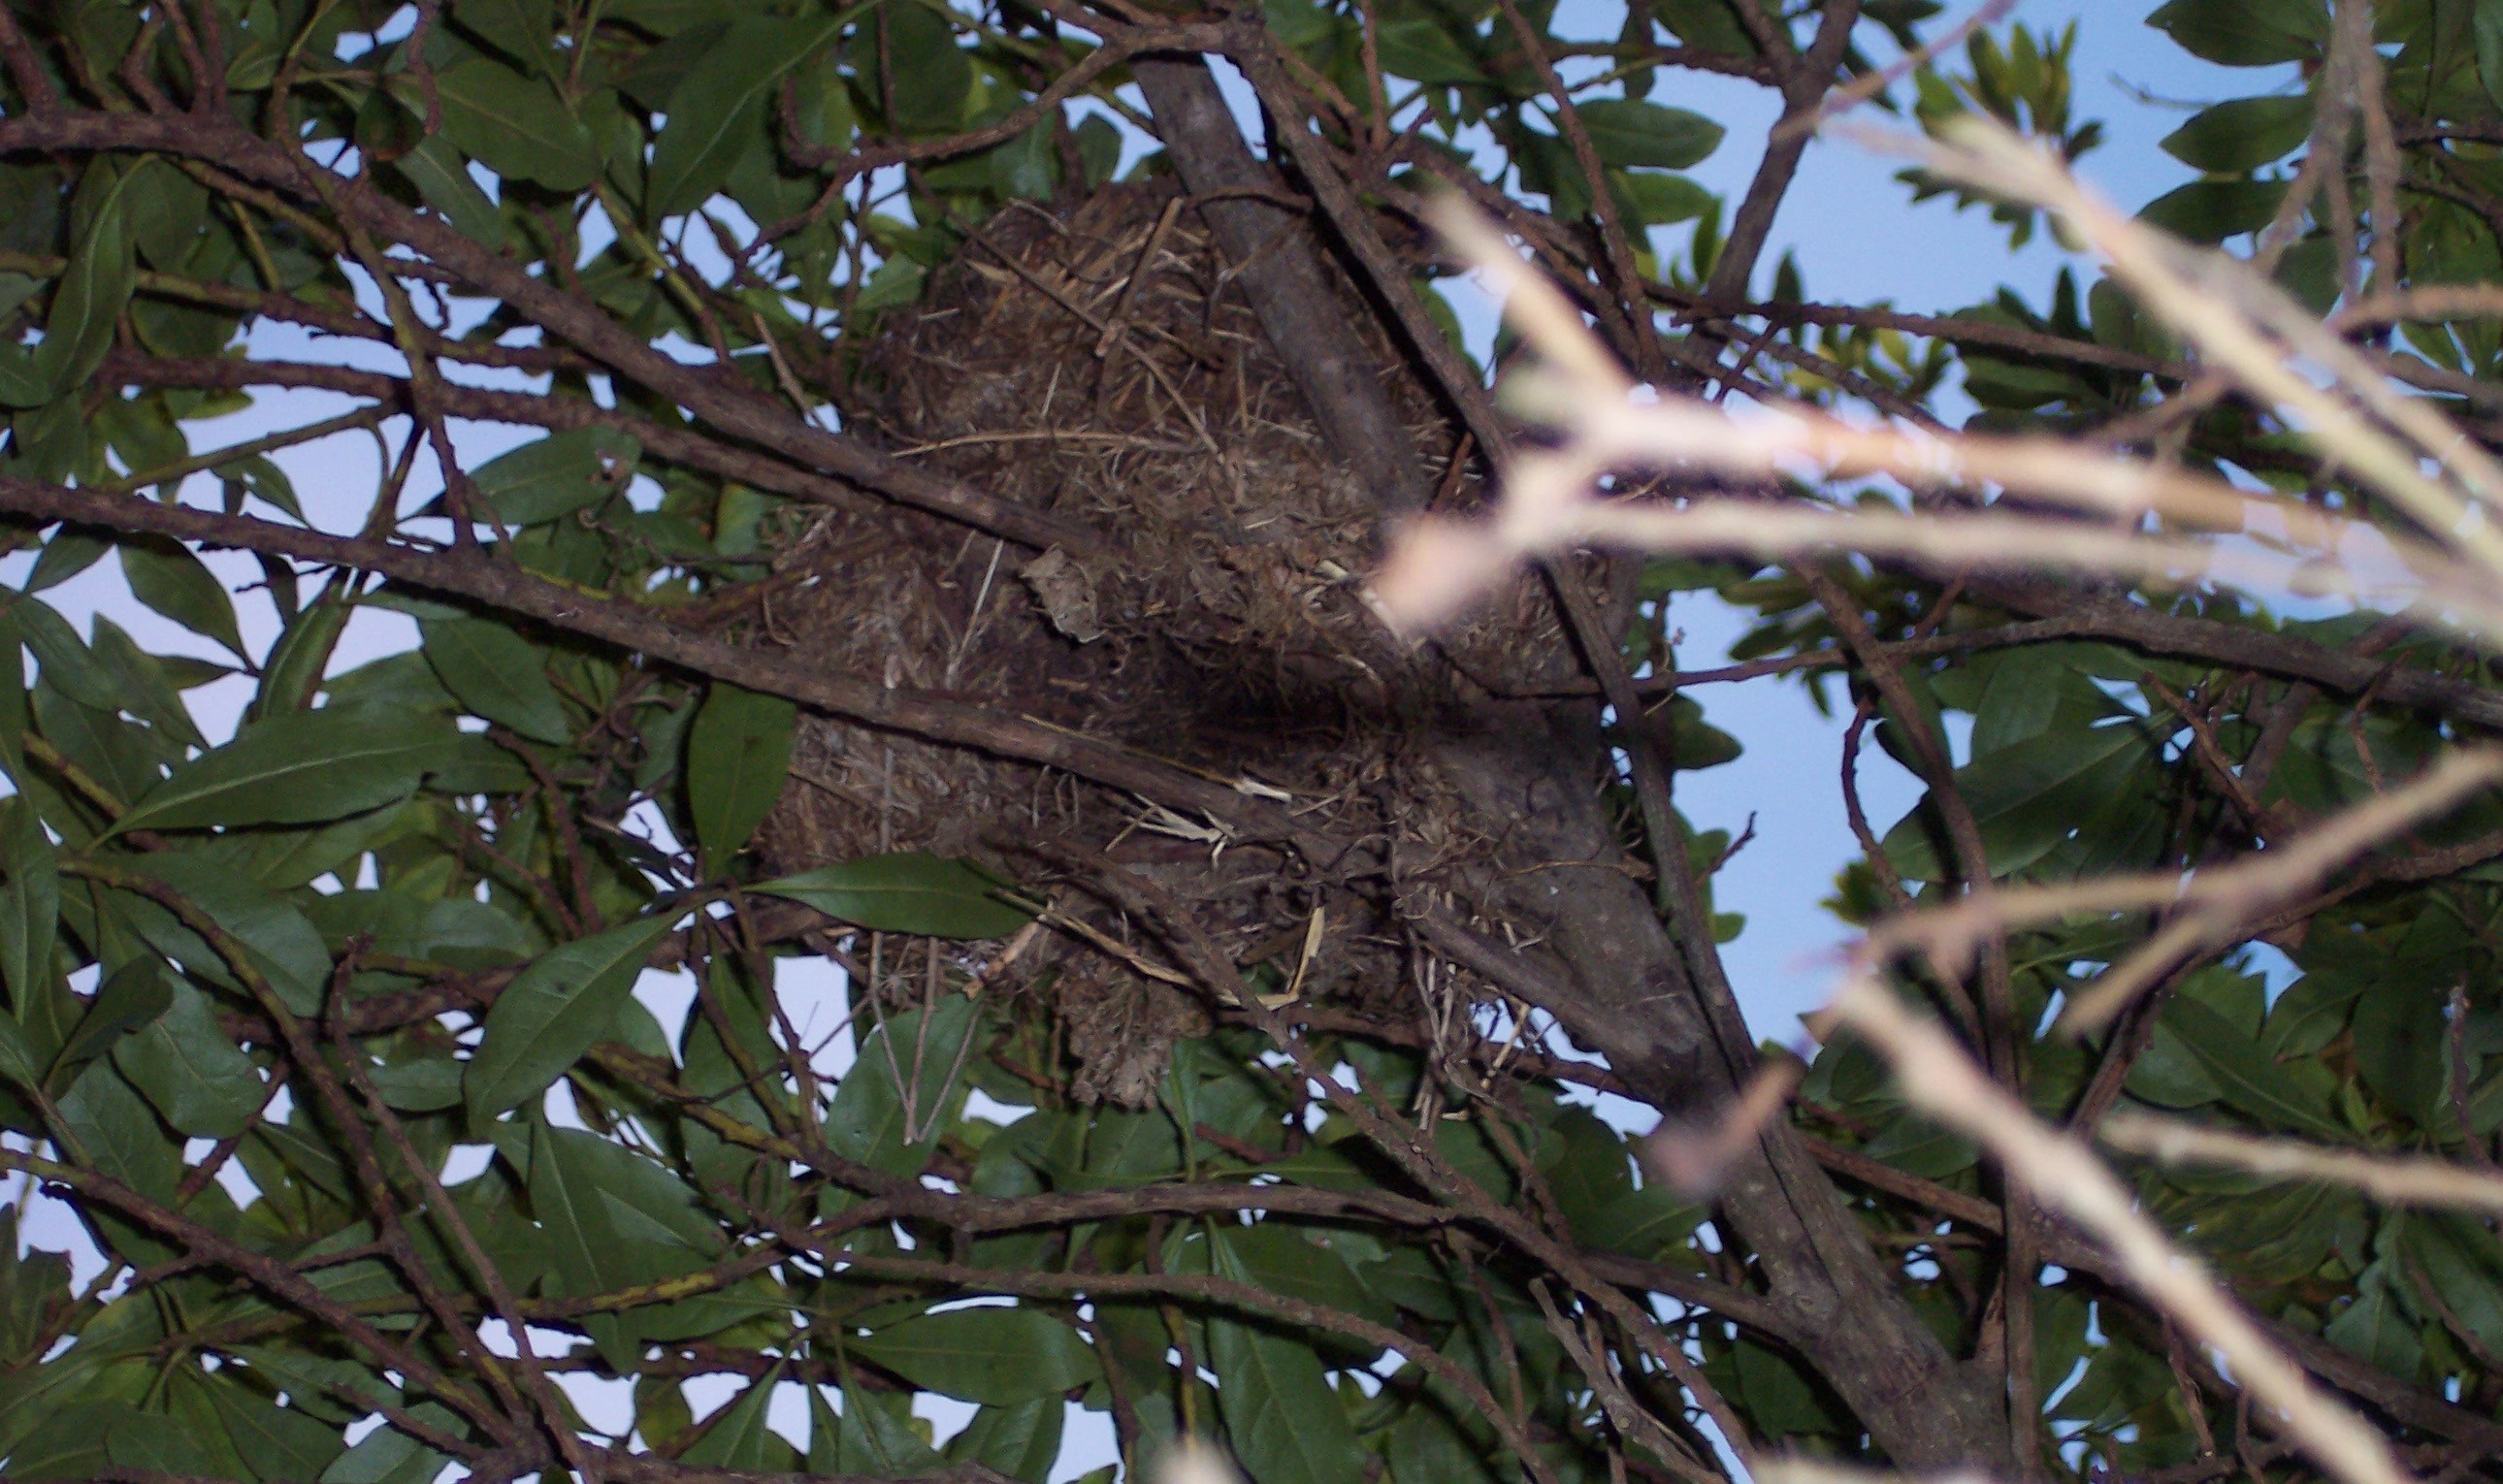
The hedges area is another interesting place for observation and learning for our users since it can show its various functions (nesting, sighting of birds and other animals, protective screen, biomass generation…).
II.5 Biotopes attracting animal life
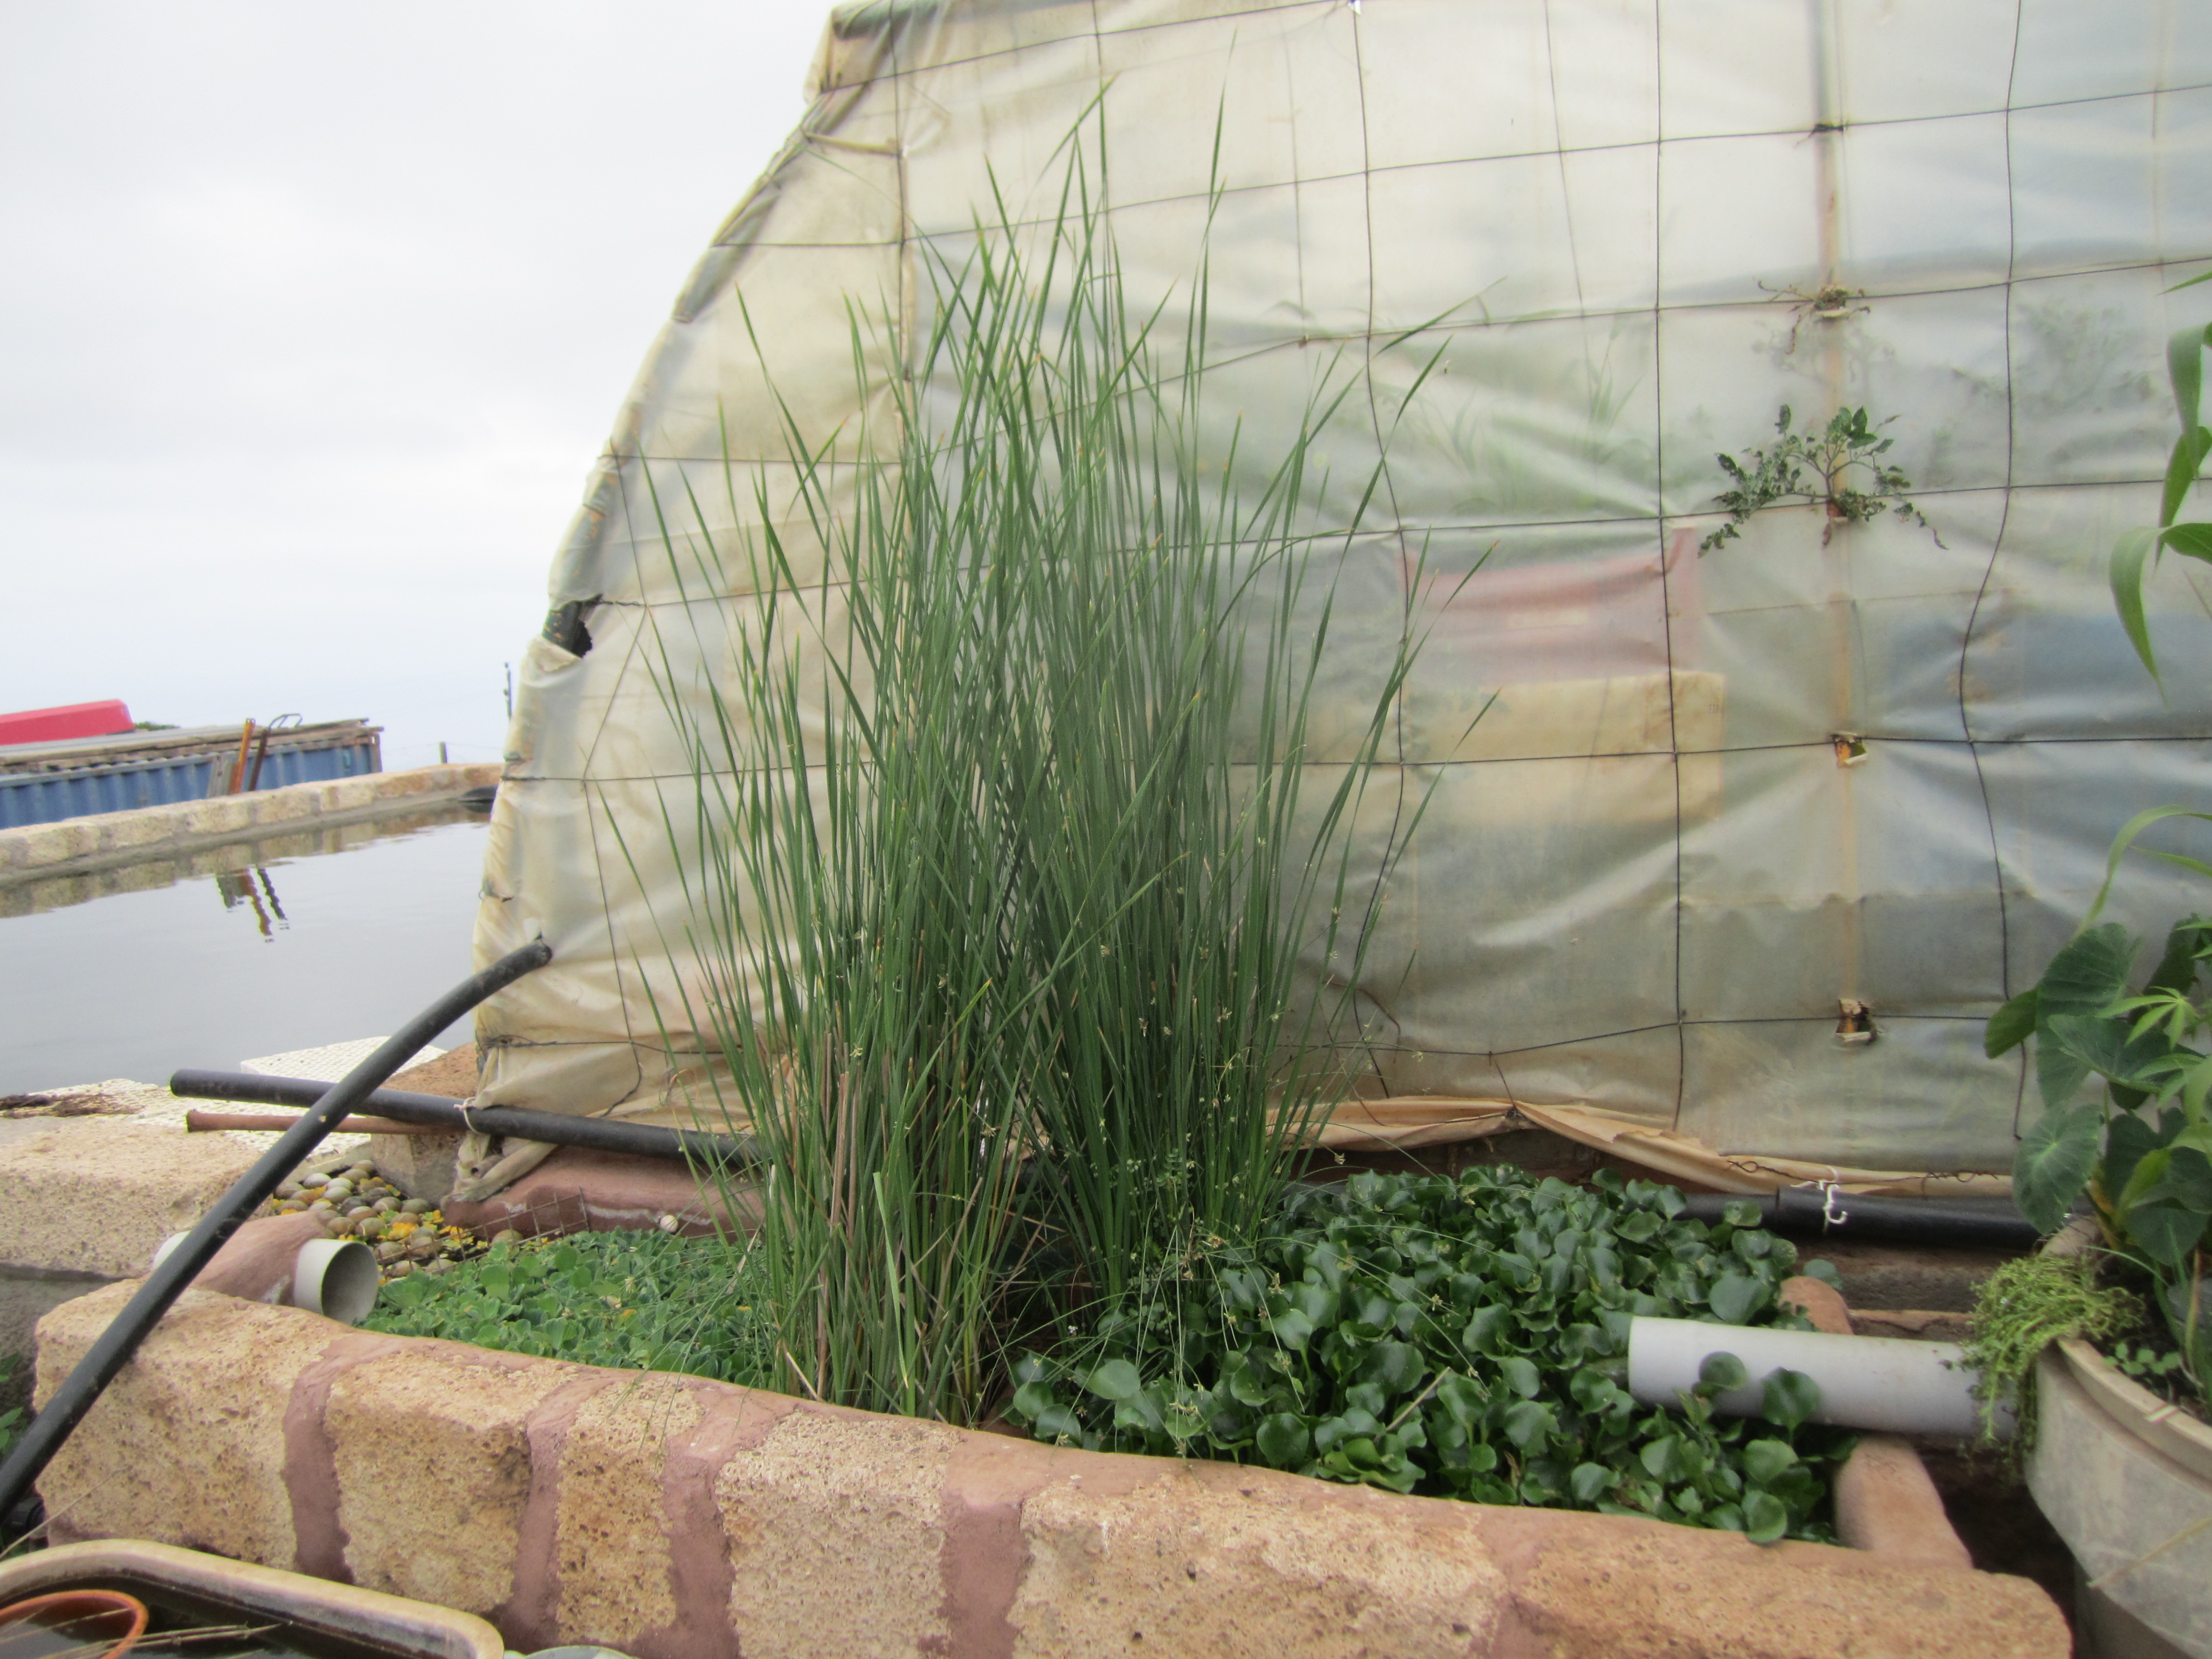
The surroundings of the hedges are the best place to create biotopes, small places to attract life as the name itself indicates. A biotope is a small pond where fishes, turtles or frogs can live with aquatic plants –such as lilies, hyacinths, water lettuce, lemna– or semi-aquatic ones –such as lilies and rushes. Native animals can benefit from this water and we can search native aquatic and semiaquatic plants acclimatized to the area.
The function of these plants is to oxygenate the water and to keep it clean so it attracts wildlife. These can be predators that restore the balance in the ecosystem of the edible garden and its surroundings and increase the biodiversity at the same time. The biotopes should be placed on shaded areas and not too exposed in order to facilitate the arrival of animals.
The biotopes always become an interesting place for observation and research therapy for our beneficiaries. They can relax and enjoy the surrounding wildlife (Figure II.19).
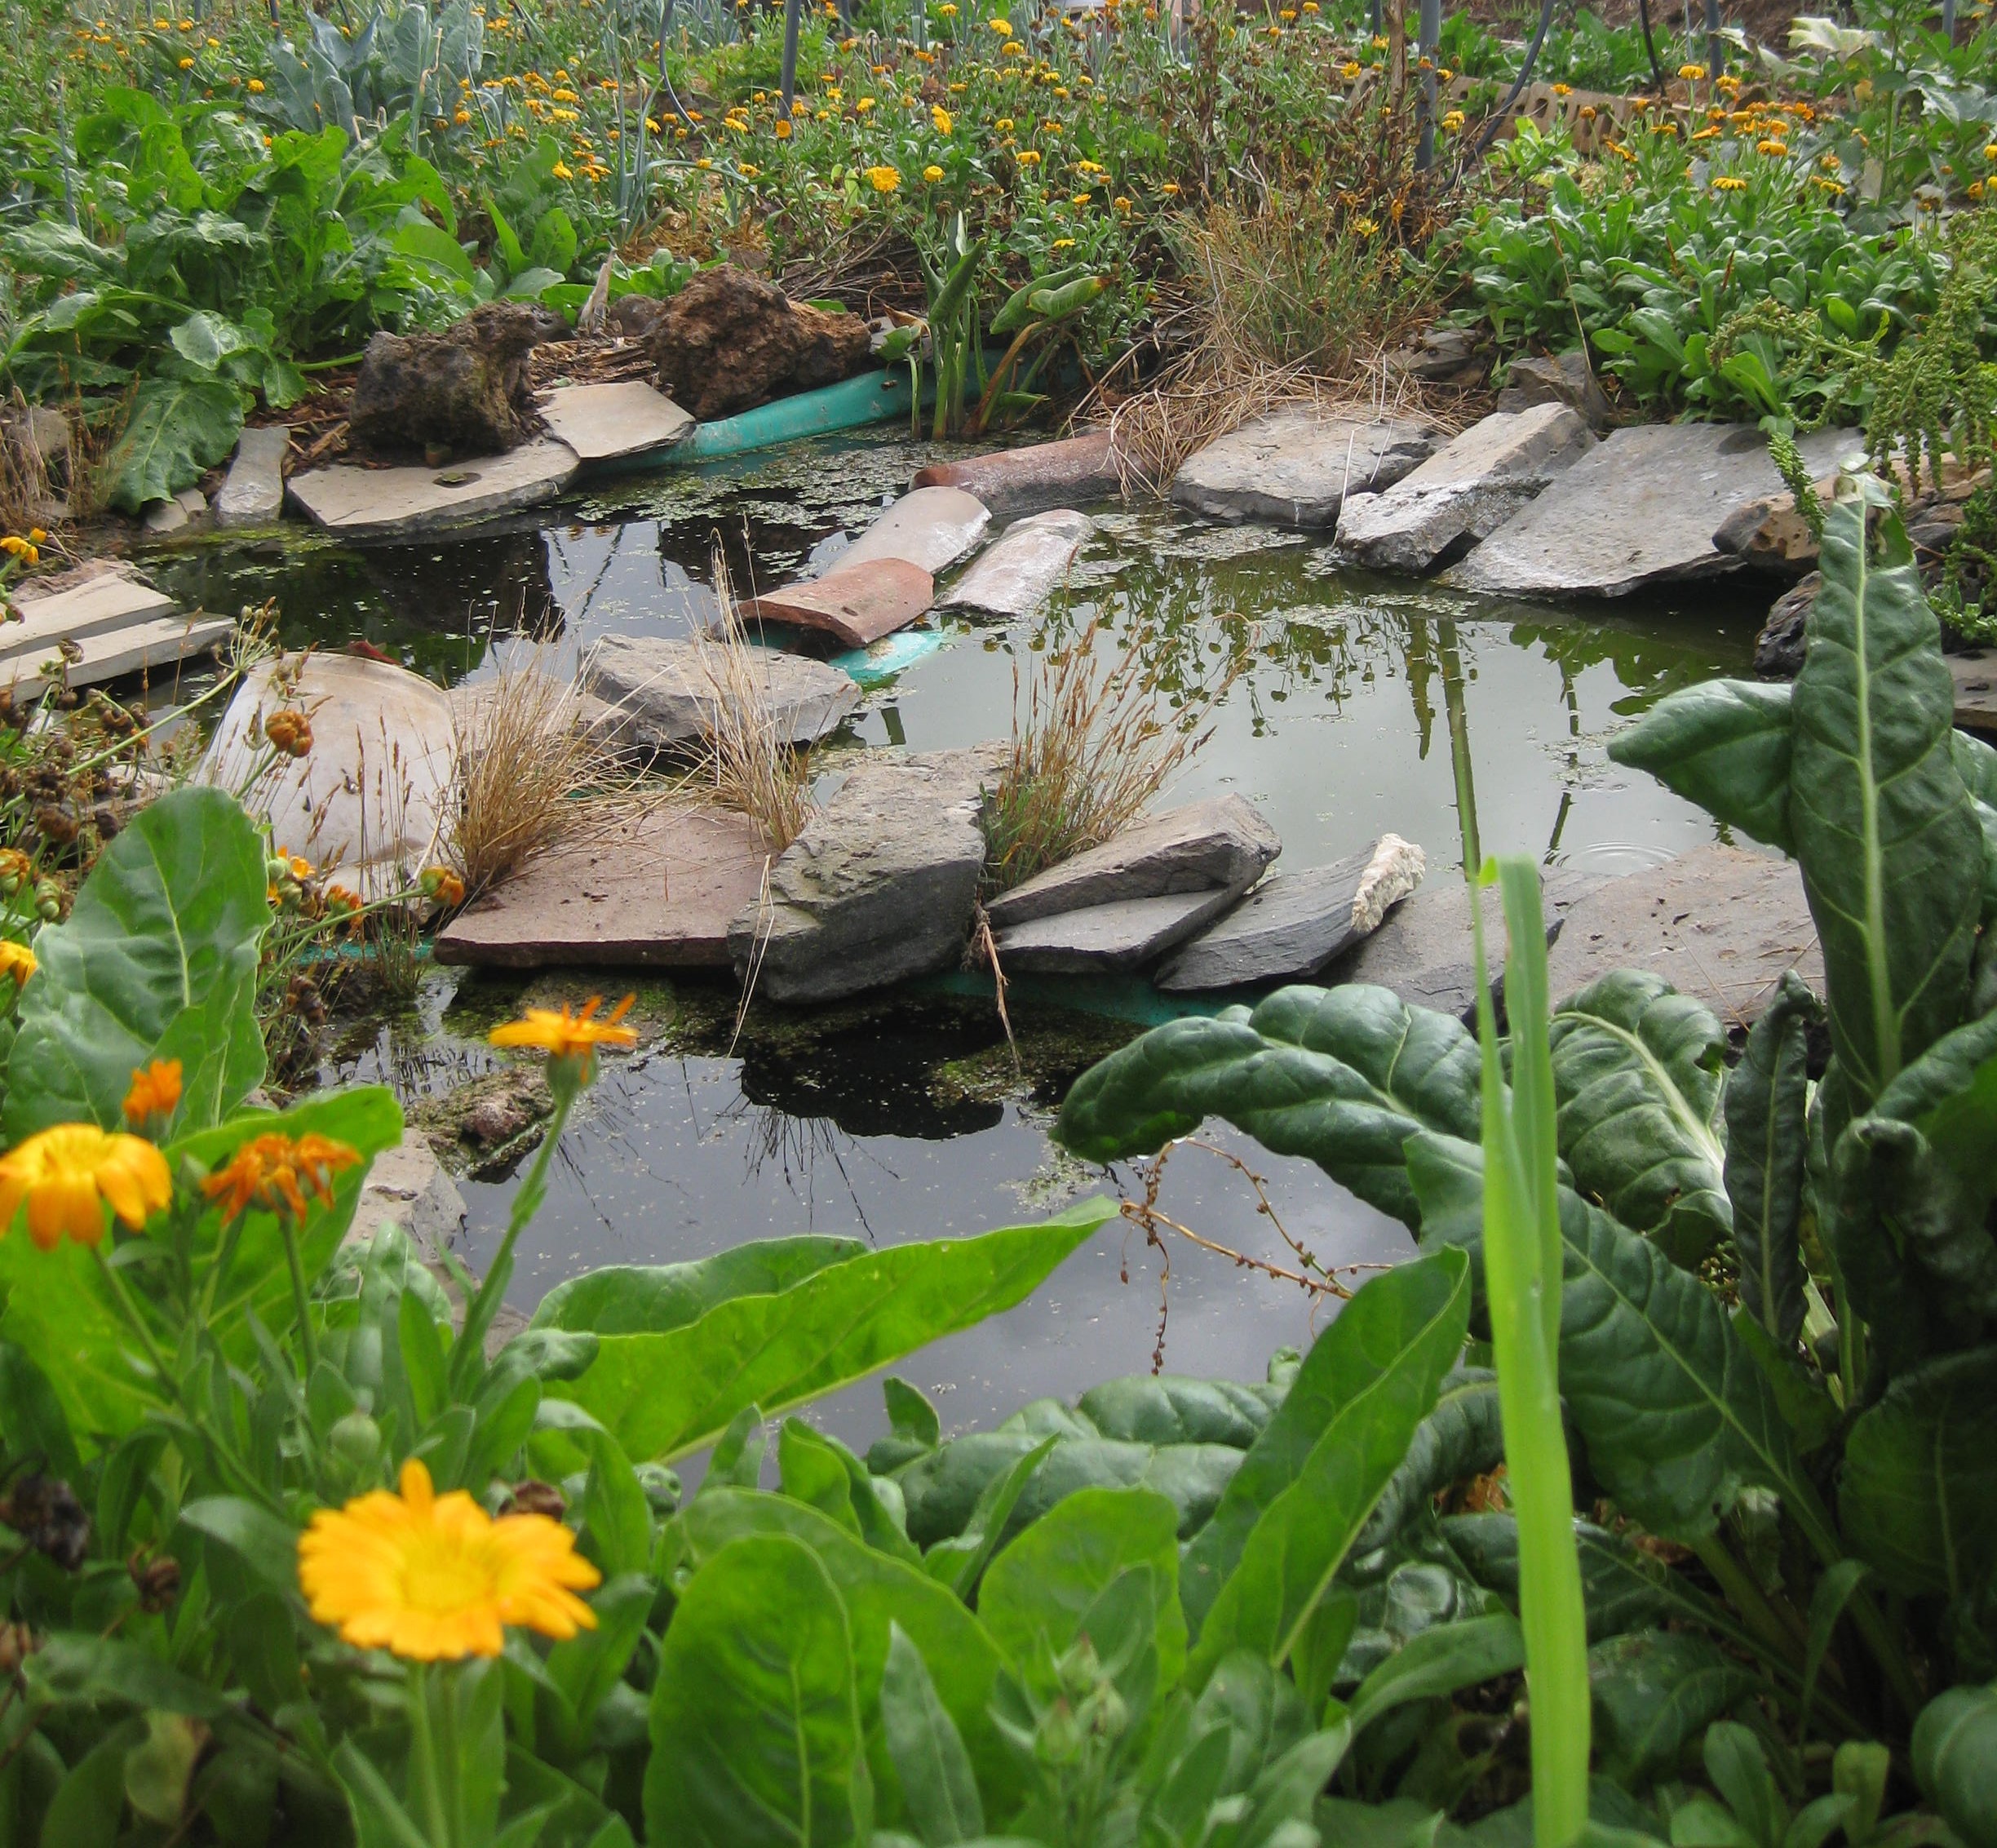
Figure II.19.- A fully operational biotope integrated in an edible garden
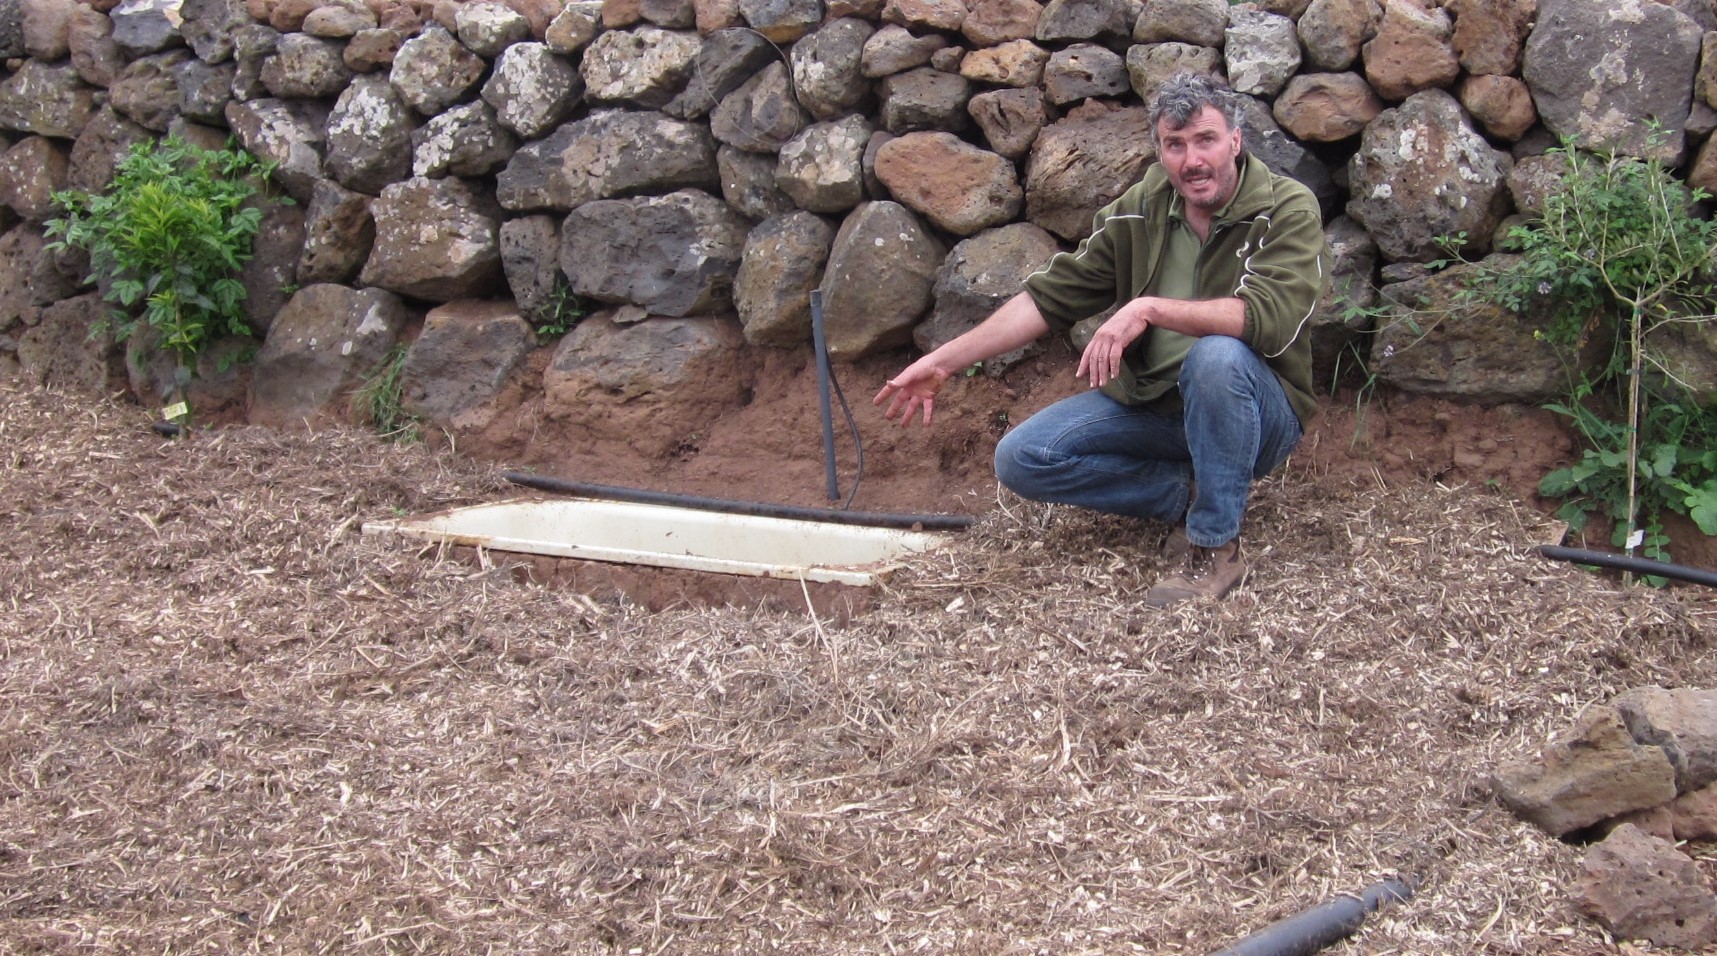
We can build the biotope with used materials such as old bathtubs, basins, barrels or any other container able to store water. Biotopes can be fully or partly buried after making sure there are no fractures or cracks (Figure II.20).
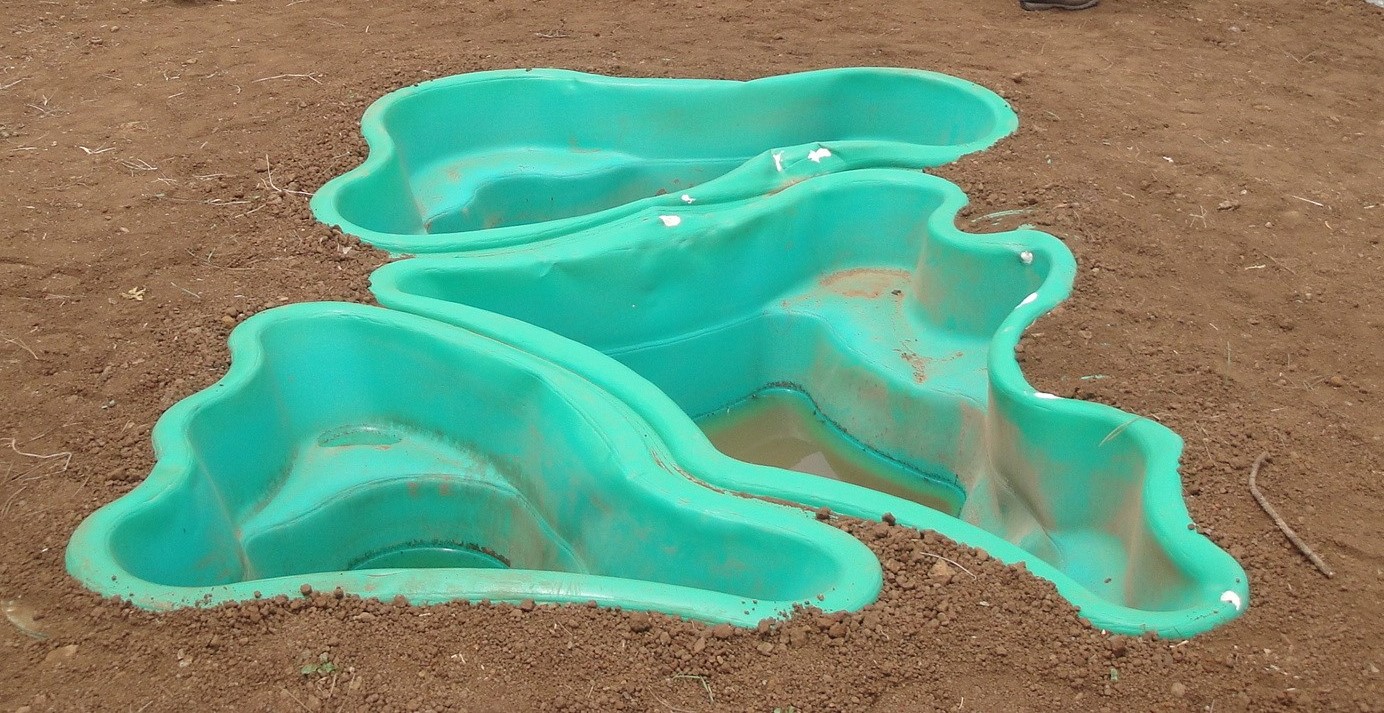
Figure II.20.- Construction stage of the biotopes with reused vessels
The use of some fabrics such as burlap, used carpet or artificial turf to cover the edges of the container is advisable. Once the cover is under water level, it will help any small animal that accidentally falls into the biotope to climb out of it.
We will use stones or trunks to set the edges and to keep the cloth tied up. A stone big enough to excel the water surface in the middle of the biotope would be helpful for birds to sit and drink (Figure II.21).

Figure II.21.- Artificial turf –tied up the edges by stones– covering a biotope, and the central stone where the birds rest
Once the biotope is finished we fill it with water and put the plants or pots for the semi-aquatic ones. This way it gets integrated in the environment and becomes an oasis for small animals.
The use of a chock on the bottom to keep the semi-aquatic plants over the water surface level is advisable too (Figure II.22).
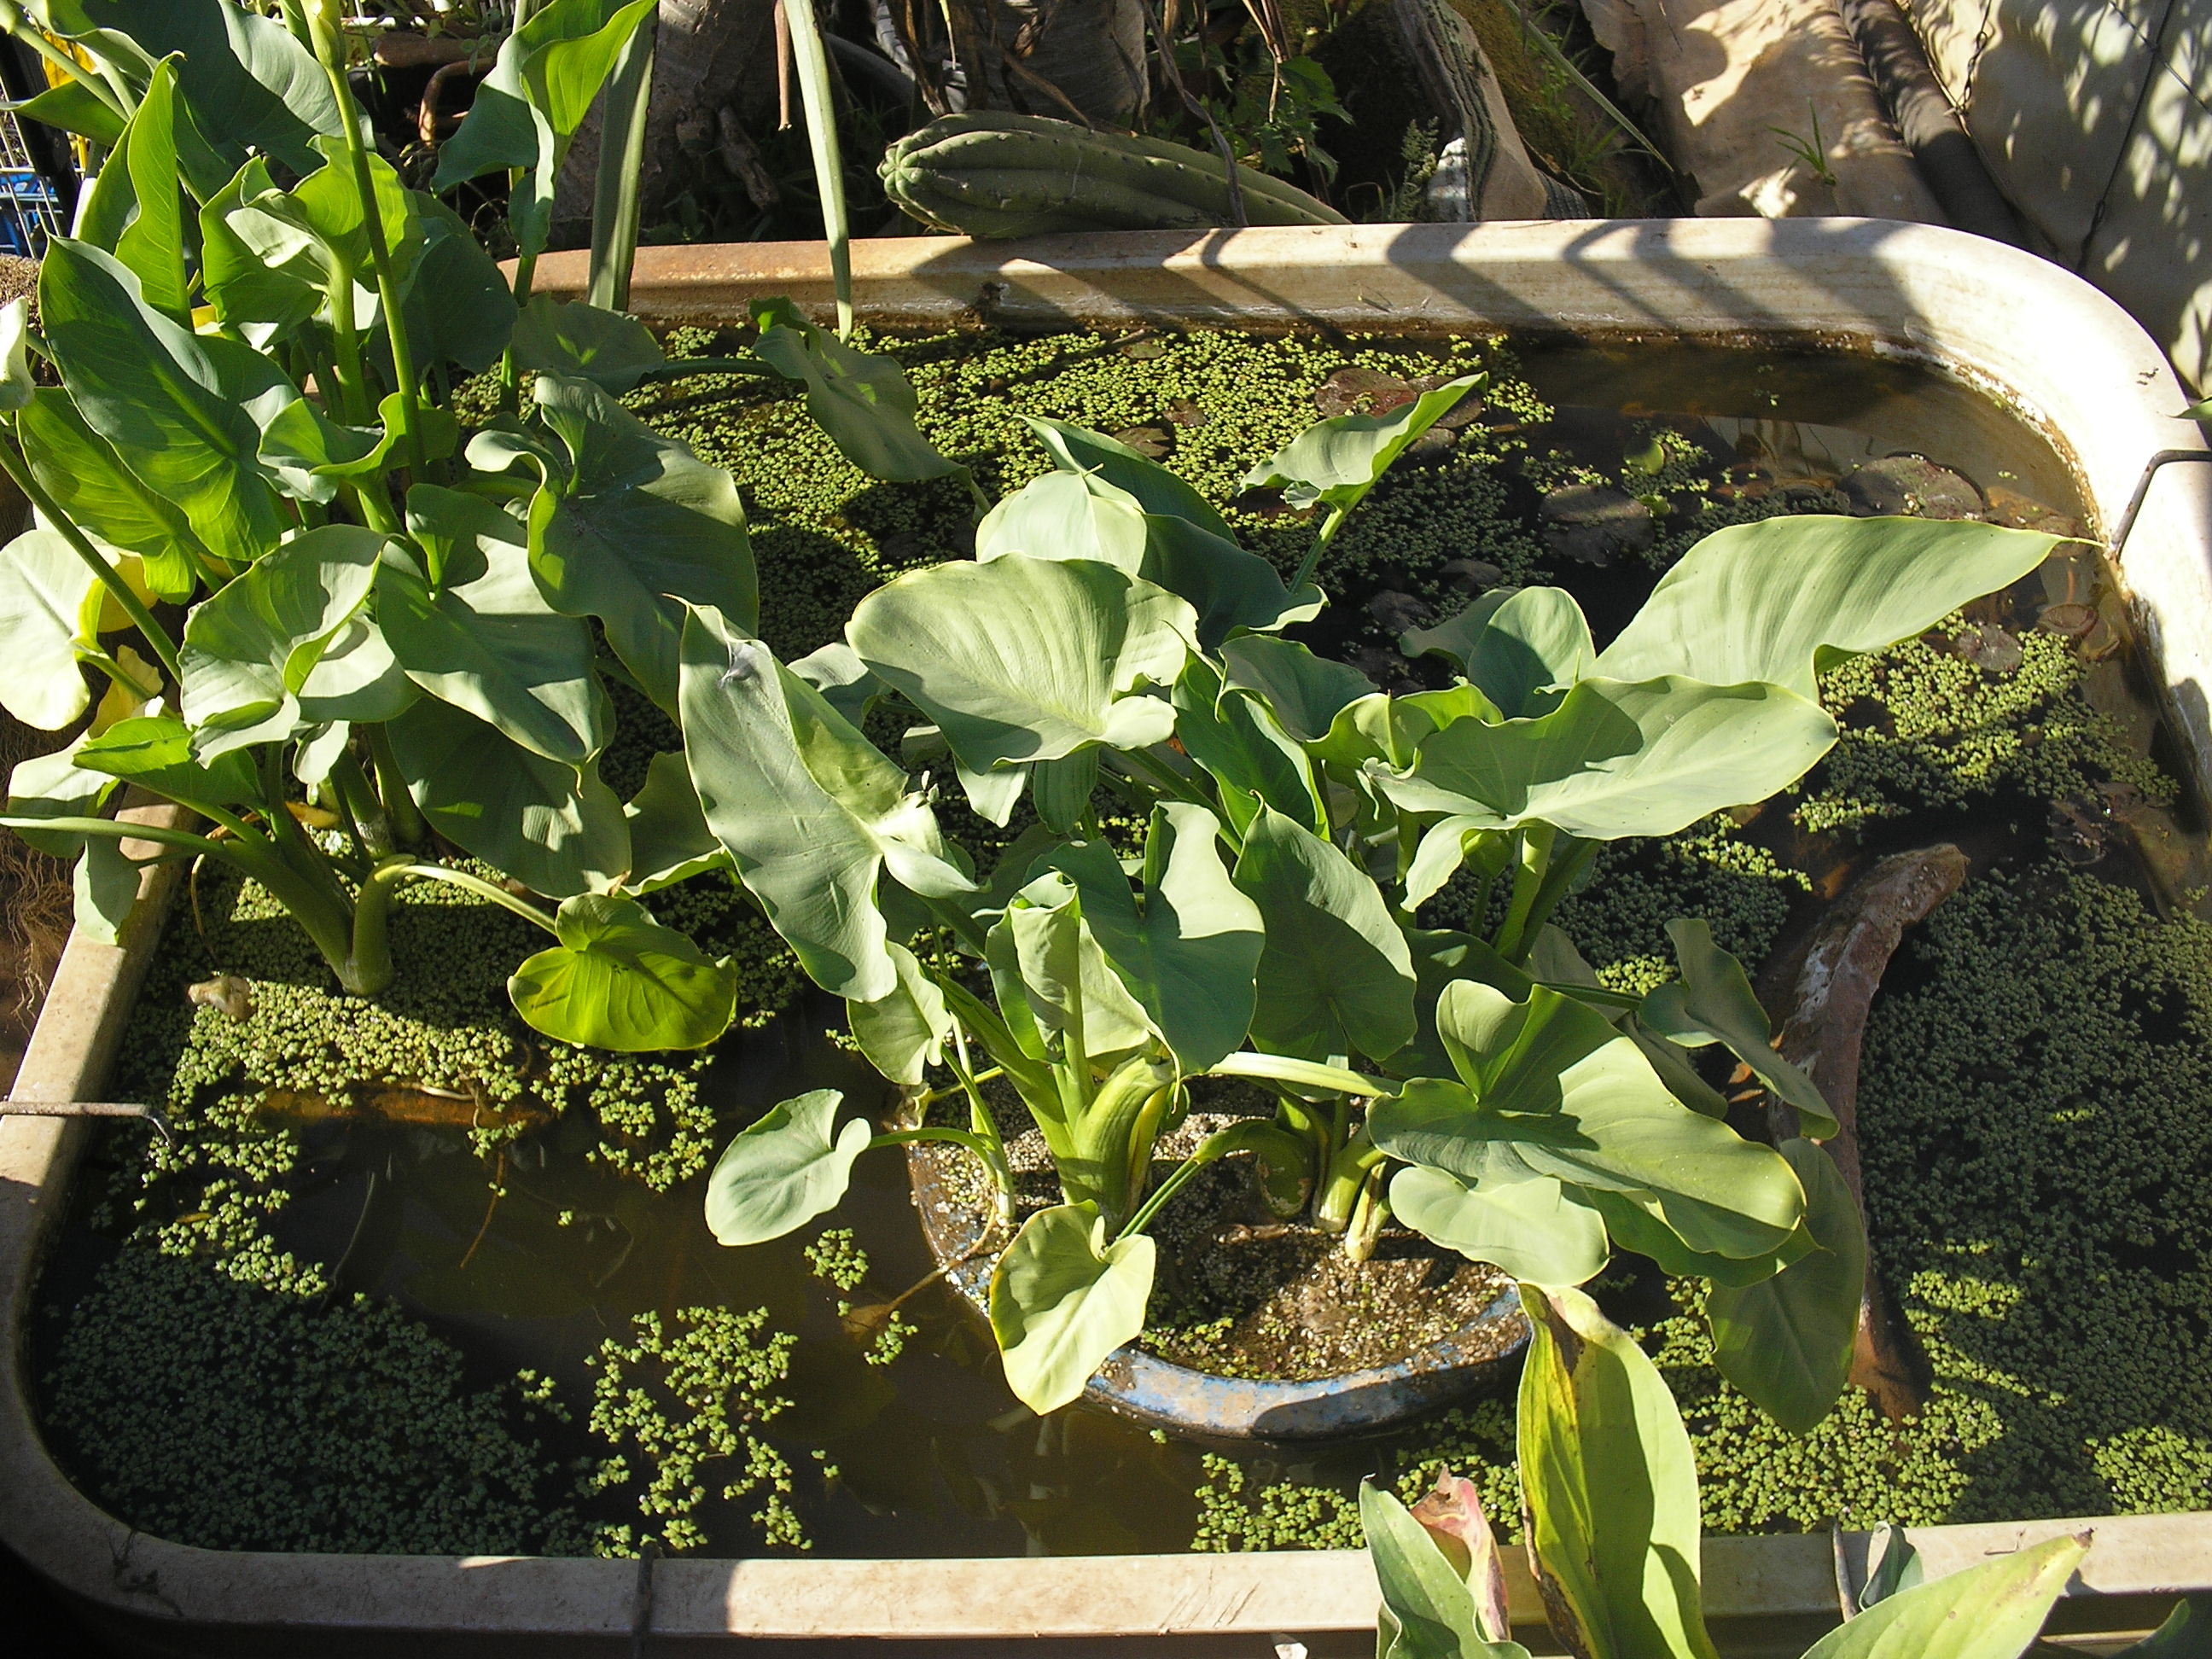
Figure II.22.- Aquatic plants in a biotope in pots
The maintenance of the biotope is simple. A pruning of the excess of plants surrounding the biotope should be made at least once a year to keep its condition of oasis.
Also we have to ensure that a third part of the water surface is free of plants. This will facilitate the water oxygenation and the easy access of small animals (Figure II.23).
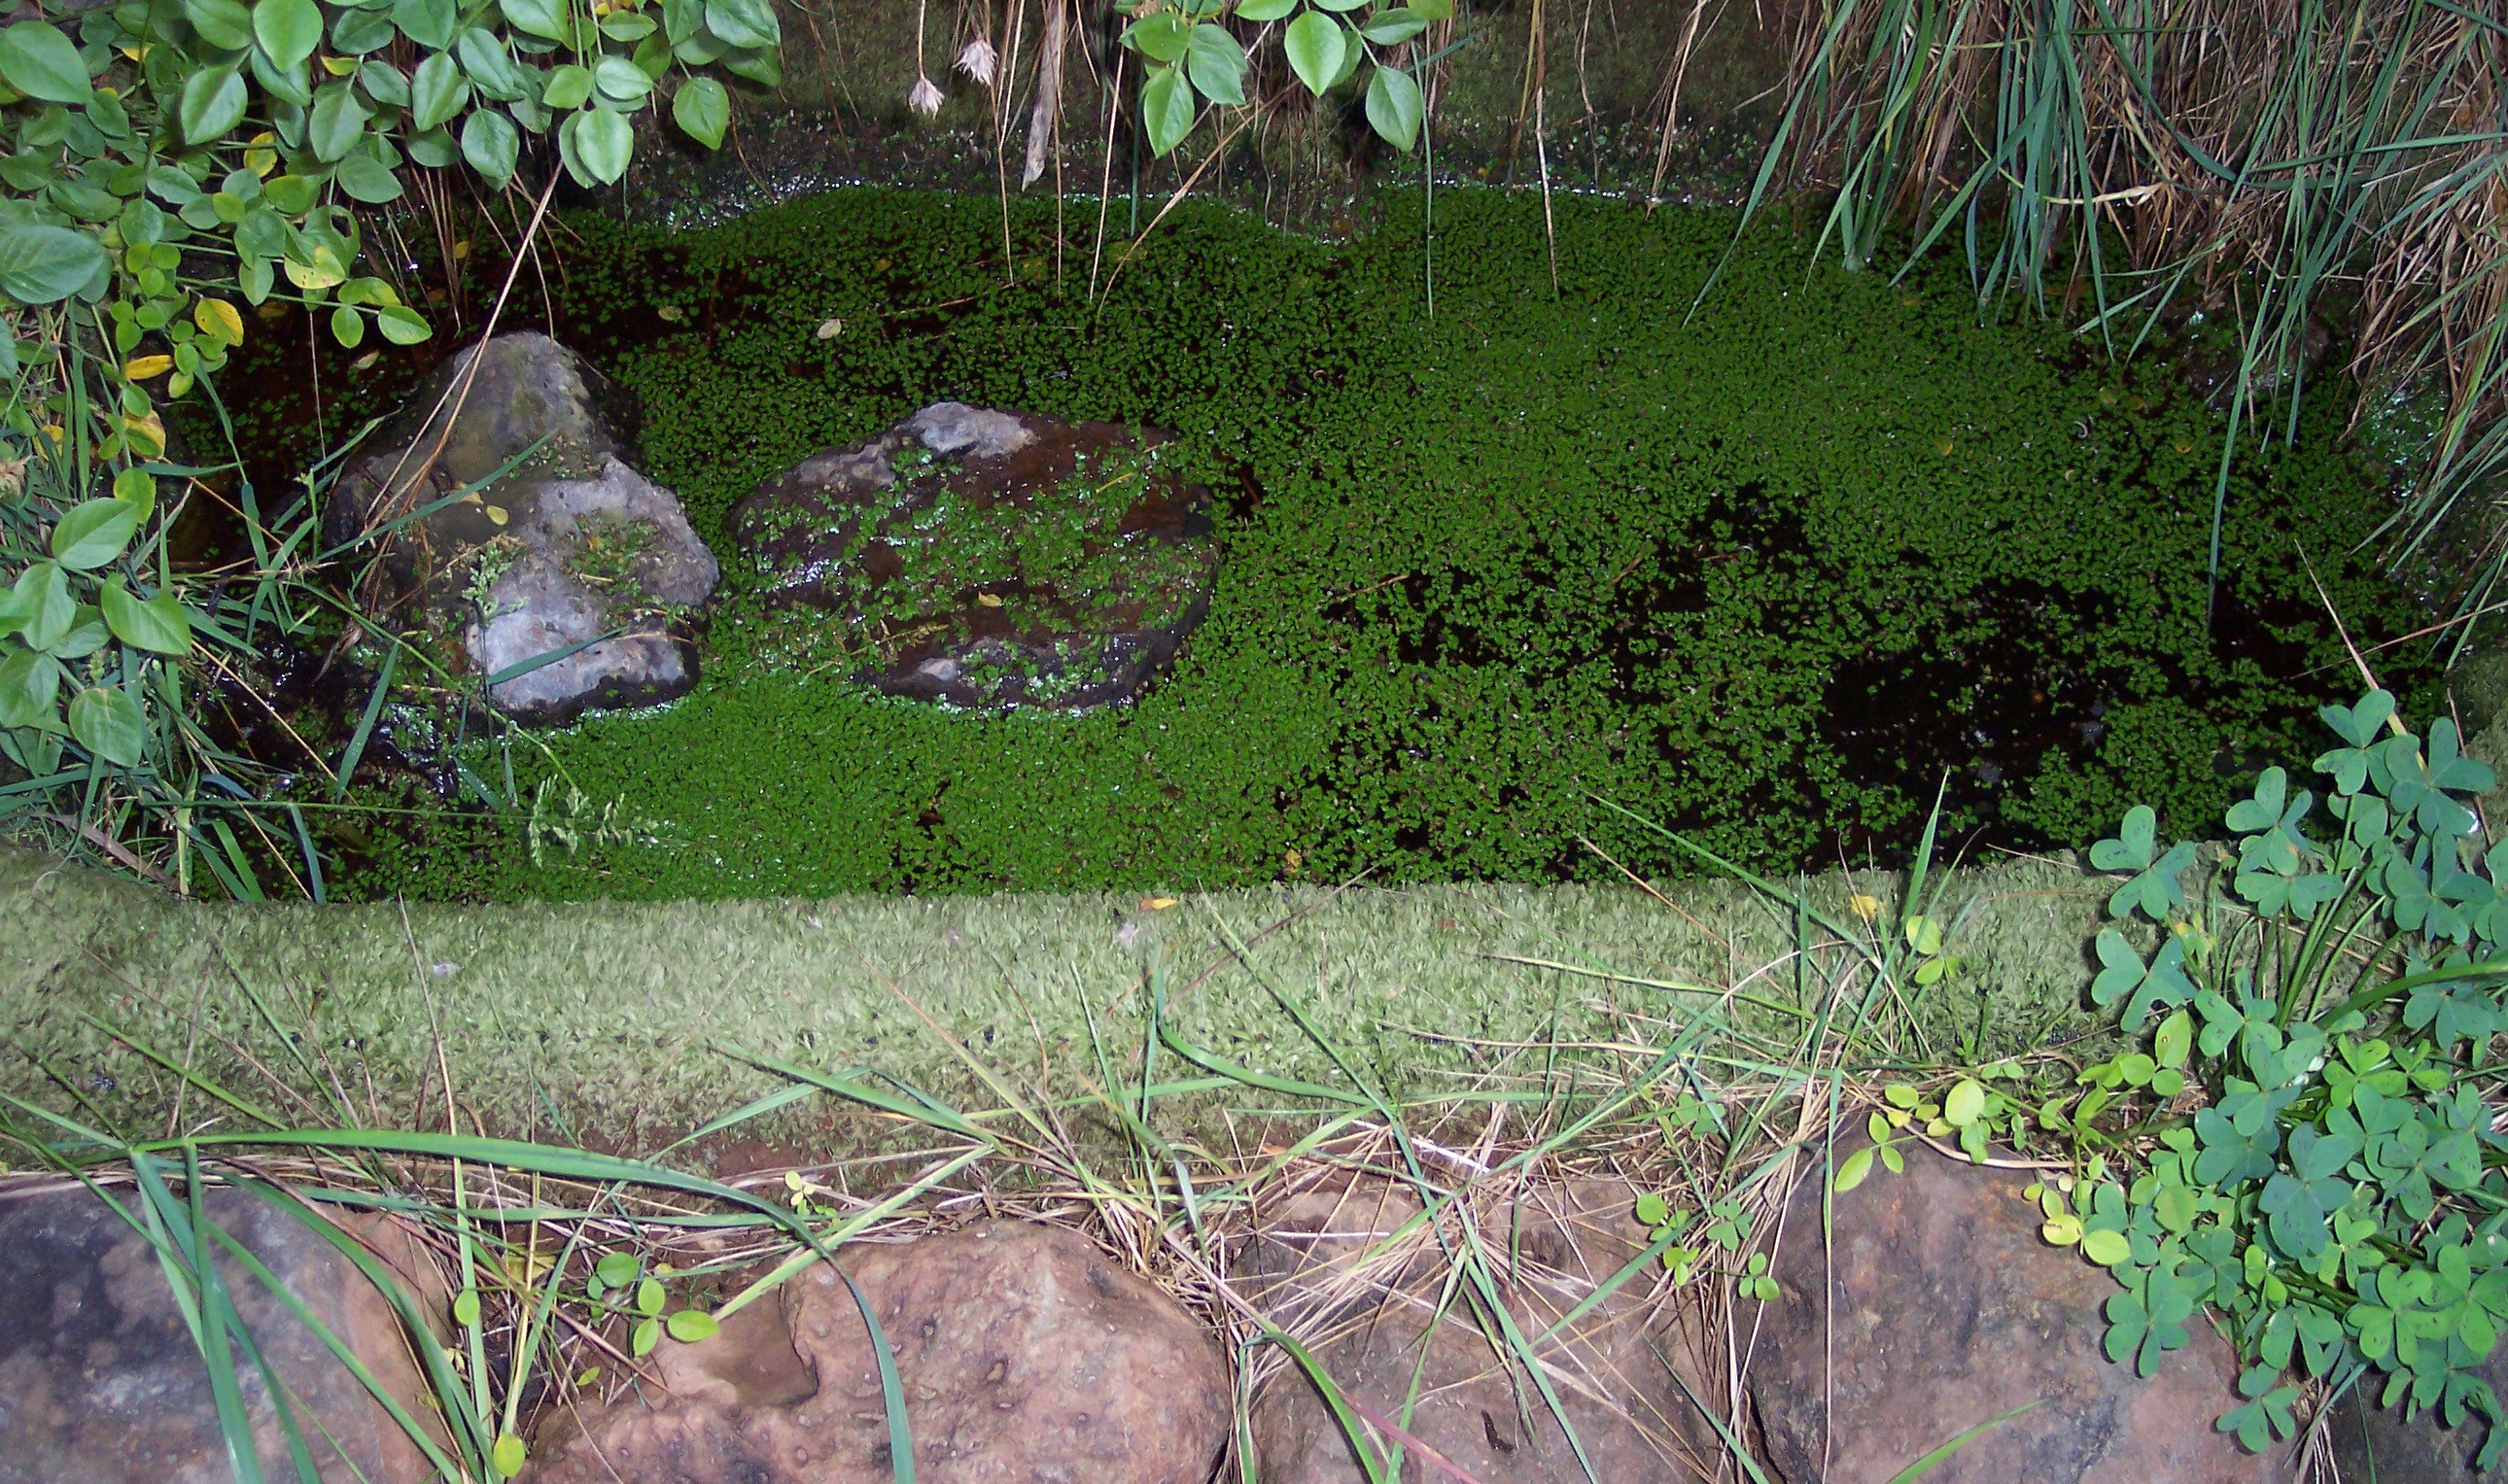
Figure II.23.- Biotope covered by duckweed without covering all the surface of the water
The plant material from that pruning and the one that’s drawn from the biotopes can be reused, as we will learn in the edible garden maintenance unit.
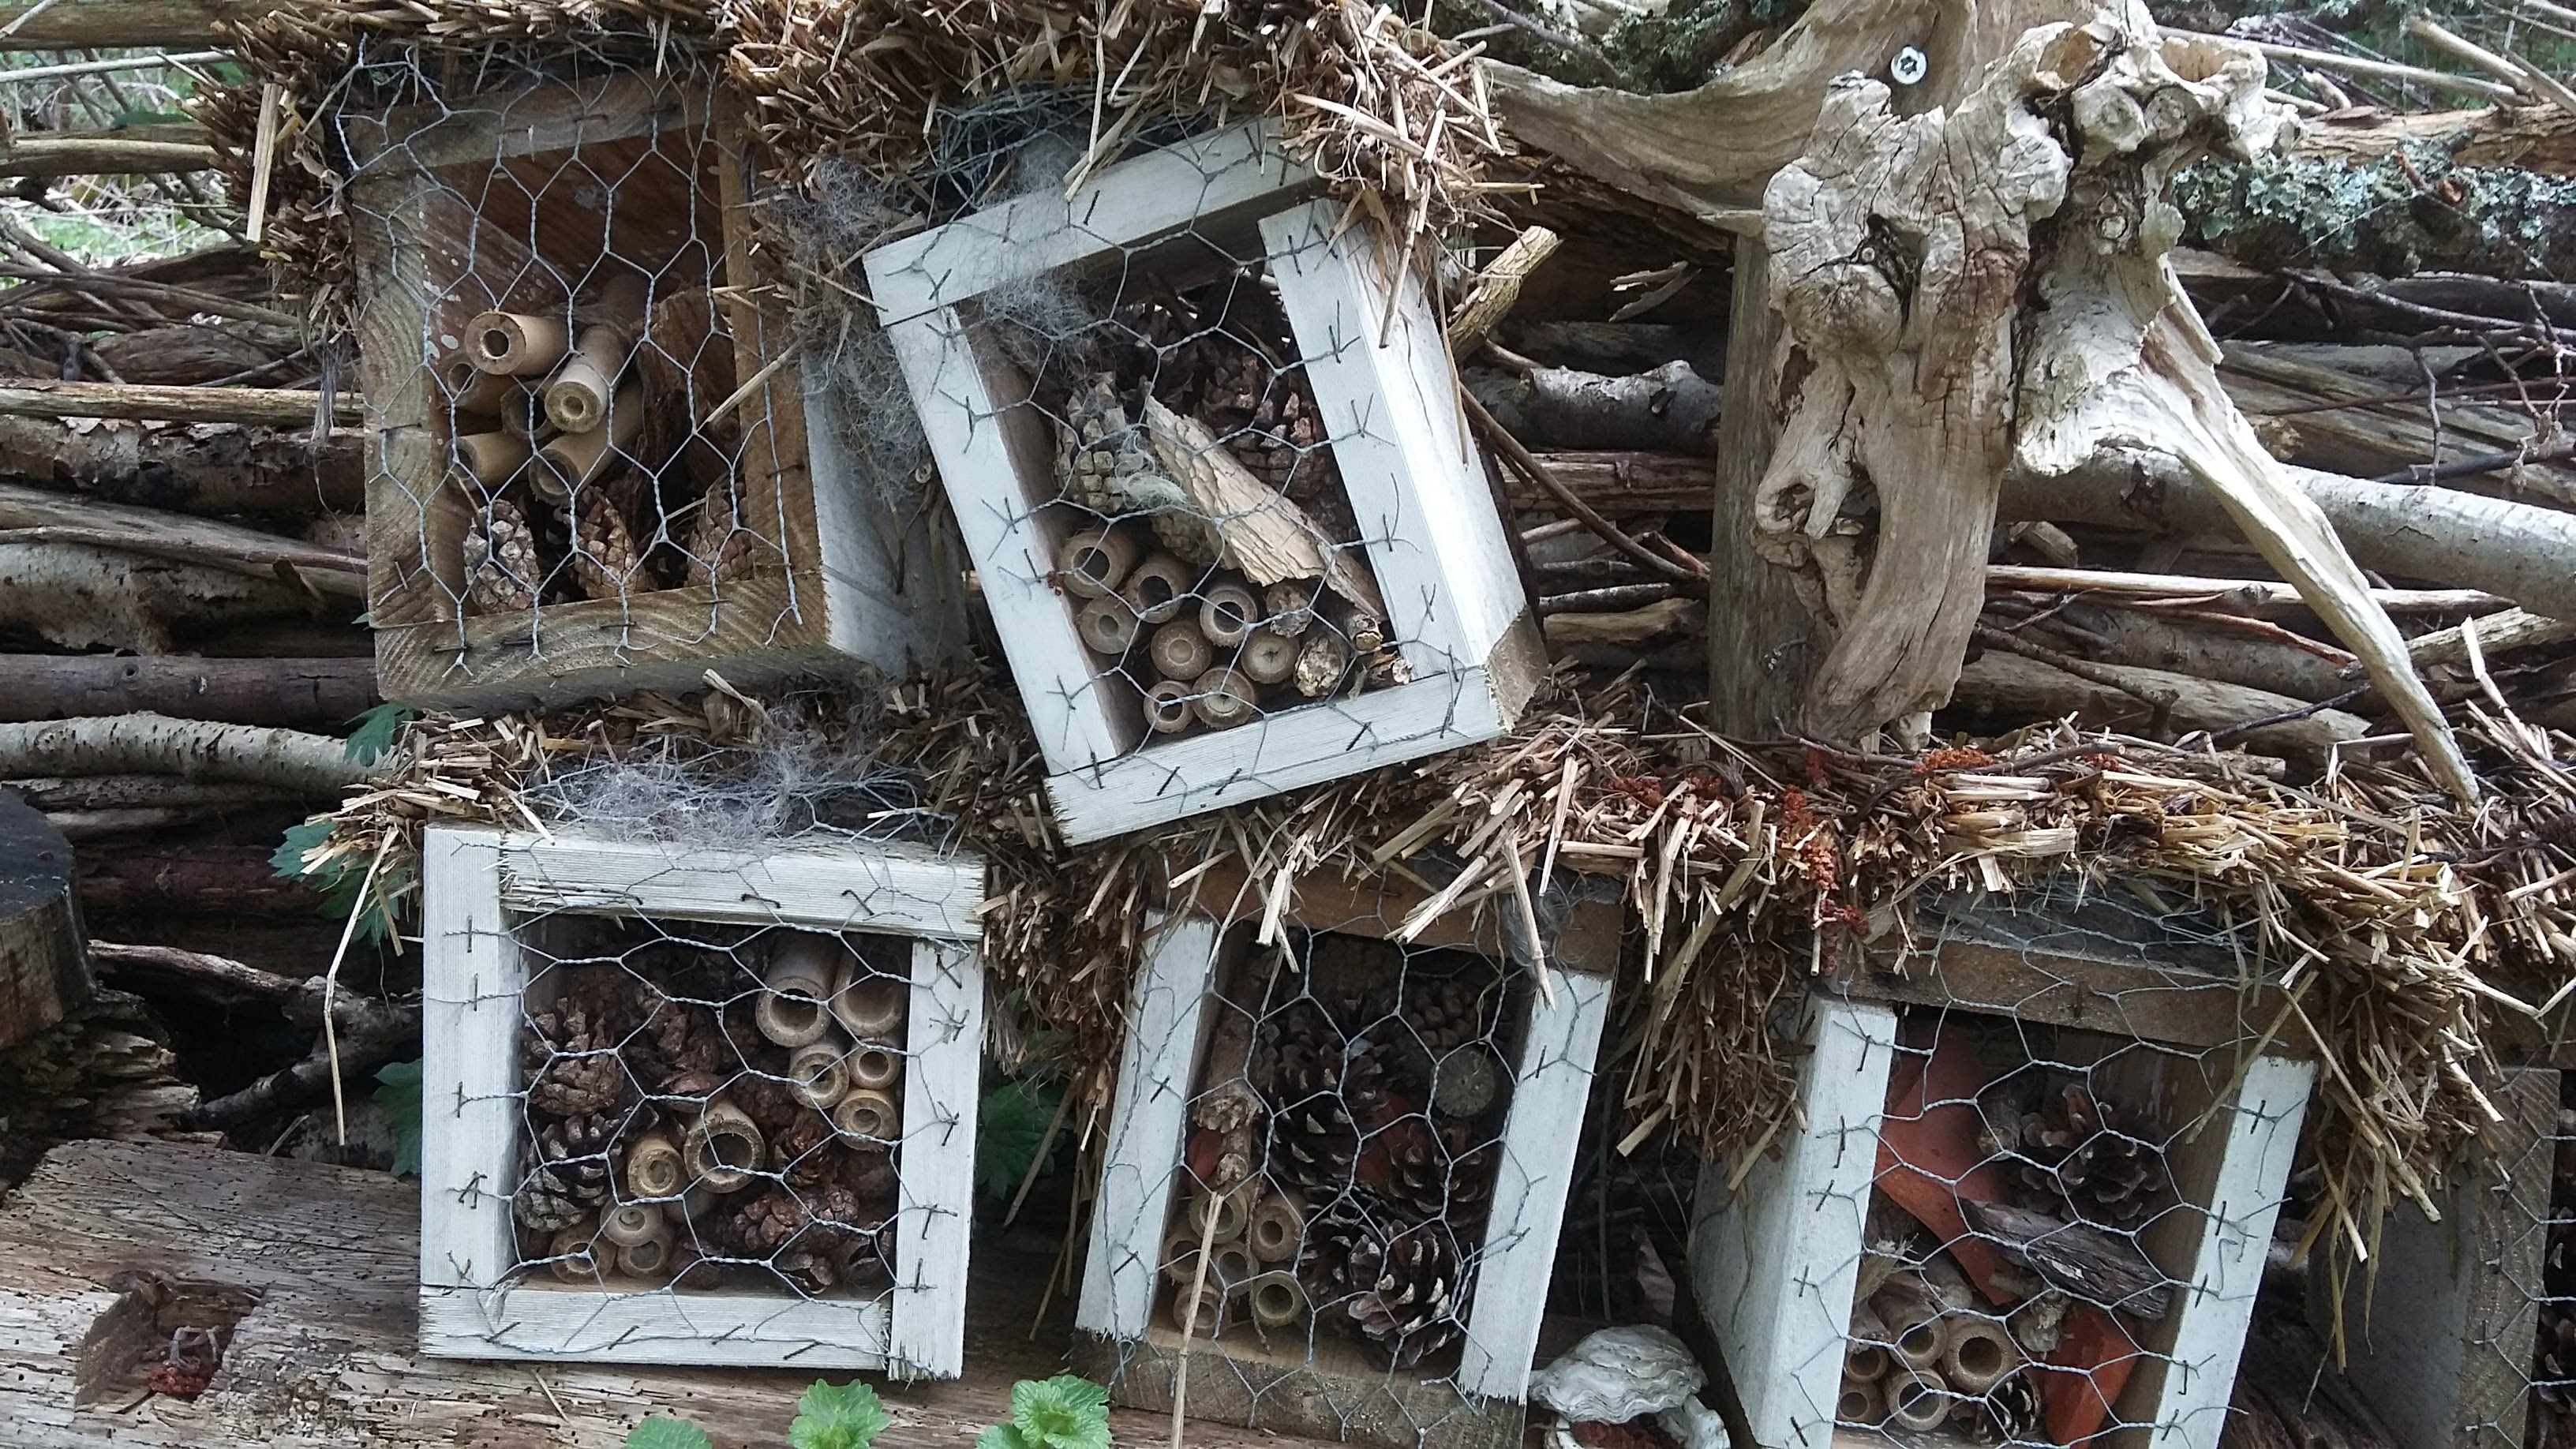
We could also place an insect hotel next to the biotope, especially if we have our own isolated edible garden in an urban area (school or urban orchards, roofs, balconies) to attract as much as beneficial fauna as possible (Figure II.24).

Figure II. 24.- Different insect hotel designs ls
2.6 “Pollinator volcano”
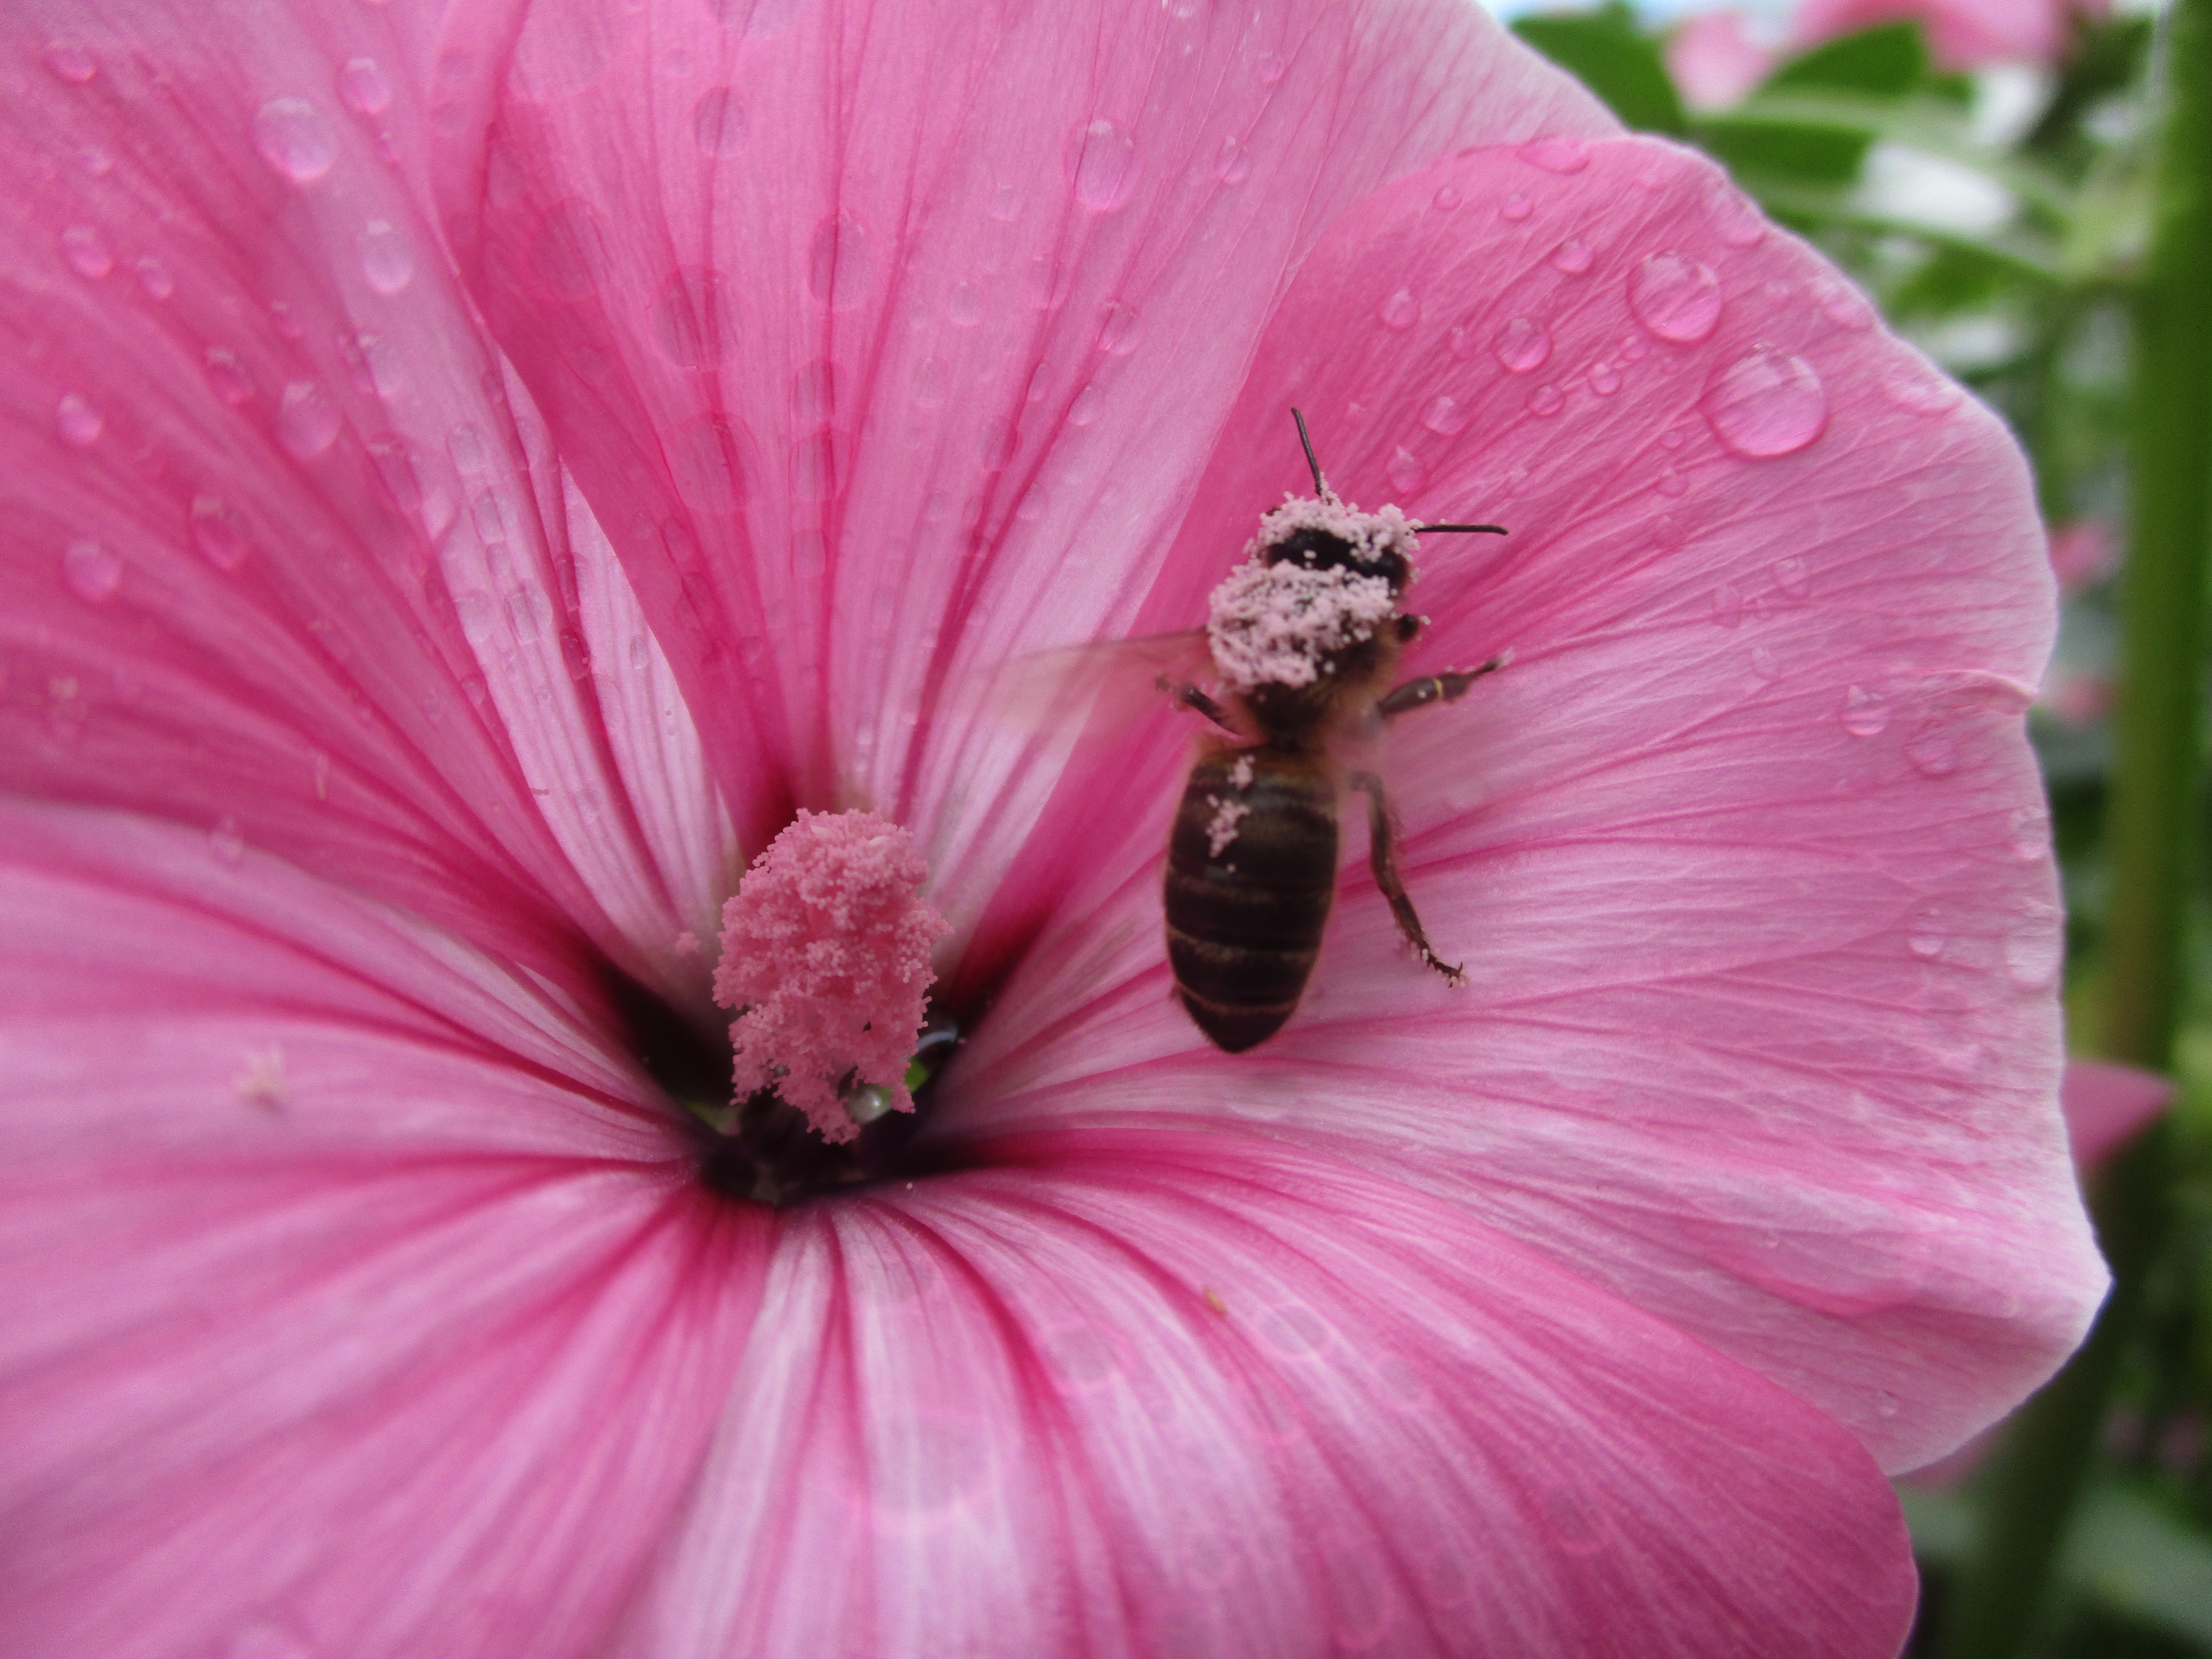
A “pollinator volcano” is a haven for our friends and allies: the bees, which are the most important pollinators. Not only our edible gardens and edible forest gardens benefit from their pollination but also the whole area around (Figure II.25).
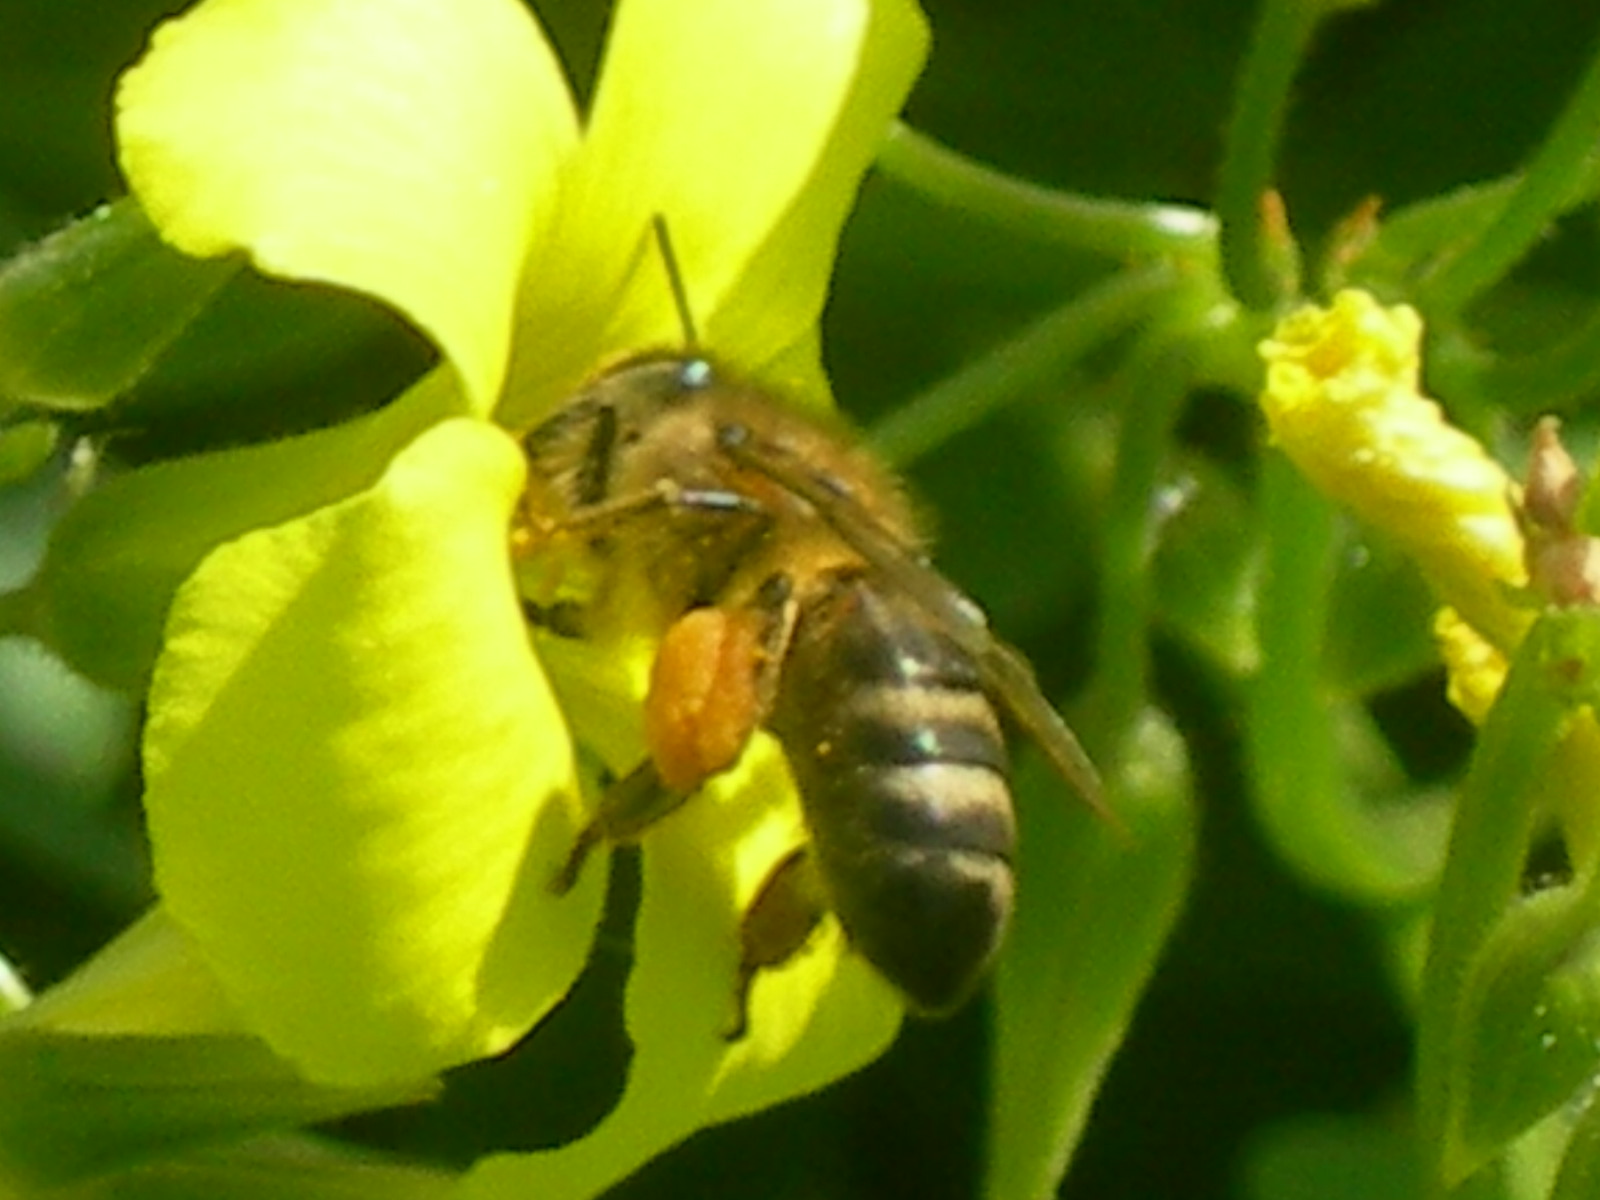
Figure II.25.- Our friends and allies the bees
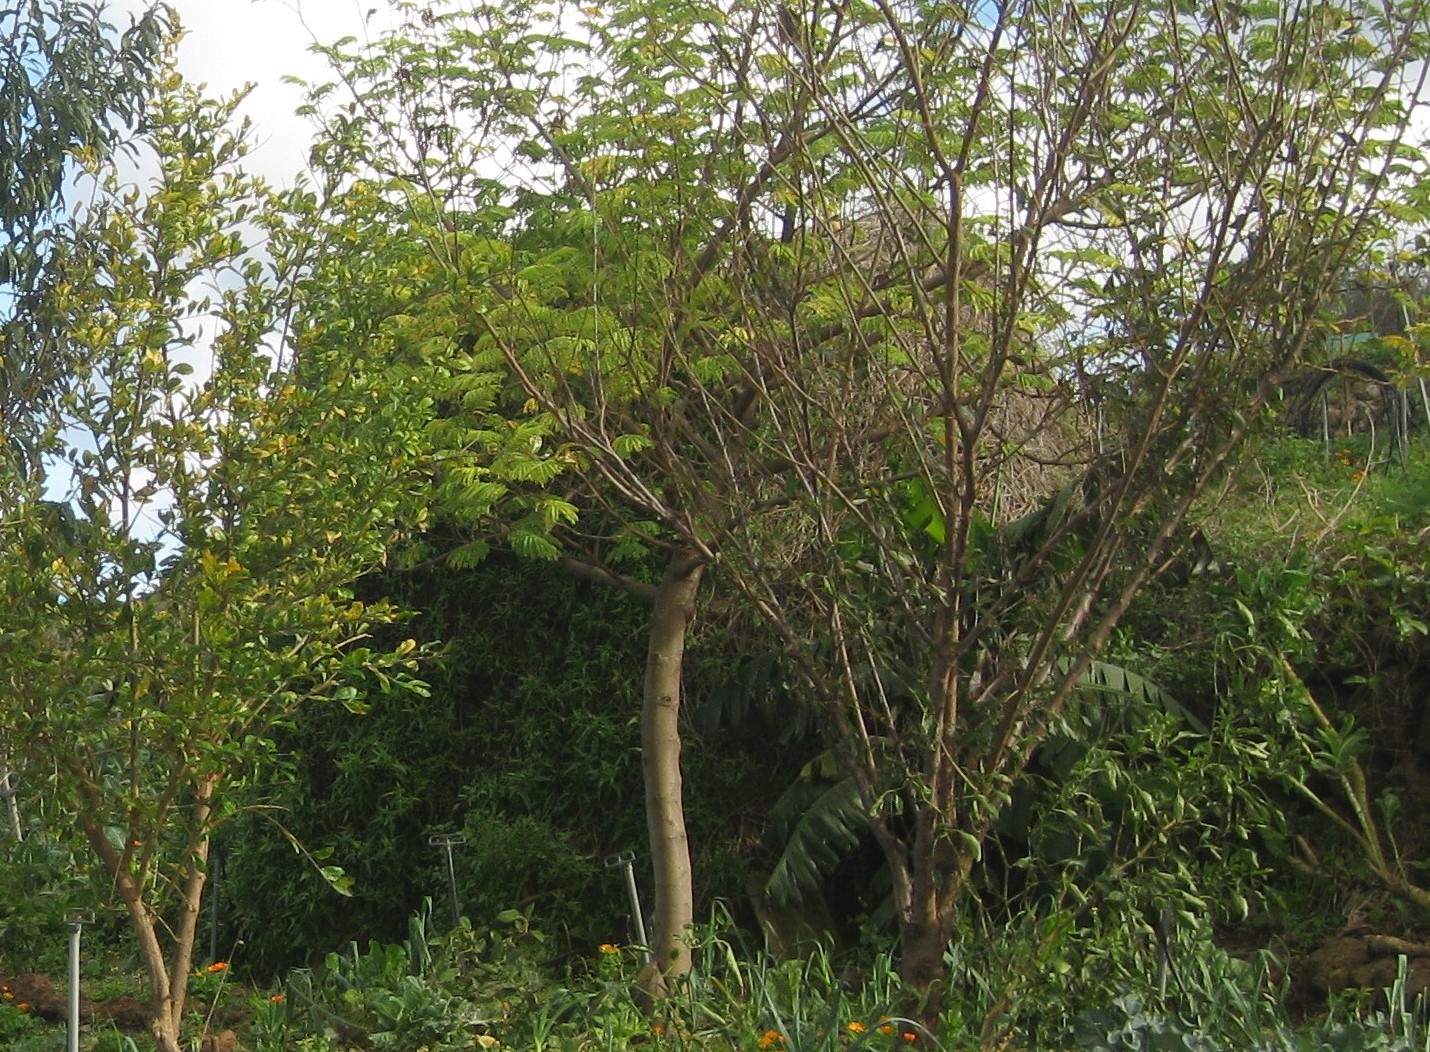
In order to integrate one or more hives safely in our plot of land we use what we call “pollinator volcano”. It allows us to work close to the hives without any risk of sting. We named it like this because it has the shape of a small volcano (FigureII.26).
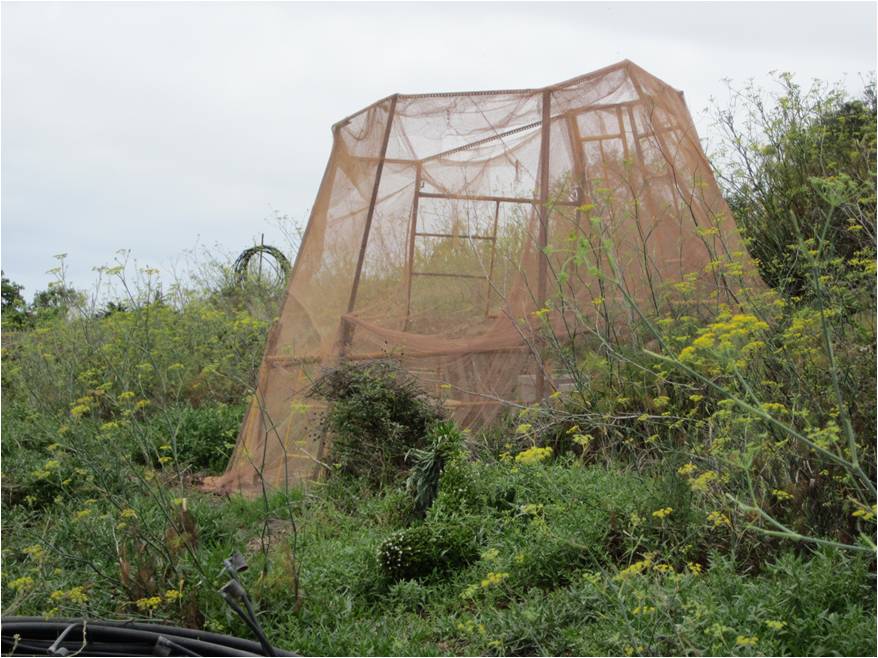
Figure II.26.- The construction evolution of the “pollinator volcano”
If you were able to design a “pollinator volcano”, it would be really helpful to increase the pollinating potential in the area. In addition we would have the opportunity to learn about the bees, work with them and moderately obtain their products such as the wonderful honey, propolis, pollen, jelly… These excellent products are beneficial for the balance and health of our bodies.
The presence of a professional beekeeper would be needed to help us in the maintenance and harvesting process and to teach our users about them: their social life, the responsible handling of the hives and how to efficiently interact on set times. The students love this activity.
The purpose of the cone shape of the structure is to make sure the bees fly high enough when they leave their shelter– the hives inside the “volcano”. Therefore the bees no longer present a threat outside the “pollinator volcano” for any person around (Figure II.27).

Figure II.27.- Coexistence between beneficiaries and bees in the edible garden forest
Materials such as wood or iron tubes –preferably used– are required for the construction. These would be used to build a cone with a diameter of 5 meters on the base and a height of 3.5, leaving a circle with an approximate diameter of 3.5 meters on the top of the cone. This minimum height of 3.5 meters between the hives and the upper part ensures that the bees are no threat for anyone around the “volcano” and that neither do we for them.
We have to keep in mind during the construction that we need some space for an access door to the hives inside so the beekeeper is able to do routine maintenance (Figure II.28).
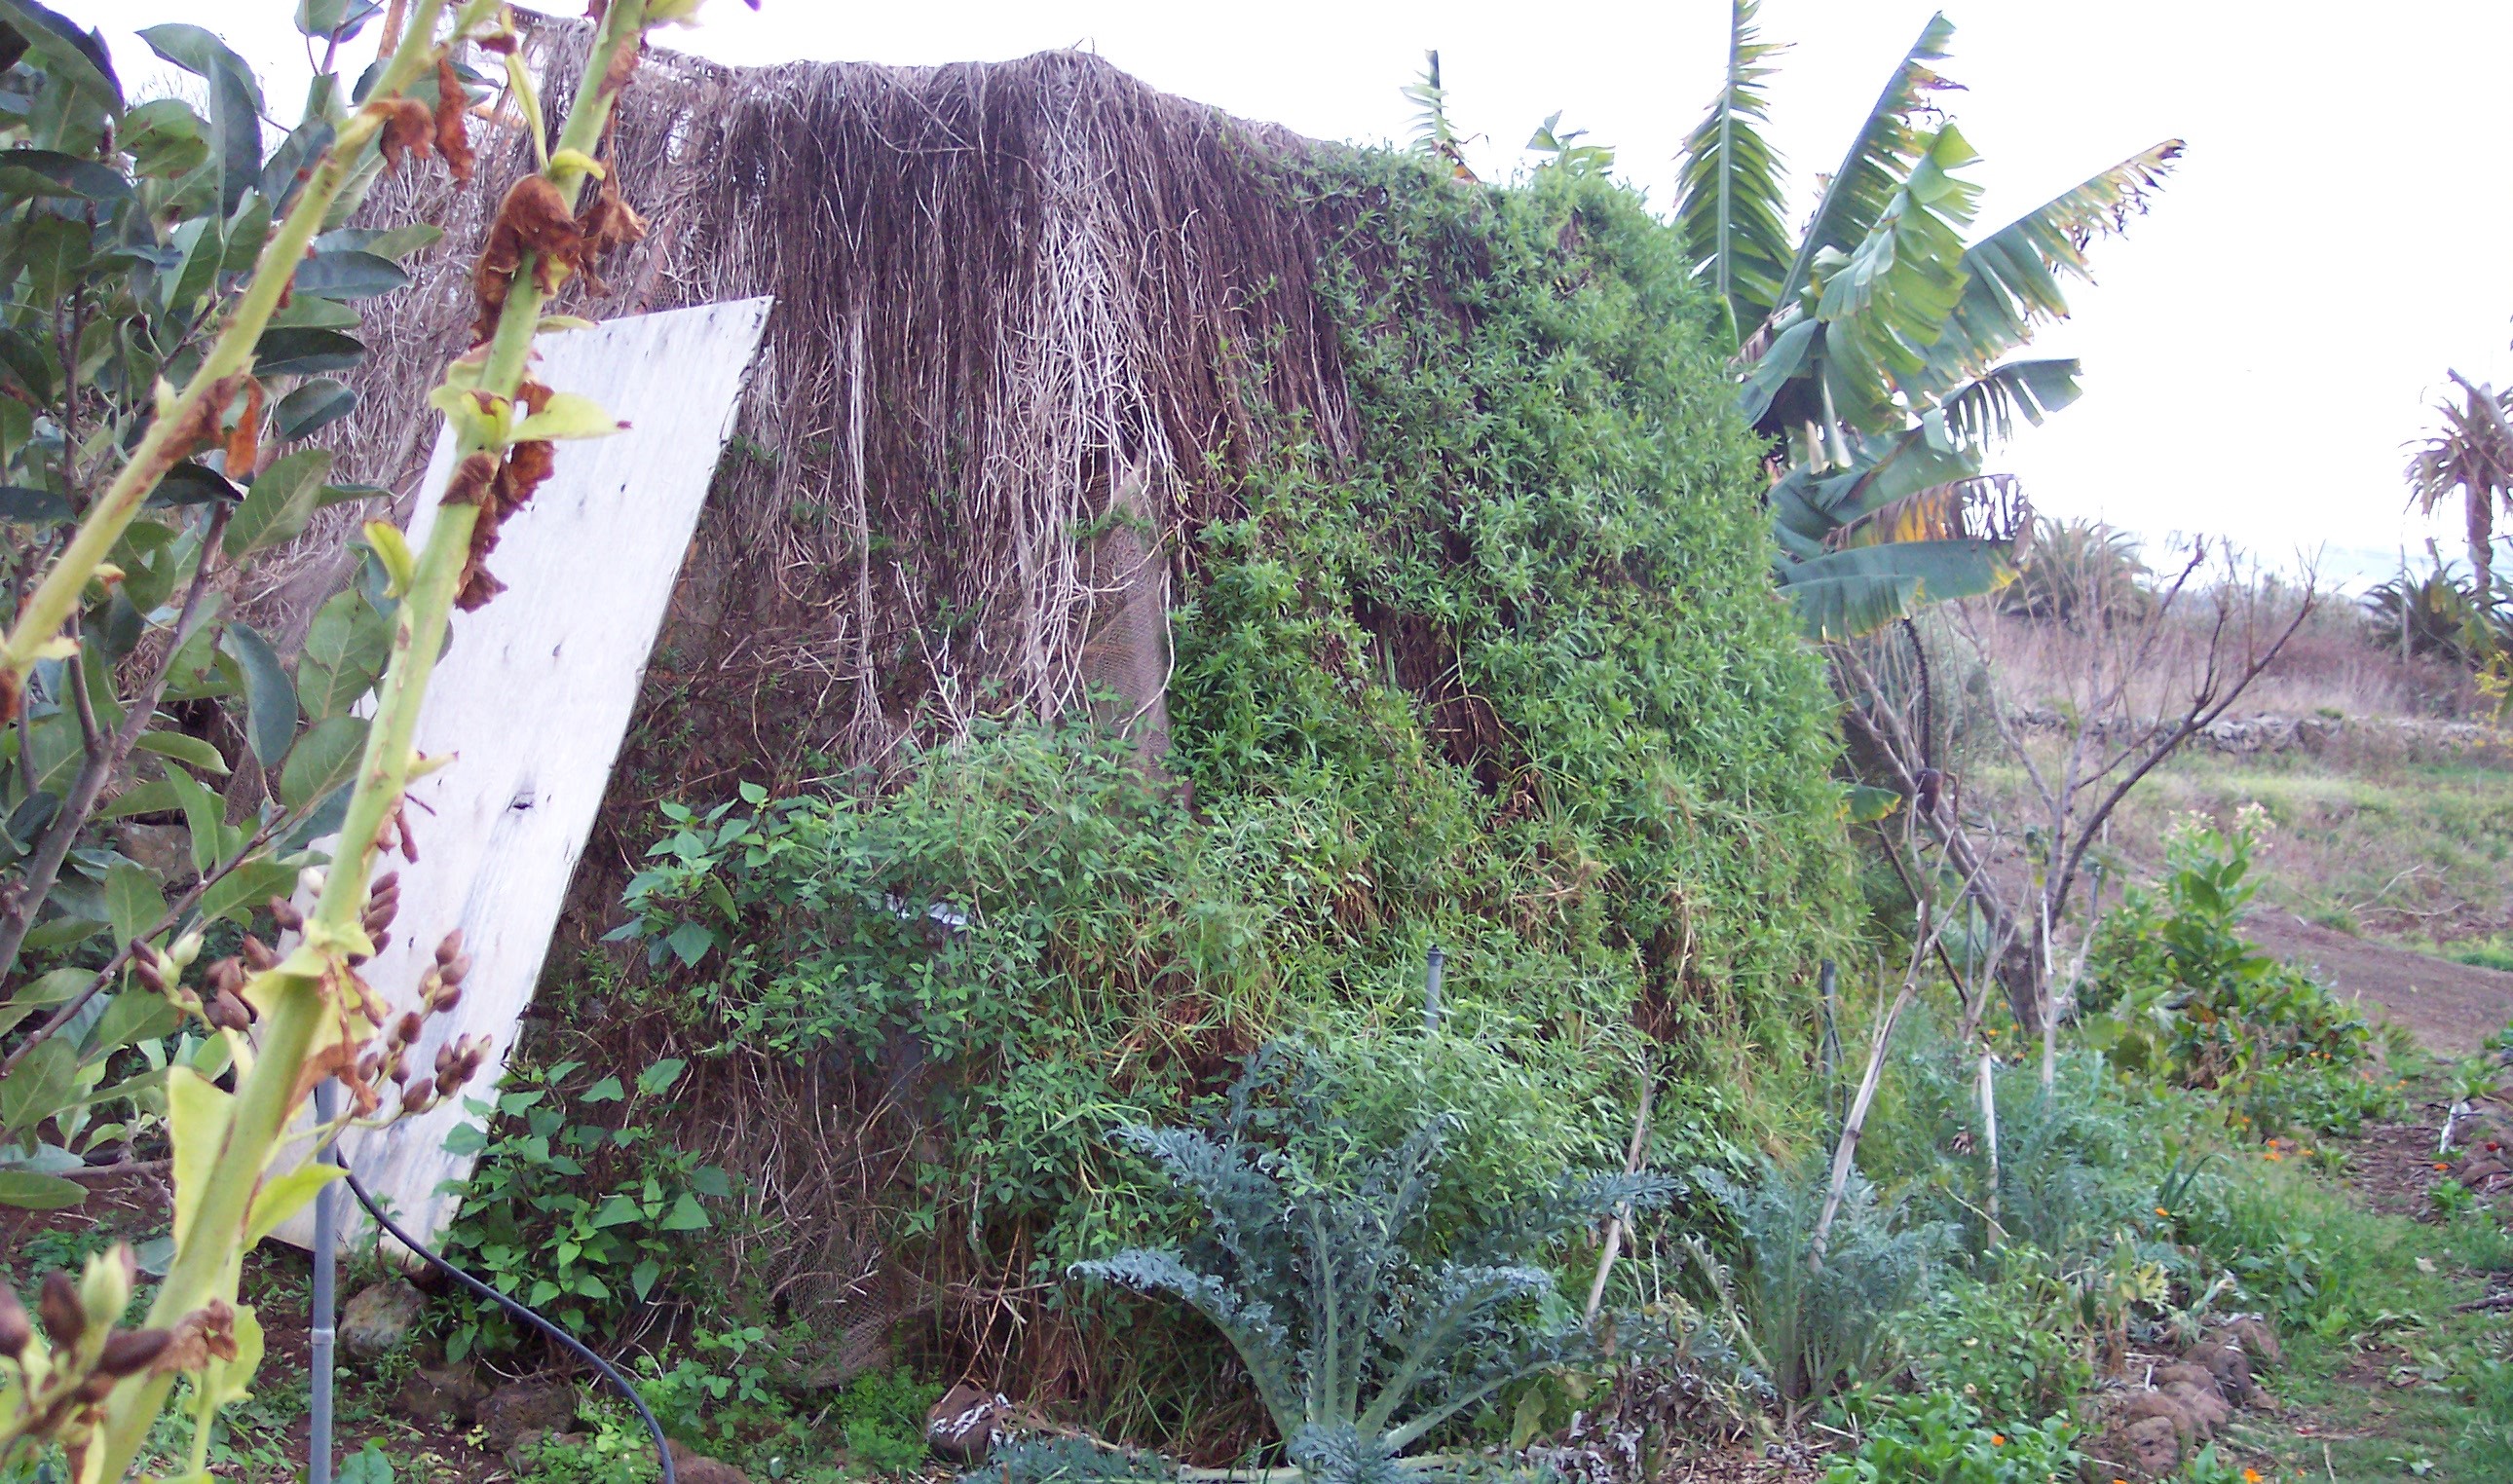
Figure II.28.- Access door to the “pollinator volcano”
The structure has to be firmly attached to the ground and covered around–except for the door and the top which we will leave free – by any metallic net or wire mesh with very small holes that bees cannot go through. By doing this we make sure bees are able to exit the cone only through the top. Therefore we will never be on their flight path, no matter if they exit to recollect pollen and nectar or return to the hive.
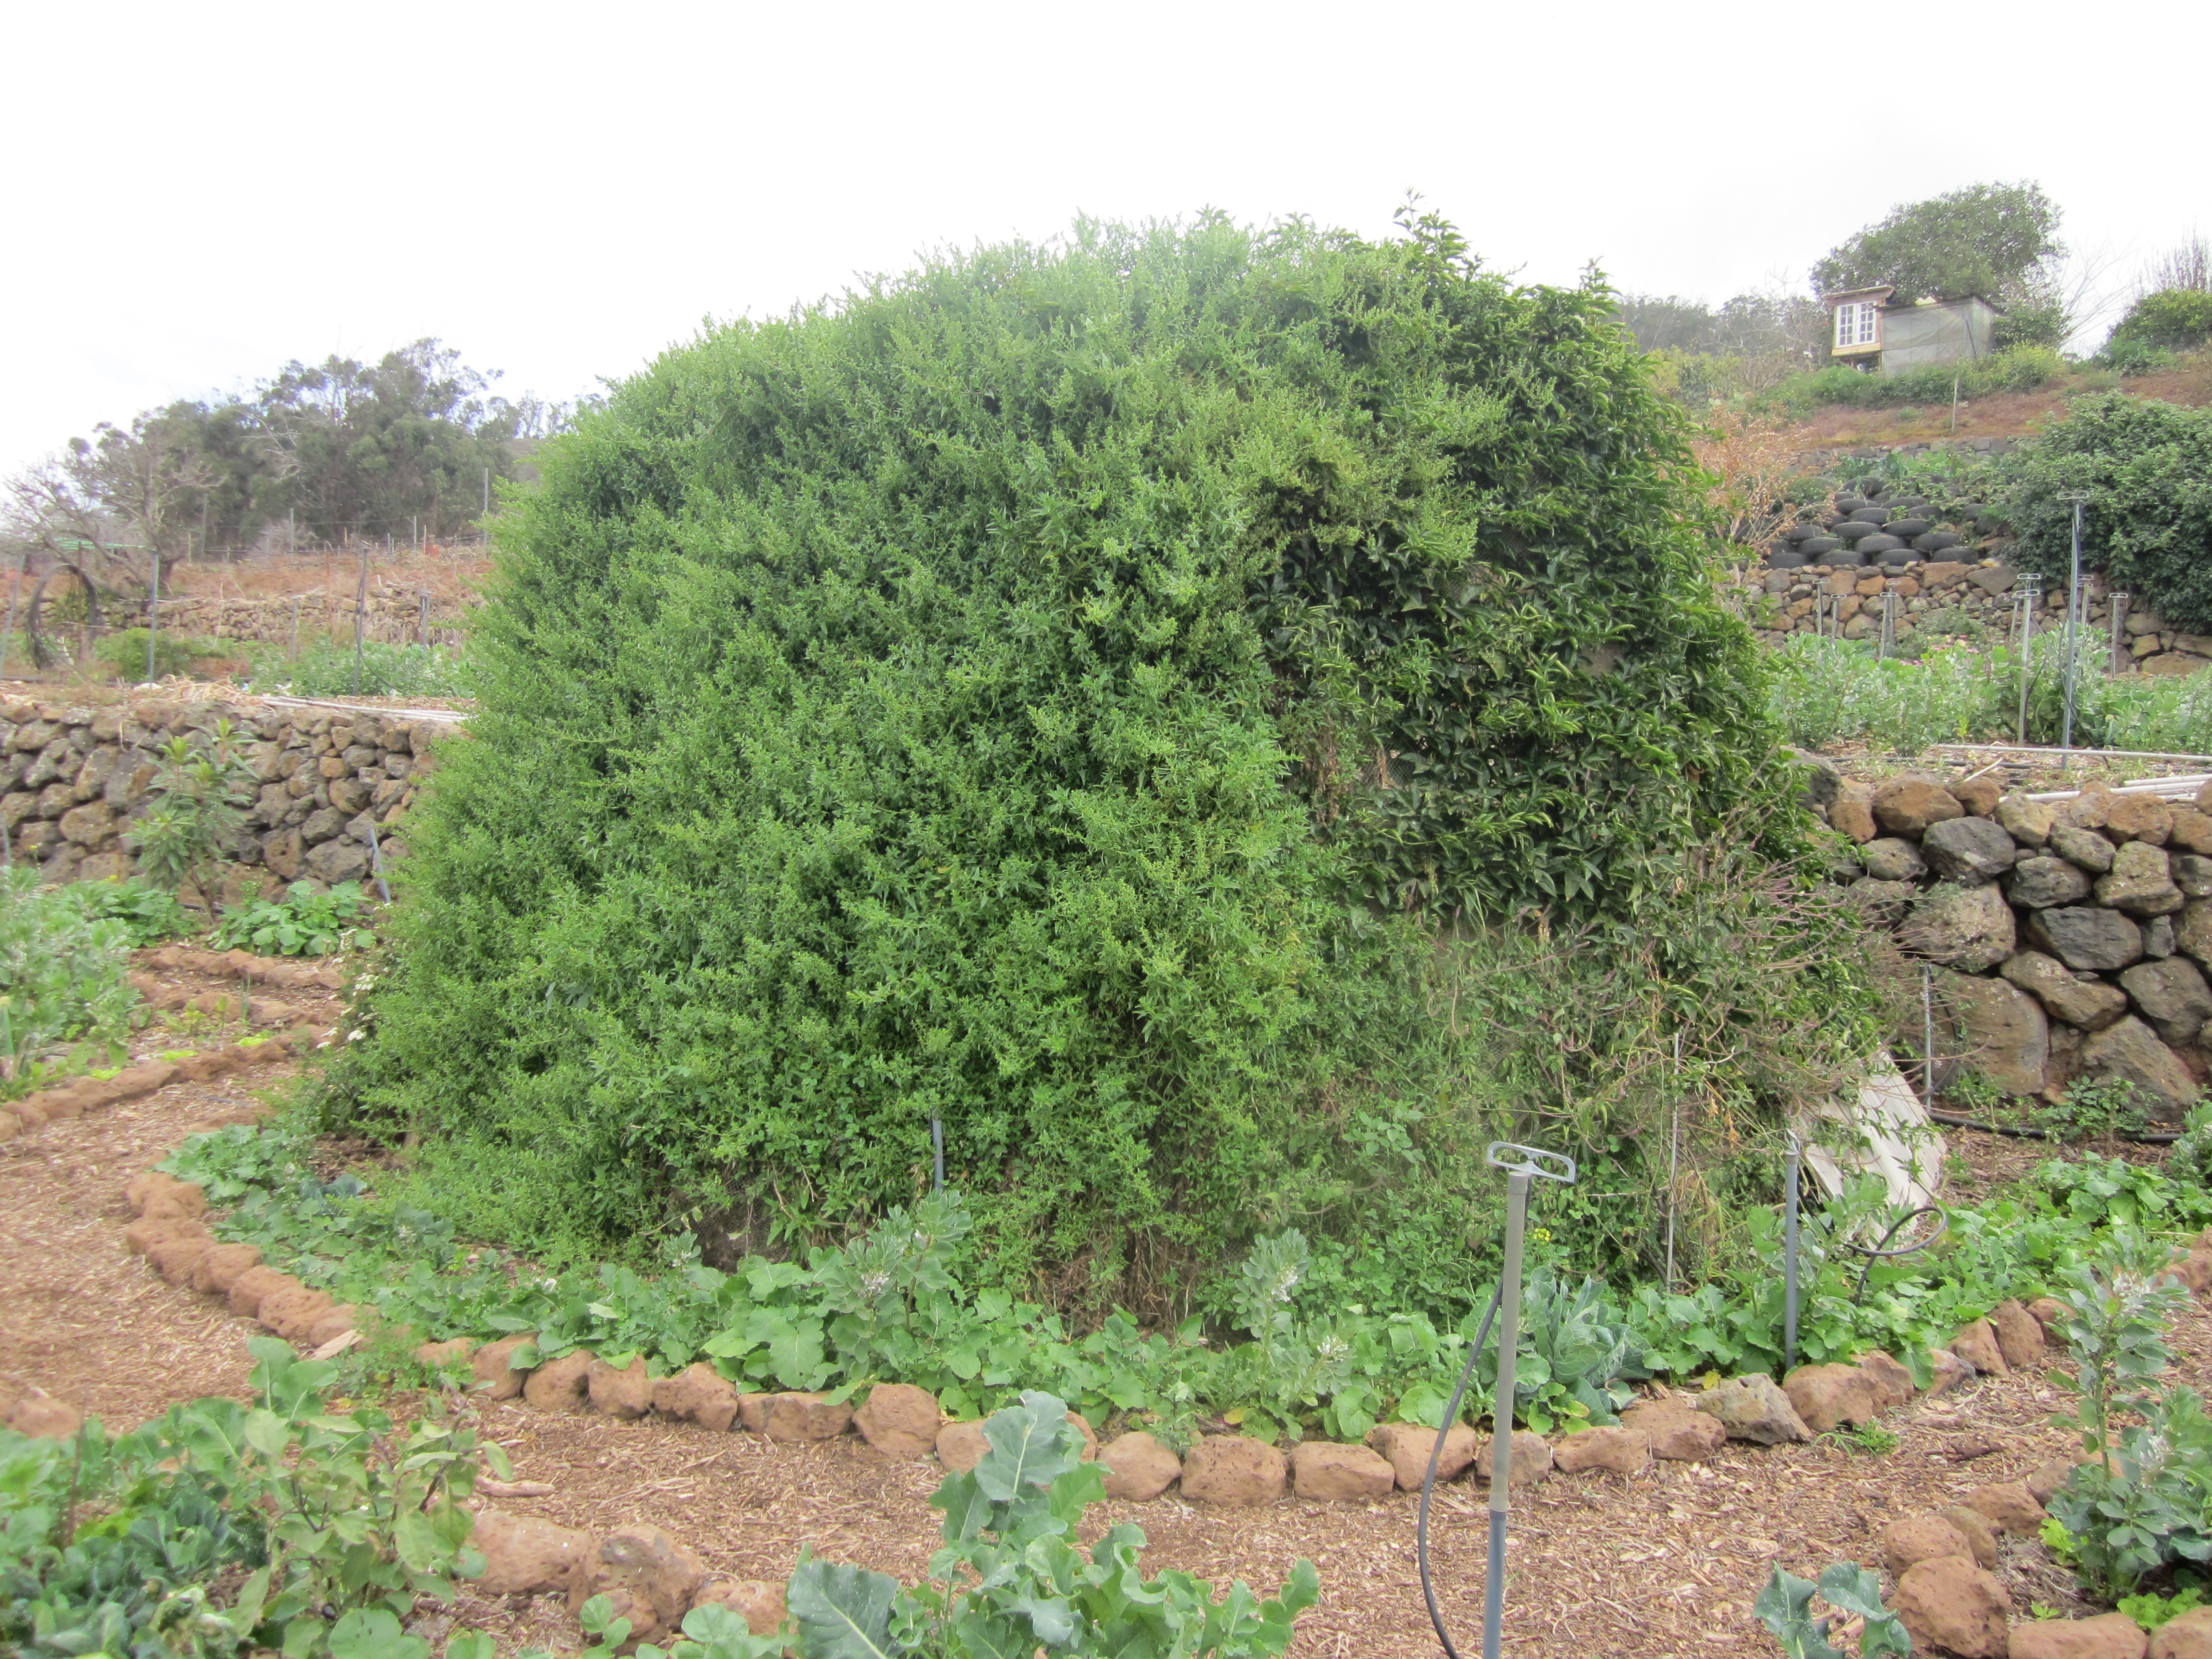
The outside part of the “volcano” structure should be sown with vines and melliferous plants – and better still if they give edible fruits- plants which would climb up the net or the wire mesh. Given this plant cover, we would obtain fruit while the bees and us would not disturb each other. It also makes the “volcano” integrate into the landscape harmoniously (Figure II.29).

Figure II.29.- Integration evolution of the “pollinator volcano” along with passion fruit
The ideal place to set the “volcano” would be in the edible garden forest.
In case we had a carpentry workshop the course students could make boxes for the bees using a construction plan. If it was not the case, the hives could be bought on the market.
The box or boxes have to be lifted from the ground with pallets of bricks to keep humidity and waterlogging away during rain seasons. We suggest a maximum of four hives boxes in a row for the area of the “volcano” (Figure II.30).
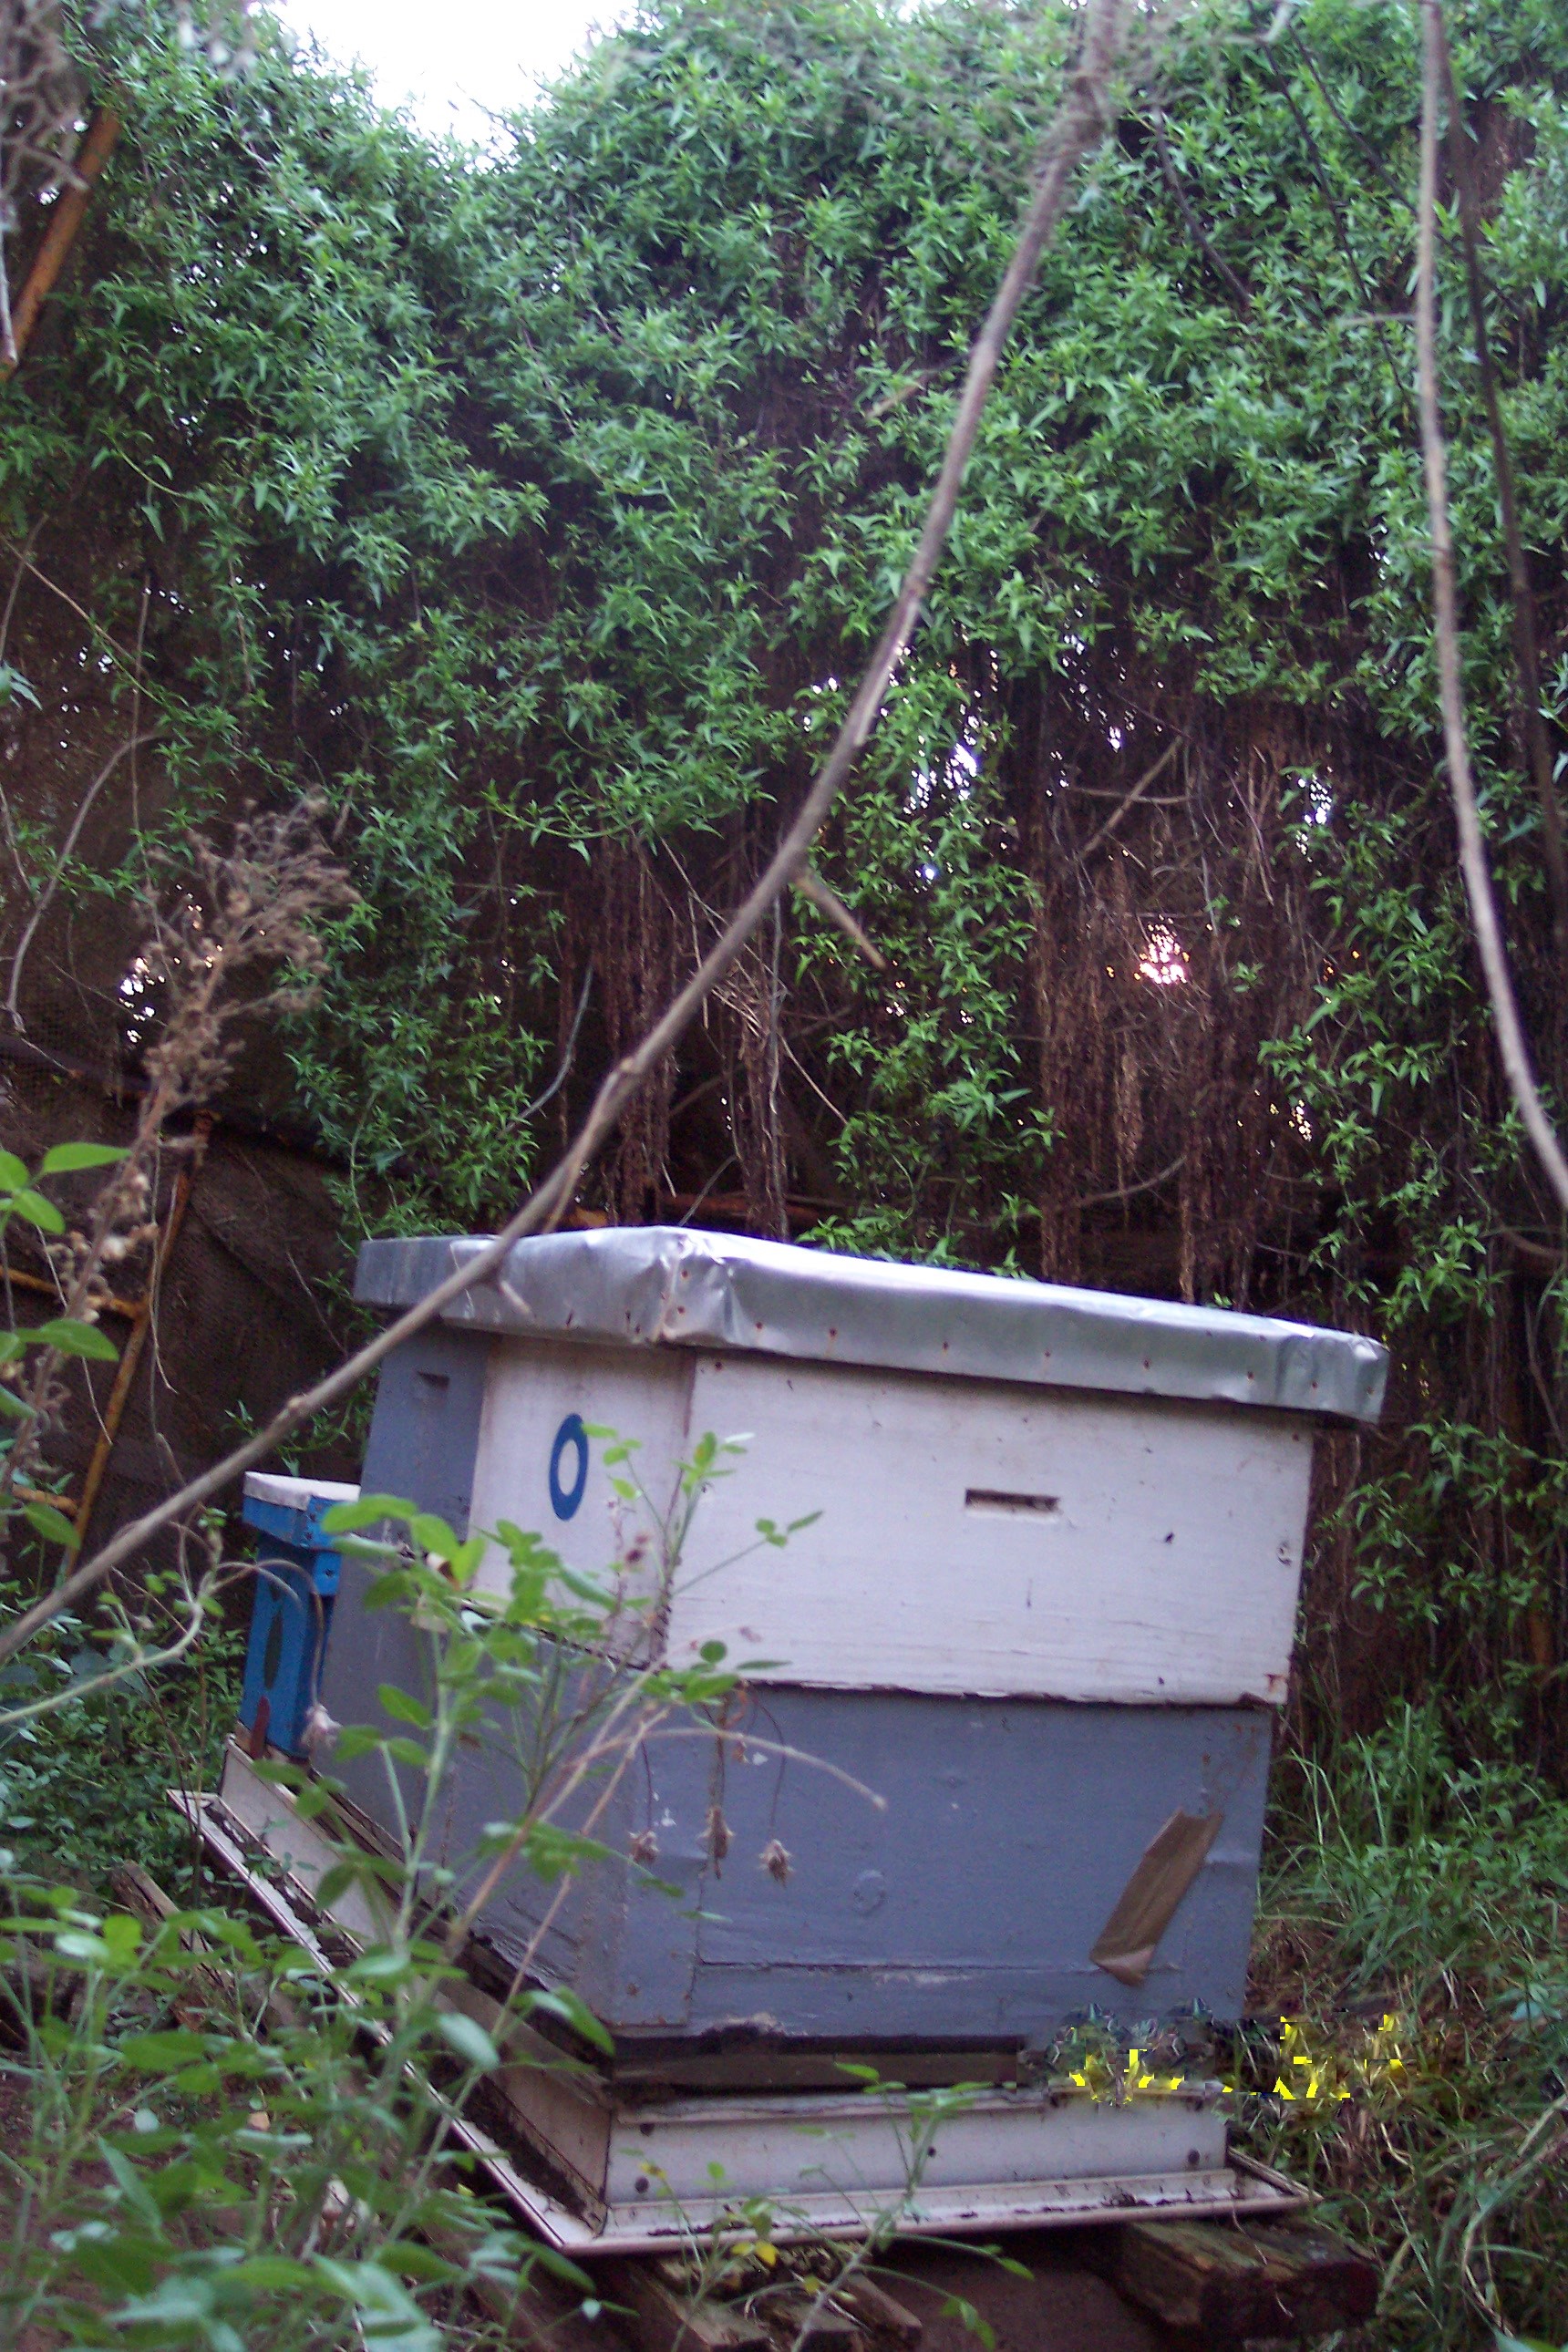
Figure II.30.- Hives boxes inside the “pollinator volcano”
II.7 Wastes and resources network connected to the neighbourhood
In the design of the place it is very important to keep in mind the need of a network to manage the conversion of waste into resources. It is important and necessary to survey the area or any neighbourhood, village or city in order to identify the waste produced by our neighbours. We can take advantage of this waste as part of our permacultural project in terms of mutual support. This task serves to re-educate and raise awareness within society about the need to cool down the planet together – some take responsibility of part of the waste while others use them as nutrients to be turned into food.
If there were already any relationship in collaboration with the neighbourhood it would be a great chance to deepen it.
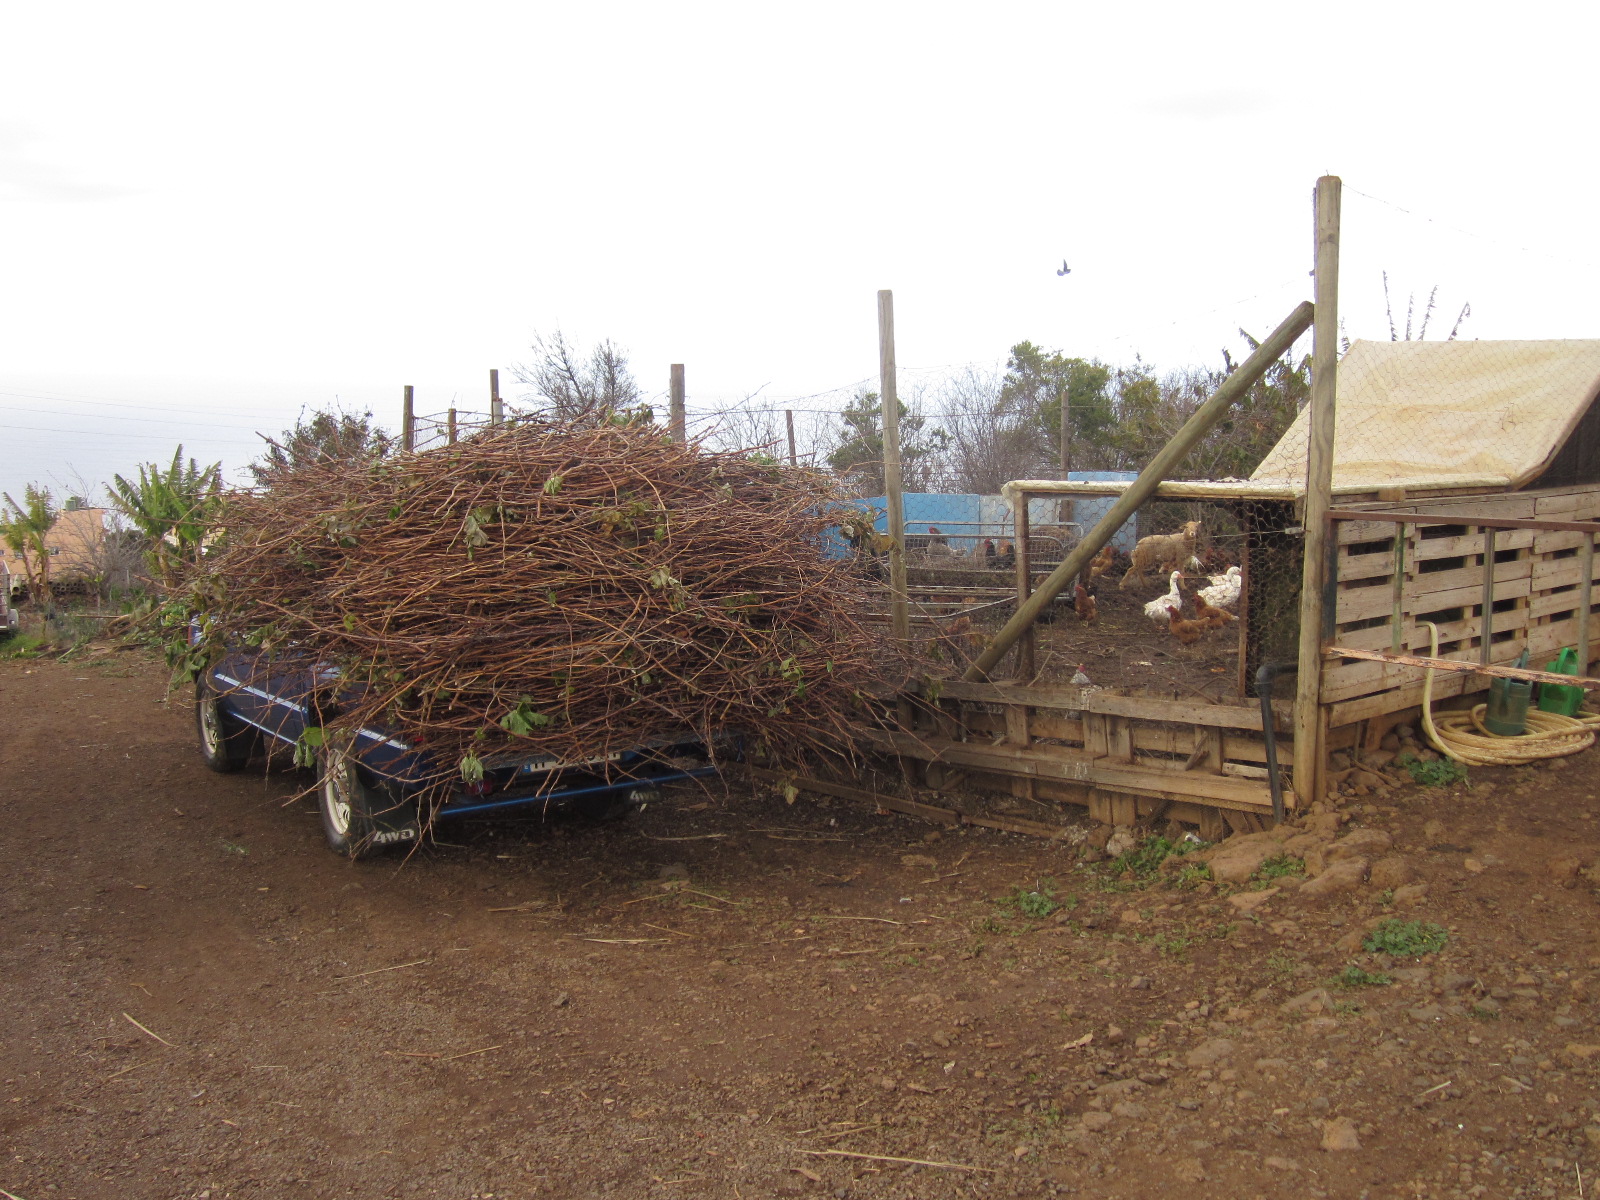
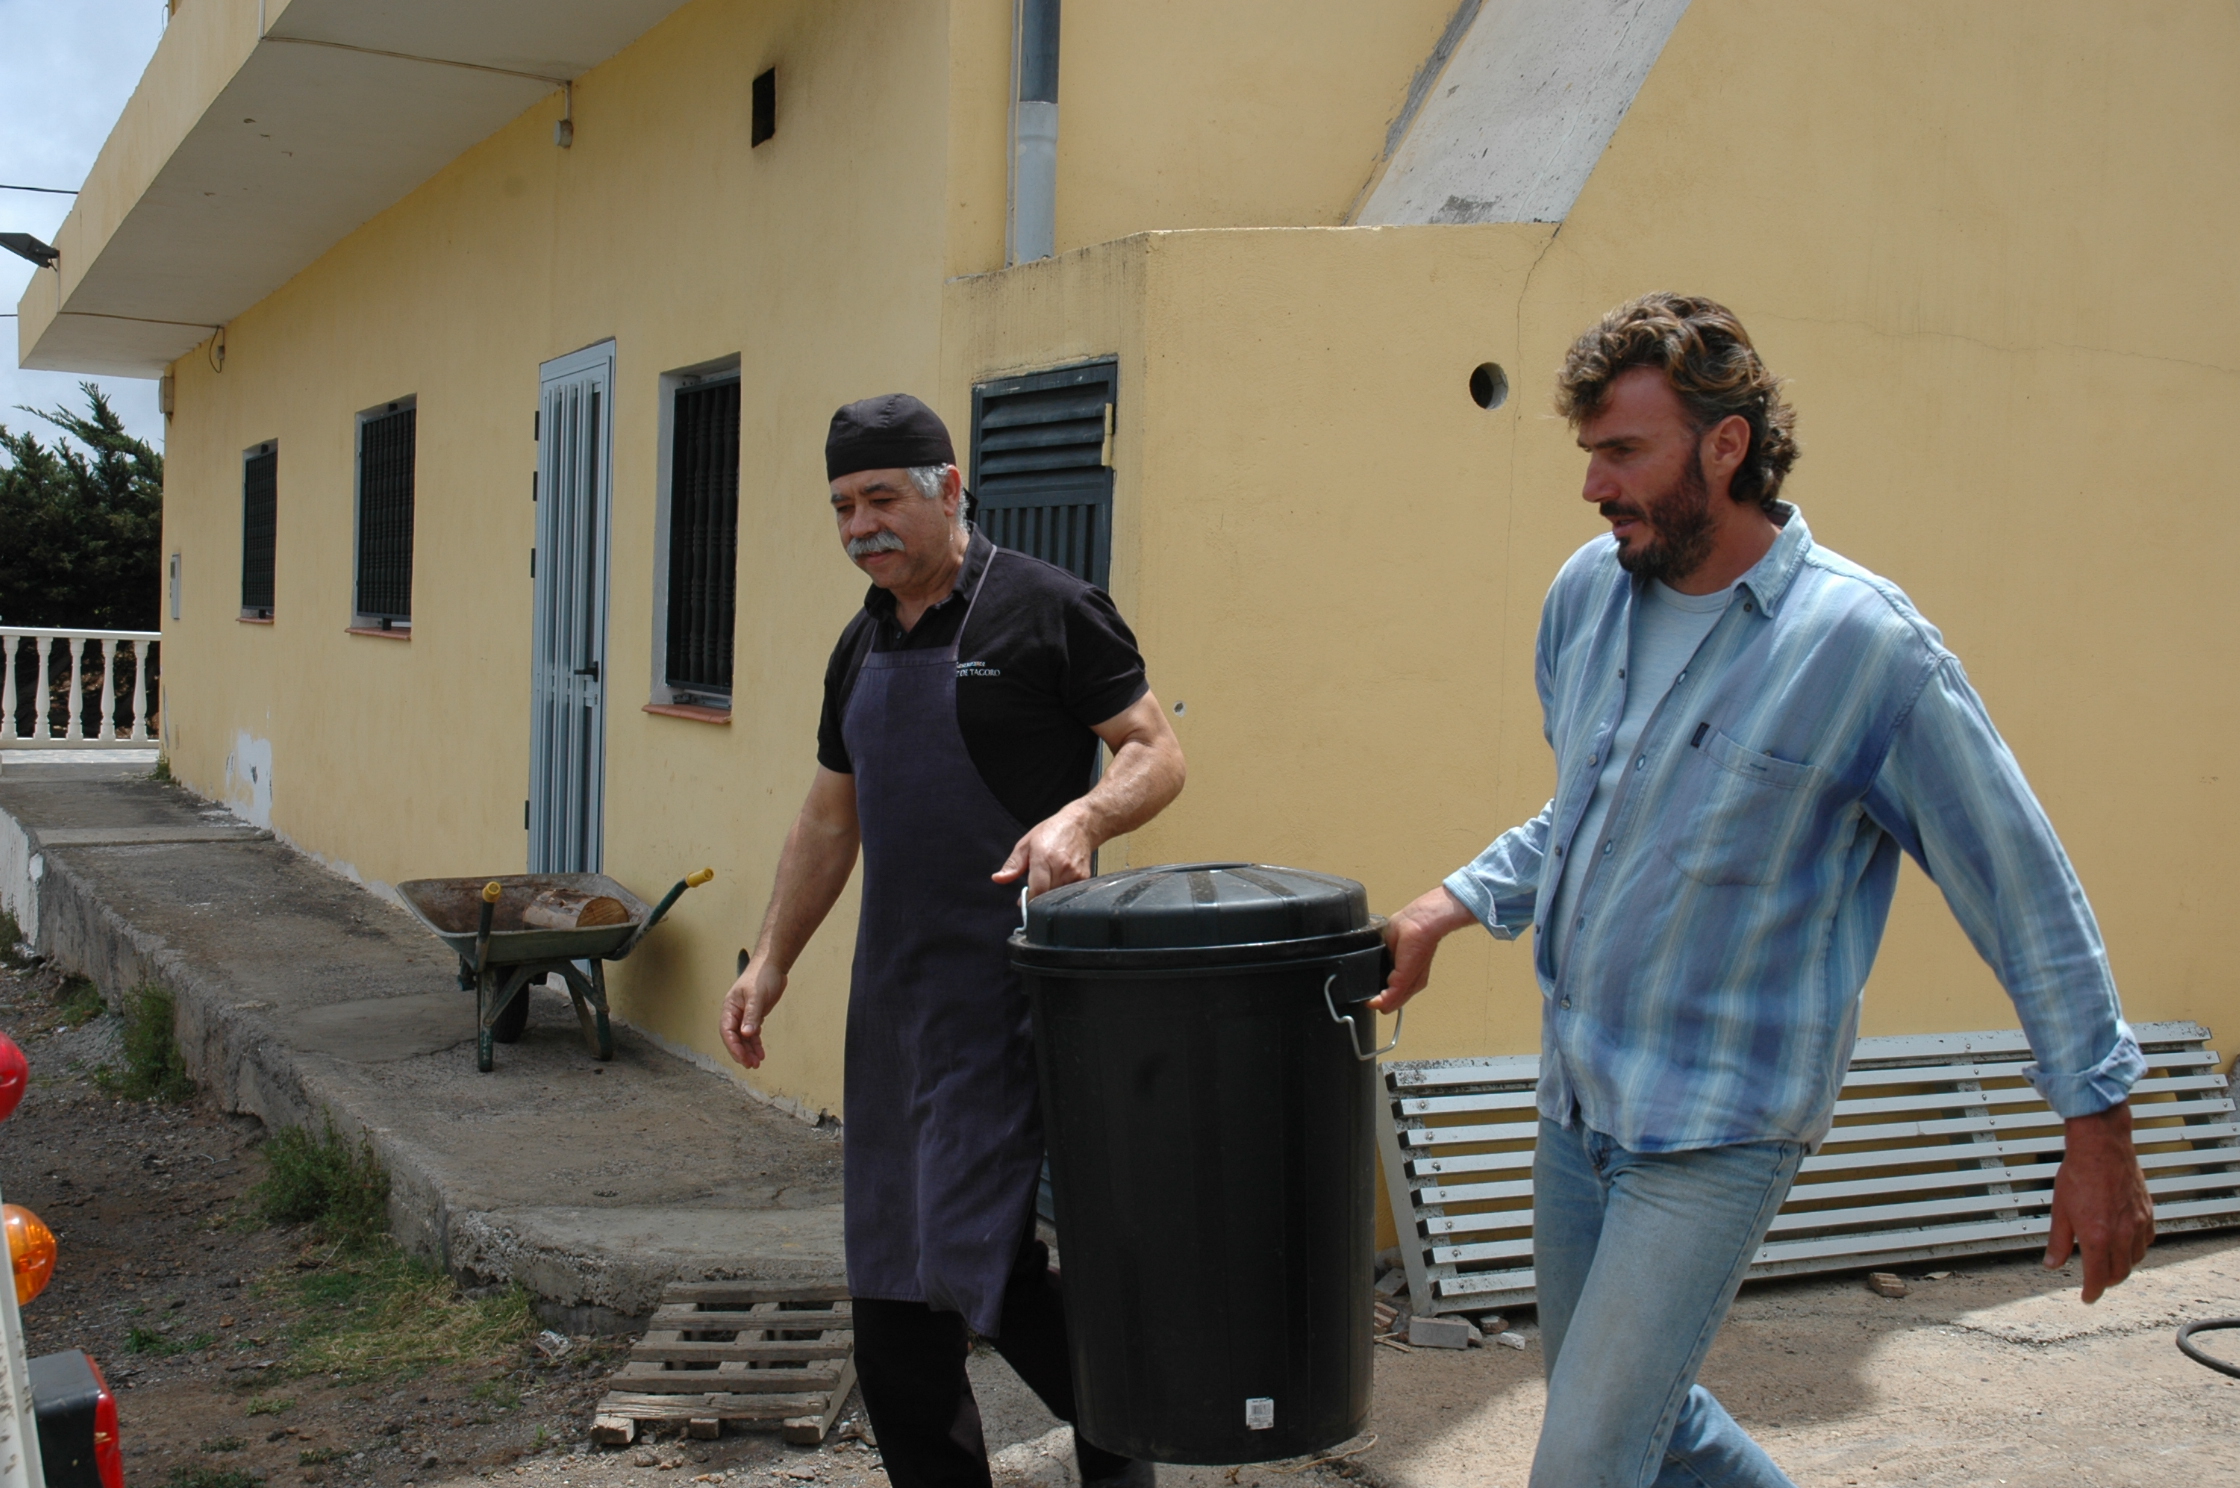
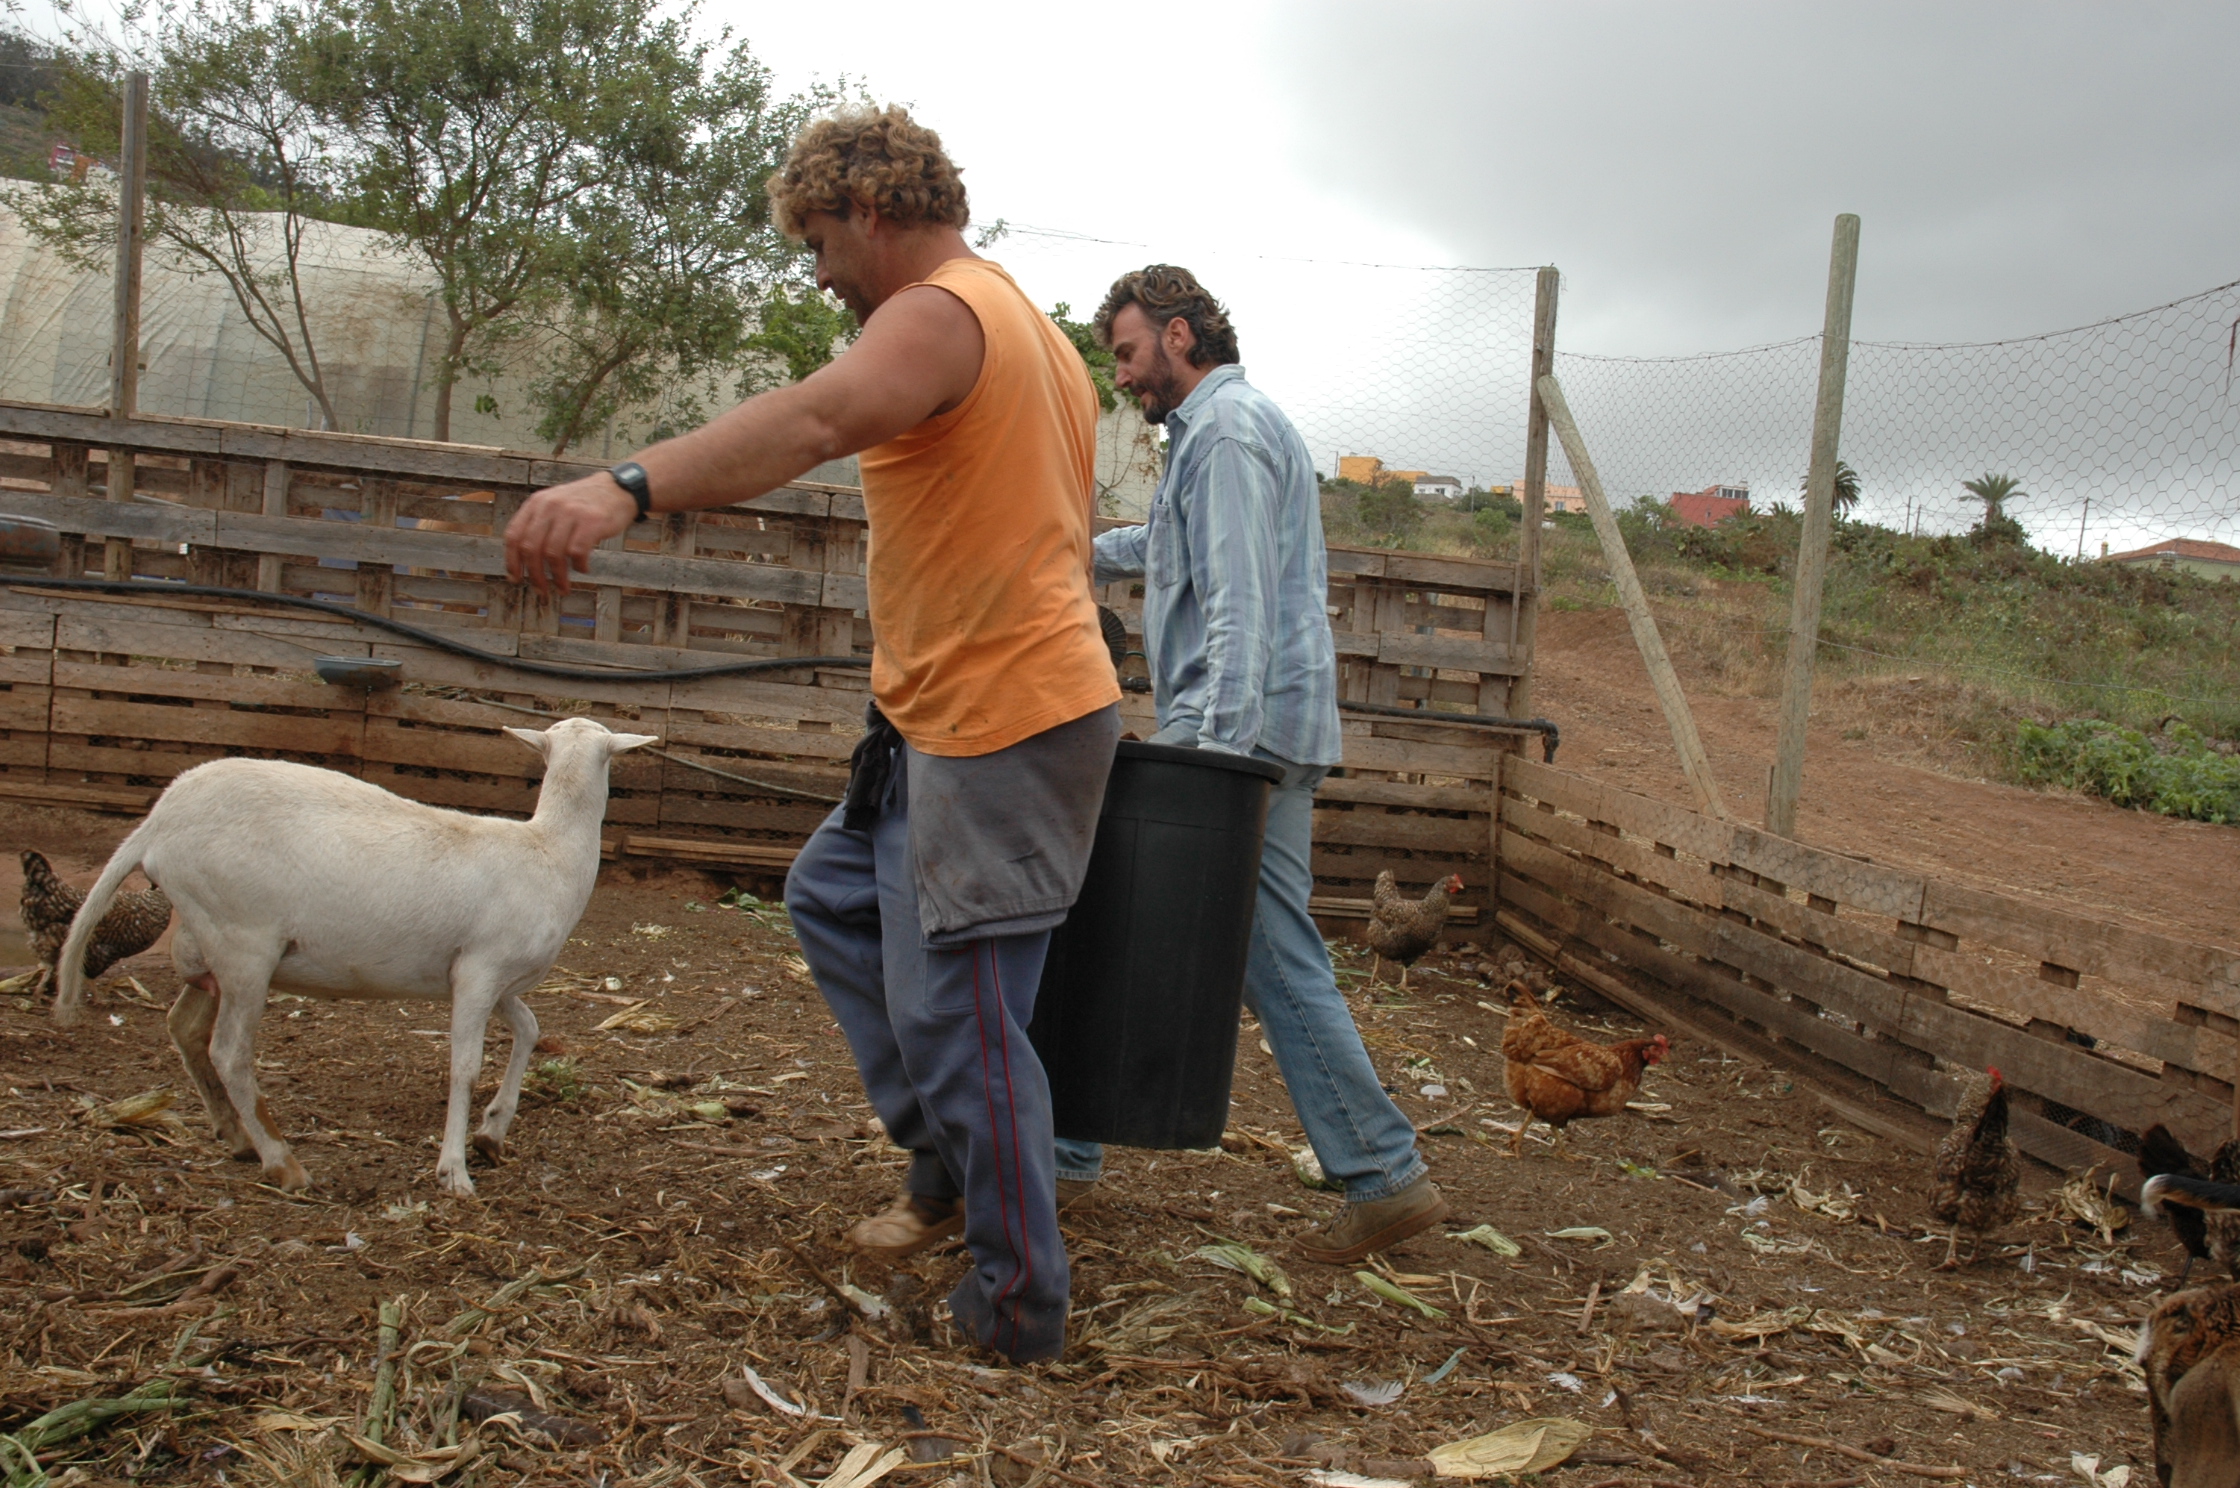
The “waste” materials we talk about are newspapers, cardboard, coffee grounds, garden pruning, woodchips, waste from cellars, bottles, logs, stones… They are resources that prove to be strategic for the design and maintenance of the edible gardens, as we have already mentioned in this unit. We will address a review about it in subsequent units (Figure II.31). The collection of these resources can be done throughout the year. We will need a place in the center to store them.
The beneficiaries can get involved in the recollection of the materials, which also proves to be a great opportunityto interact socially. The contributing neighbours could be invited so they can get to know the center and, if possible, guided by the beneficiaries themselves. This way the whole process becomes a very inclusive activity.

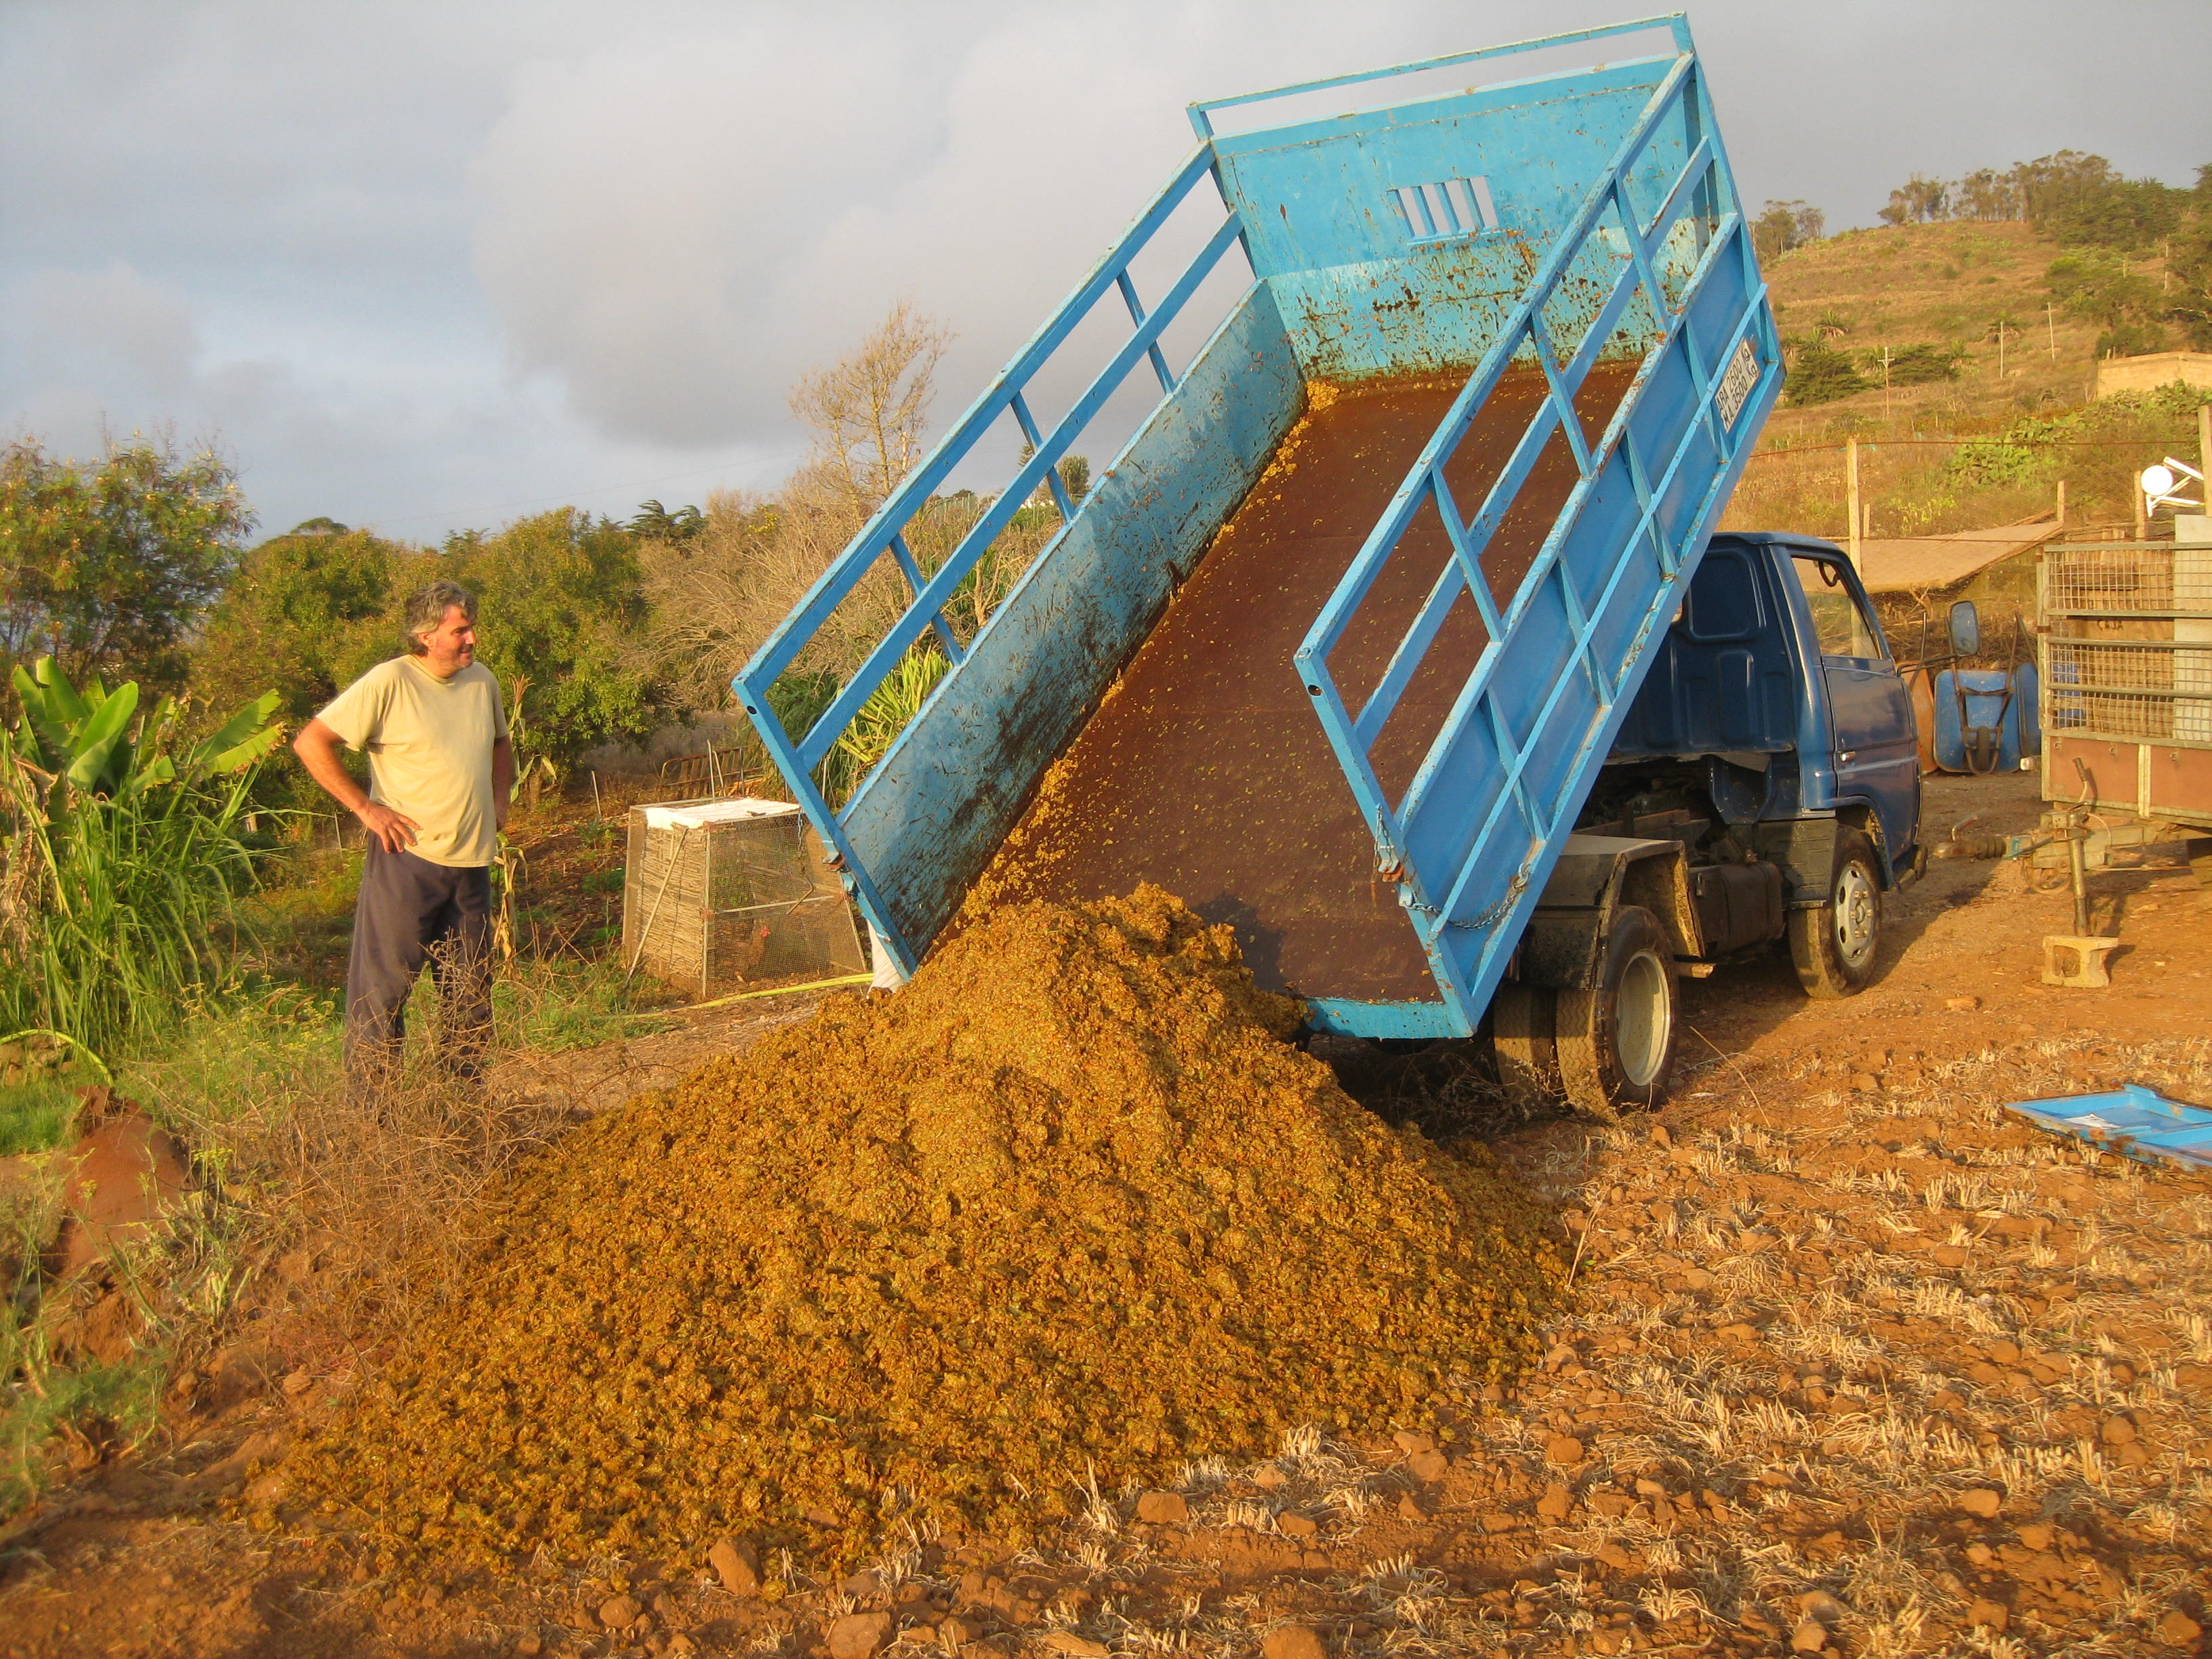
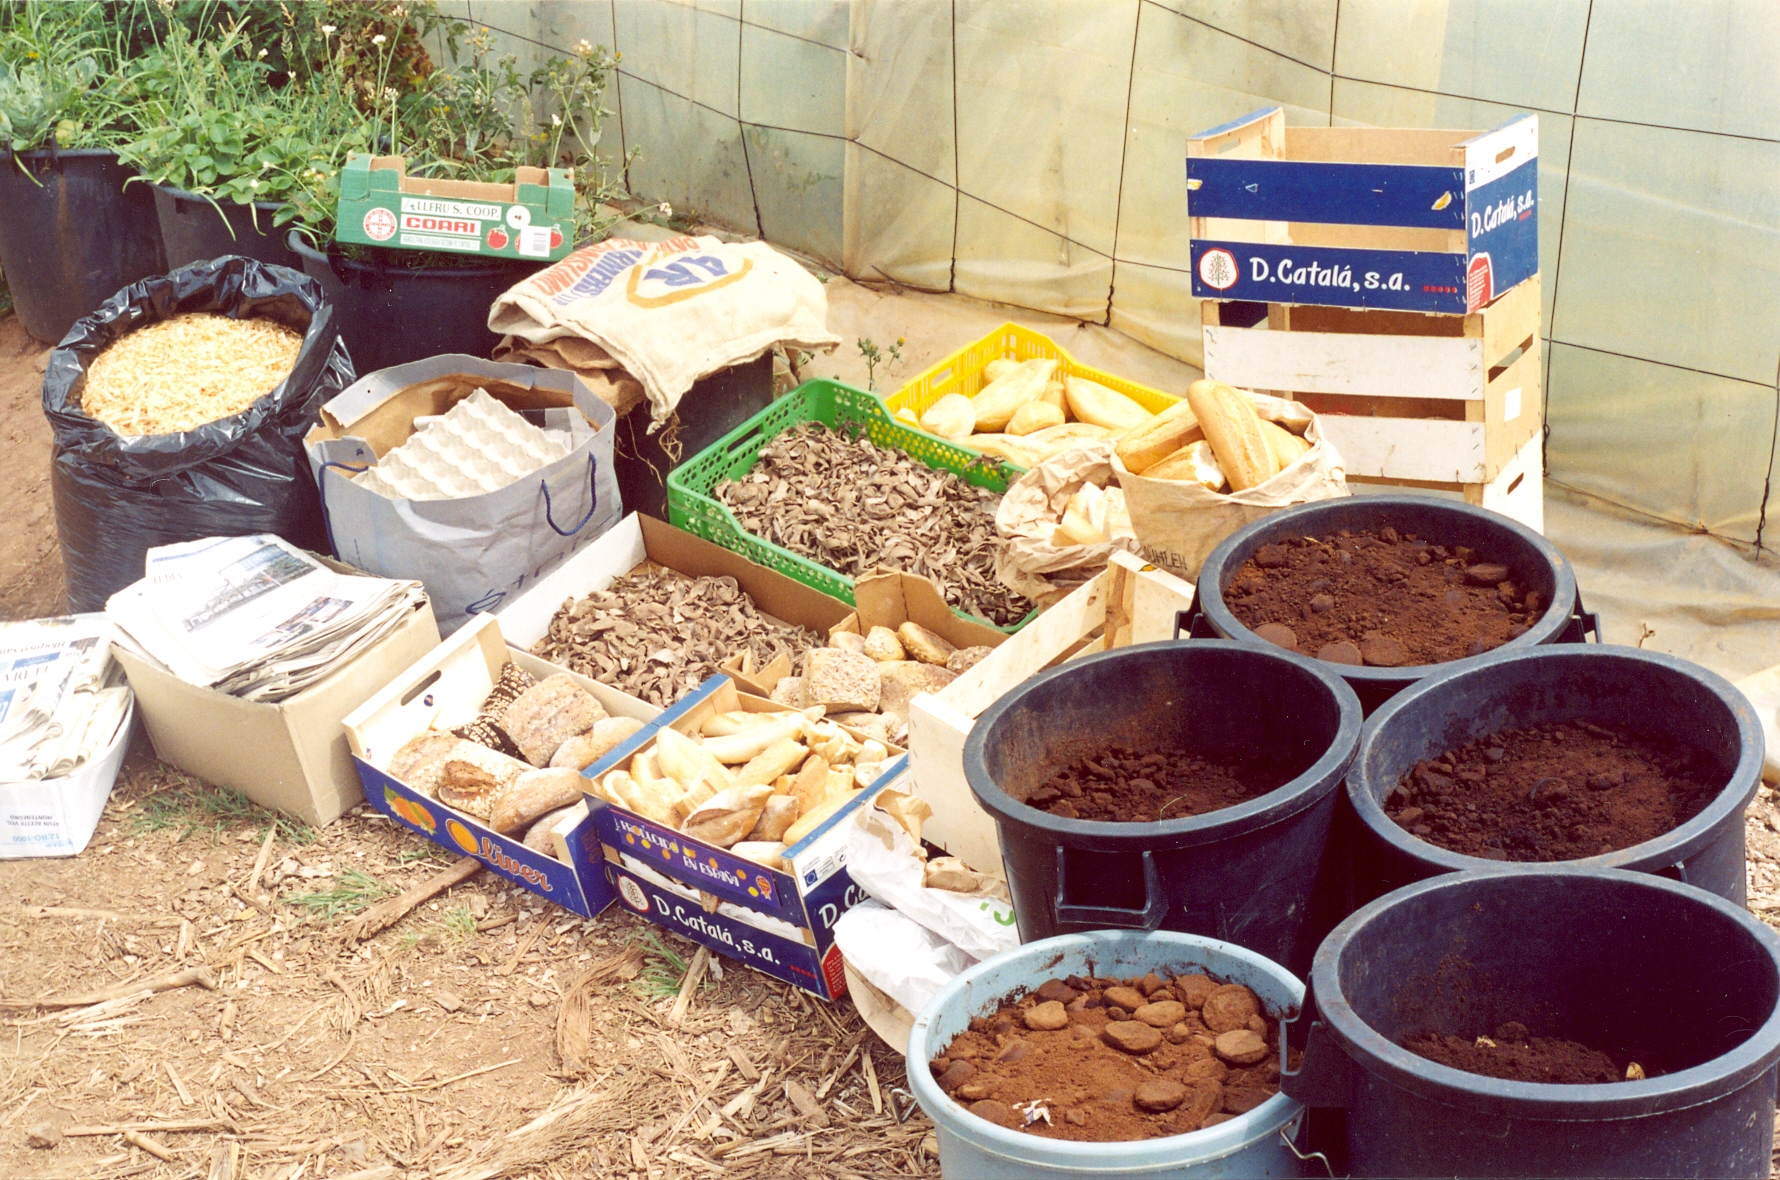
Figure II. 31- Examples of collaboration of the waste-into resource network
II.8 To summarize
By integrating the permaculture principles into our centers, we are inculcating our users and making them conscious of the importance of a fair distribution and a responsible use of the resources of mother Earth. We also prove that we can be more than self-sufficient with a right management of the environment.
While learning how to design this place we give our users the opportunity to build self-confidence. In general, we are not used to observe our environment in order to learn from it and to adapt our lives according to our observations.
The purpose of this didactic unit is to organize the information obtained from this place so it provides a comprehensive approach and makes us think of the changes we need for a better mental health. The humankind has been able to destroy nature but here we suggest a new life scheme that is able to heal it. The path to do so is to organize our thoughts in order to find out how to coexist with both the environment and ourselves and to understand the mental patterns of our nature (Figure II.32).
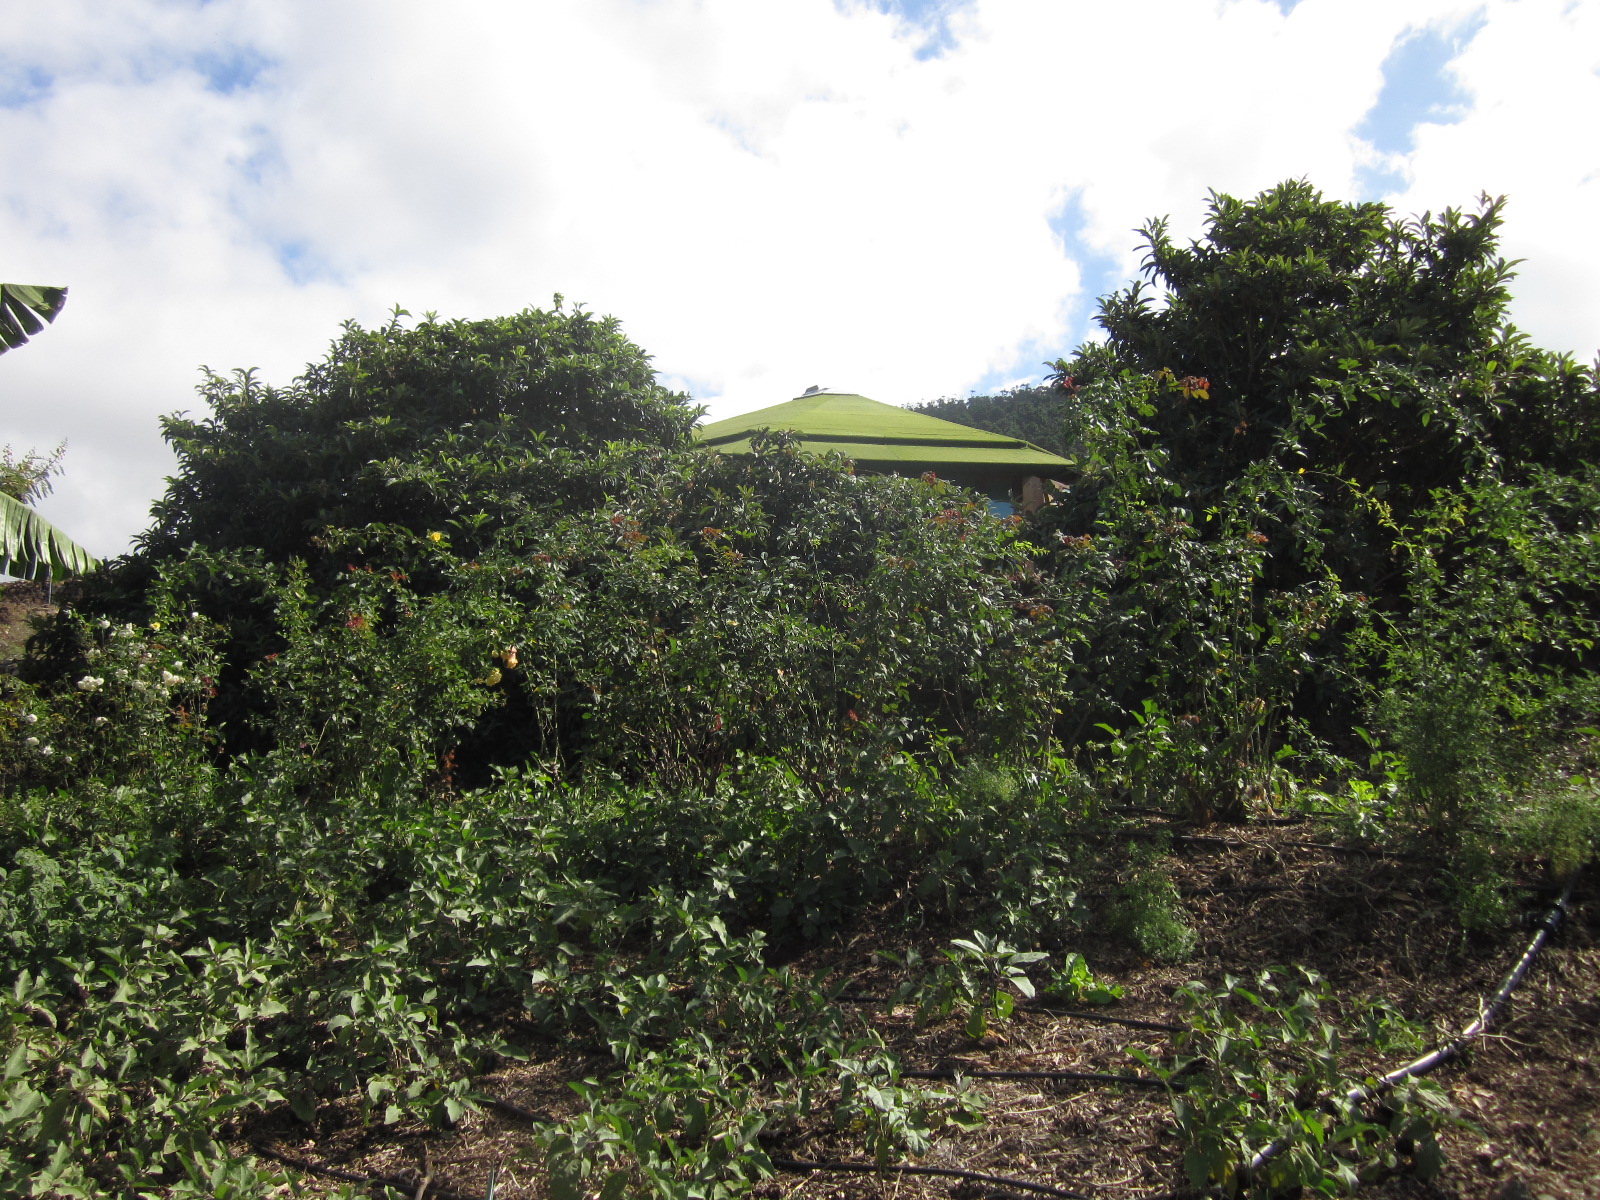
Figure II.32.- Sight of the classroomof the Association for the Development of Permaculture, bioconstructed by the beneficiaries and integrated within the environment